-
Title
How to delegate permissions in Defender using the Delegation Wizard -
Description
How to delegate permissions in Defender using the Delegation Wizard.
For example, Helpdesk users need to manage users via the Management Portal. These users can delete/unassign a token, but they do not have the option to assign a new token. -
Cause
Permissions need to be granted to Helpdesk users via the Defender Console, using the Delegation Wizard. -
Resolution
The Defender Delegated Administration wizard is installed automatically when you install the Defender Administration console.
To access Defender Delegated Administration, from the Defender menu, select Delegate Control. The Delegated Administration Wizard will start.
Note: The Defender Administration wizard only modifies permissions within Active Directory for Defender attributes in the schema. It does not modify any standard Microsoft Active Directory permissions.
For complete instructions and a description of each role, please refer to the Administration Guide in the section Delegating Defender roles, tasks, and functions.
Delegating Roles
To delegate administrative roles to a user or group, perform the following steps:
1. From the Defender menu, select Delegate Control: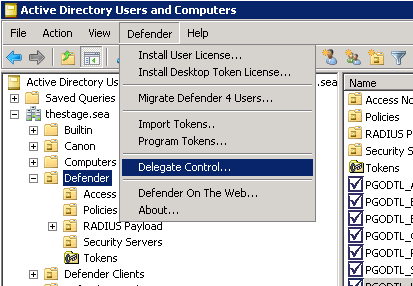
2. The Defender Delegated Administration Wizard starts and the Users and Groups dialog is displayed: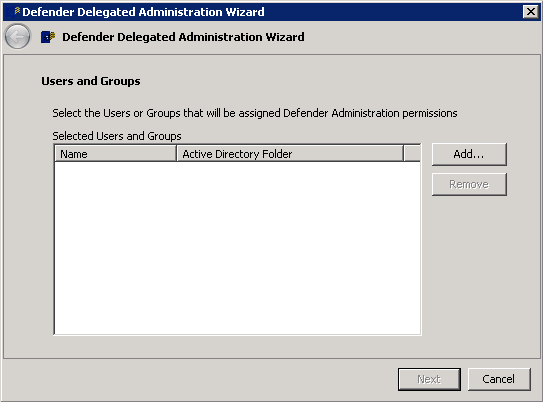
3. Click Add to specify the user or group to which you want to delegate administrative roles. The Select Users and Groups dialog is displayed: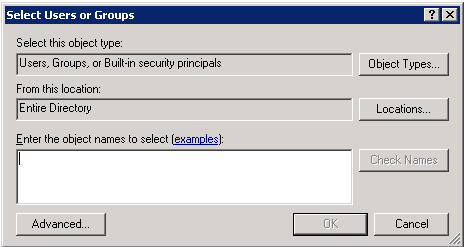
4. Enter the names of the users or groups.
5. Click OK to continue. The Users and Groups dialog is displayed, showing your selected users and groups.
6. Click Next to continue. The Tasks to Delegate dialog is displayed: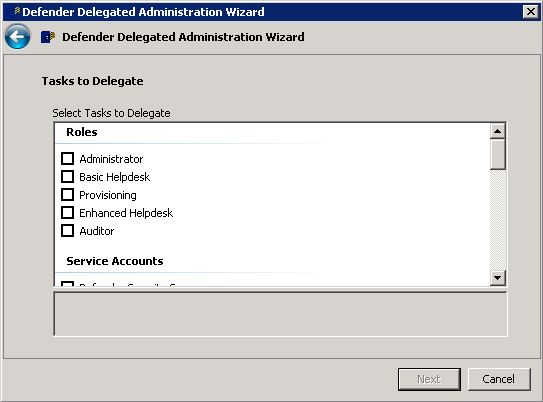
The Tasks to Delegate dialog includes the following sections:
• Roles
• Service Accounts
• Advanced Control
• Full Control.
Check the boxes adjacent to the administrative functions that you want to delegate to the selected user or group.
7. Click Next to continue. The User Locations dialog is displayed: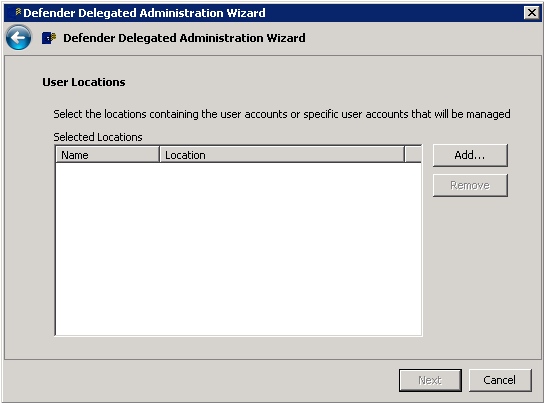
8. Click Add to specify the location of the users that will be managed by the user or group to which you have delegated the tasks.
9. Click OK to continue. The User Location dialog displays the selected locations.
10. Click Next to continue. The Summary dialog is displayed: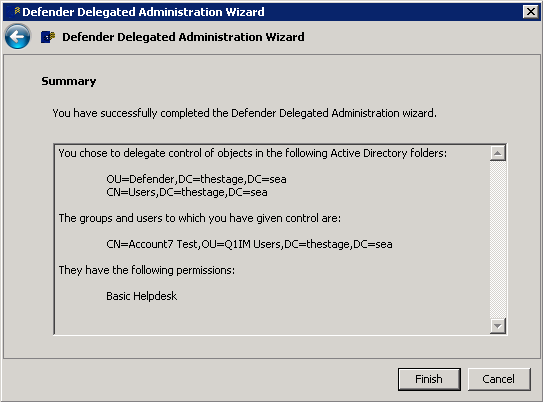
11. Click Finish to complete the procedure.
