-
Title
How to Install the Defender Client SDK Software -
Description
What are the correct steps that can be used to install the Defender Client SDK Software?
-
Resolution
To install the Defender Client SDK Software, please follow the below steps:
1. Log into the Windows system that the Defender Client SDK Software is to be installed on.
a. Please note, you will need to be a local administrator to ensure that the installer can run correctly and write all necessary changes.
2. Ensure the Defender Complete package has been downloaded and extracted to the system.
a. To download the Defender Complete Package, please click here, or visit software.quest.com/support.
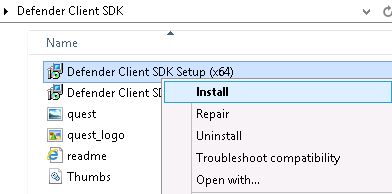
3. Browse to “Extracted Folder\Components\Defender Client SDK”4. Two installers will be listed in this folder. Please double-click on, or right click and select “Install” to the correct setup file for the system.
a. If the system is 64-bit, use “Defender Client SDK Setup (x64)”
b. If the system is 32-bit, use “Defender Client SDK Setup”
5. The “Defender Client SDK Setup”, License agreement page should appear. Please review this agreement, and if accepted, enable the “I accept the terms in the License Agreement” and click “Install”
6. Please wait while the Defender Client SDK is installed.
7. Once the install has completed, click “Finish” to close the installer.
8. The Defender Client SDK is now available for use on this system.
