
-
Title
Configure Office 365 V2 SSO with OneLogin -
Description
This topic describes how to configure OneLogin as the federation service that provides SSO for Office 365.
For more information about how OneLogin works with Office 365, see Introduction To Office 365 Integration With OneLogin or watch the video training below.
-
Resolution
Important to Review
Does your Office 365 account allow for single sign-on configuration?
Not all Office 365 plans do. You can check by visiting Microsoft's Office 365 plan details page.
- Do I need to upgrade to Office 365 V2?
If you added Office 365 after February 1, 2018, then you don't need to upgrade. If you added Office 365 before 2.01.18, then you need to upgrade to V2. For more information on how to upgrade, see Upgrade Office 365 Connector to V2.
Does your Office 365 implementation use ADFS or another identity provider for federation?
For more information, see Disabling ADFS Federation to Enable OneLogin SSO With Office 365.
Is your organization's domain registered with your Office 365 account?
Your OneLogin domain (typically your organization's domain, such as acme.com) must match the domain you use for Office 365, and all users must share the same Office 365 and OneLogin email addresses, using this domain. For more information about registering your domain in Office 365, read Microsoft's guide to adding your domain.
Note: Microsoft does not allow you to federate an onmicrosoft,com domain (such as acme.onmicrosoft.com).Is the domain you want to federate your primary domain (set to Default) in Office 365?
You can't federate your primary domain; you must switch the Office 365 default domain to another domain, such as onmicrosoft.com. For more information about switching the default domain in Office 365, see here.
Do you have a global administrator account that lies outside of a federated domain?
We recommend that you use an onMicrosoft account e.g. admin@acme.onmicrosoft.com.
Do you want to set up OneLogin to federate multiple domains with Office 365?
If so, you must configure each connector separately for each domain (following the instructions in Configuring the Office 365 app each time). It is best practice to provide a separately configured X.509 certificate for each domain, which you must create before you configure your Office 365 connectors. Go to Settings > Certificates and click New to create new certificates. You will use these certificates when you set up SAML configuration.
Have you tested?
Configure OneLogin SSO for Office 365 in a test environment first to ensure that your users are getting the correct access to Office 365 before you roll it out to your user base, or enable and test SSO outside of business hours.
- Is your security up-to-date?
Please read our knowledge base article here to check your security settings against our recommended parameters.
Configure Office 365 V2
To add Office 365 to your OneLogin account, with SSO configured using SAML:
Go to Applications > Applications and click Add Apps.
Search for Office 365 V2 and select it.

Click Save to display additional configuration tabs.
On the Configuration tab, enter your Office 365 domain and the information required to connect to the Office 365 API.
Authentication is required for automatic SSO (WS-Federation) configuration and for provisioning through OneLogin. If you use a OneLogin plan that doesn't allow provisioning, the API connection persists until the automatic SSO configuration process finishes.

Enable WS-Trust WS-Trust (Basic Authentication) to authenticate into thick clients. Microsoft is deprecating support for Basic Authentication (use of usernames and passwords), with some exceptions, in favor of Modern Authentication for Office365 products. For more information about the use of Office365 authentication with the WS-Trust security protocol, click here.
Note: The best security practice is to disable WS-Trust, but your org may use apps that require WS-Trust. See the two cases below for additional guidance.
If you configured Office 365 V2 before August 5, 2020, WS-Trust is enabled by default, but doesn't affect which client applications can connect.
If you disable WS-Trust, applications that require WS-Trust will fail and impact your end users. It's important to audit the applications that connect to Office 365 to verify if they rely on WS-Trust. If they do, don't disable WS-Trust. See the list below for apps that use WS-Trust.
If you added Office 365 V2 after August 5, 2020, WS-Trust is disabled by default. We suggest that you don't enable WS-Trust to ensure that your org employs best security practices.
If your end users connect to Office 365 V2 with applications that require WS-Trust to authenticate, then you must enable WS-Trust. It's important to audit the applications that connect to Office 365 to verify if they rely on WS-Trust. See the list below for apps that use WS-Trust.
Examples of applications that require WS-Trust:
- Any Office Application BEFORE Office 2013
- Office 2011 and below for Macs
- The native Mail app on iOS 11.x+
- Outlook on iOS version 10.x and greater
- Outlook on Android
Please research and audit apps to verify if they use WS-Trust.
For more information on Office 365 Client Apps that support, see Microsoft 365 Client App Support - Modern Authentication.
Enter the domain (
yourdomain.com) that you want to federate with Office 365 and click Verify. Once your domain is verified, the Authenticate buttons are enabled.All users must share the same Office 365 and OneLogin email addresses, using this domain.
Click the Authenticate buttons for Office 365 V2(Azure Graph) OAuth and Office 365 V2(Microsoft Graph) OAuth, to attain the access token for each API. If you haven't previously authorized, you will receive a consent request that enables OneLogin to access the Windows Azure Active Directory for Office 365.
A dialog prompts you to complete the authentication process by authorizing access for OneLogin. Click on your Office account name and you will be directed to Office 365. Choose your account, or sign in if prompted.
Once you authenticate, the Authenticate button becomes Clear Token which allows you to clear the bearer token and reauthenticate.
On the Parameters tab, map Office 365 user attributes to OneLogin attributes.

For SSO configuration, enter the following OneLogin attributes under Value, depending on your directory configuration. Note: If OneLogin is not integrated with Active Directory, OneLogin generates a unique AD ID value to map to the Office 365 ImmutableID.
Display Name sets the way the user name displays in Office 365 (including the name that appears in the From: field in emails). If you don't set this to a OneLogin value, it defaults to {firstname} {lastname}.
You can set Display Name to any OneLogin user attribute, or you can set it to a custom value using an Attribute Macro or Custom User Field. For example, you can set it to Last name, First name using the macro
{lastname}{firstname}. Or you can set it to nickname by creating a custom user field (let's say nickname), populating the field with users' nickname values, and mapping the Display Name to the new field. For more information, see Attribute Macros and Custom User Fields.The Display Name can be set to AD ID, AD user name, or company. AD ID maps to the objectGUID field in AD, while AD user name maps to sAMAccountName field.
All other attributes are used only when provisioning from OneLogin to Office 365. See Provisioning User Attributes to Office 365.
ImmutableID should always be set to AD ID. If OneLogin is not integrated with Active Directory (AD), and there is no ImmutableID to provision from AD to Office 365, OneLogin generates a unique AD ID value to map to the Office 365 ImmutableID.
Note: The ImmutableID parameter is provisioned bi-directionally. If a OneLogin user is provisioned into Office 365, and that user exists with an assigned Immutable ID, OneLogin will copy that value back into the ImmutableID parameter. If the value in Office 365 differs from the value in OneLogin, we copy the value from Office 365 into OneLogin ImmutableID parameter. For this reason, we recommend you create a custom parameter to safely store Immutable IDs.
The correct ImmutableID is required for SSO to function. SSO will fail if the wrong ImmutableID is stored in OneLogin.
Important! ImmutableID is immutable! You can't change it once it's set.
The Sharepoint Online Persistent Sessions parameter allows single-sign on sessions to persist for 5 days with Sharepoint Online. With this parameter enabled, the user does not need to go through IdP to re-establish a valid session. To enable, set the macro value to true. To disable, set it to false.On the Access tab, assign the OneLogin roles that should have access to Office 365 and provide any app security policies that you want to apply to Office 365.
You can assign a default app policy that applies to all users who use Office 365, as well as a role-specific exception to that policy. For more information, see App Policies.
You can also add a WS-Trust Policy to restrict users to a specific set of IP addresses (such as company offices) when they use Microsoft Office rich client applications (such as Lync or Outlook). As with all app policies, you must set up the WS-Trust app policy before you can select it here.
On the SSO tab, configure your WS-Federation settings automatically.

In this step, you tell OneLogin to exchange certificates with Office 365 and configure WS-Federation automatically for you. If you want to configure SSO manually, go to step 8.
Note. If you are federating multiple domains with Office 365, it is best practice to use a separate X.509 certificate for each domain. You must create any new certificates before you configure your Office 365 connectors. Go to Settings > SAML and click New to create new certificates. Before you perform the following steps, go to the Manual Configuration sub-tab, click the Change link and select a new certificate from the drop-down. Return to the Automatic Configuration sub-tab to initiate automatic federation configuration.
Turn on the Enable automatic SAML configuration toggle to open the One Click dialog.

Follow the prompts to complete the WS-Federation configuration.
If WS-Federation configuration fails, the dialog will tell you. If retrying fails, make any modifications suggested by the error message or check your settings on the Configuration, Access, and Parameters tabs and try again. If automatic configuration continues to fail, you can try manual configuration, as described in step 8.
If WS-Federation configuration succeeds, the dialog tells you it's done and prompts you to verify the configuration:
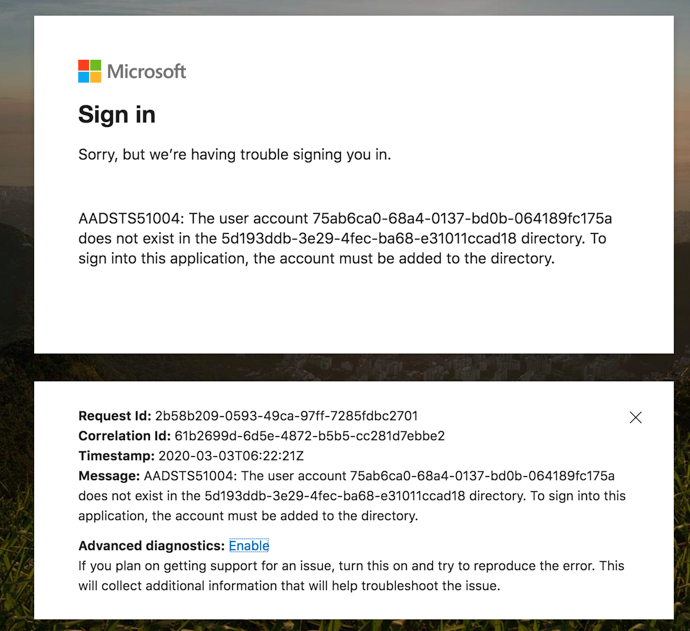
Note: the default wizard requires you to press Verify to launch a new tab, but for 30 minutes you will receive an error screen from Microsoft like the one below. Ignore it and close the tab.
If you have not already assigned yourself access to this app, the Done page displays a Next button. Click it to display a verification page:

Open a new browser window or tab. Assign this app to a OneLogin user with an Office 365 account, then log in to OneLogin as the user and try to launch Office 365 from App Home. If the app launches successfully, return to the One Click dialog and click Yes. I'm Done. Wait 30 minutes as Microsoft proagates your admin setup commands across all its servers and then open a new browser window or tab.
Note. You can also use PowerShell to verify that federation succeeded. Follow steps 1-4 in Disabling ADFS Federation To Enable OneLogin SSO With Office 365.
OneLogin returns you to the SSO tab, where you can confirm that the Enable automatic SAML configuration toggle is turned on.

If you ever need to turn off OneLogin SSO for Office 365, simply click the toggle off.
(Optional) Configure WS-Federation settings manually.
OneLogin can configure your federation settings automatically (see step 7). However, if you prefer to configure your federation settings manually, follow the instructions in this step.
On the SSO tab, go to the Manual Configuration sub-tab, where you can view the X.509 certificate, SHA-1 fingerprint, Issuer URL, and web service endpoints required required to set up WS-Federation with SAML 1.1 using Windows PowerShell. Make note of these values and contact your OneLogin support team for assistance.
For information about using PowerShell, see here.
Note. If you are federating multiple domains with Office 365, it is best practice to use a separate X.509 certificate for each domain. Click the Change link to select a new certificate. You must already have created any new certificates before you configure your Office 365 connectors. Go to Settings > SAML and click New to create new certificates.

Next Steps
Configure User Provisioning from OneLogin to Office 365
You must have either DirSync (now Azure AD Connect) or OneLogin provisioning enabled for Office 365 federation (SSO) to work. If you are not using Azure AD Connect, or if you want to switch from Azure AD Connect to the OneLogin provisioning engine, follow the instructions at the above link. For a comparison of the benefits of Azure AD Connect and OneLogin Provisioning, see Introduction to Office 365 Integration with OneLogin.