Converse agora com nosso suporte
Chat com o suporte

Active Roles 8.2 - Administration Guide

Introduction Getting started with Active Roles Configuring rule-based administrative views Configuring role-based administration Configuring rule-based autoprovisioning and deprovisioning
Configuring Provisioning Policy Objects
User Logon Name Generation E-mail Alias Generation Exchange Mailbox AutoProvisioning Group Membership AutoProvisioning Home Folder AutoProvisioning Property Generation and Validation Script Execution O365 and Azure Tenant Selection AutoProvisioning in SaaS products
Configuring Deprovisioning Policy Objects
User Account Deprovisioning Group Membership Removal User Account Relocation Exchange Mailbox Deprovisioning Home Folder Deprovisioning User Account Permanent Deletion Office 365 Licenses Retention Group Object Deprovisioning Group Object Relocation Group Object Permanent Deletion Script Execution Notification Distribution Report Distribution
Configuring entry types Configuring a Container Deletion Prevention policy Configuring picture management rules Managing Policy Objects Checking for policy compliance Deprovisioning users or groups Restoring deprovisioned users or groups Configuring policy extensions
Using rule-based and role-based tools for granular administration Workflows
About workflow processes Workflow processing overview Workflow activities overview Configuring a workflow
Creating a workflow definition for a workflow Configuring workflow start conditions Configuring workflow parameters Adding activities to a workflow Configuring an Approval activity Configuring a Notification activity Configuring a Script activity Configuring an If-Else activity Configuring a Stop/Break activity Configuring an Add Report Section activity Configuring a Search activity Configuring CRUD activities Configuring a Save Object Properties activity Configuring a Modify Requested Changes activity Enabling or disabling an activity Enabling or disabling a workflow Using the initialization script
Approval workflow Email-based approval Automation workflow Activity extensions
Temporal Group Memberships Group Family Dynamic groups Active Roles Reporting Management History Entitlement profile Recycle Bin AD LDS data management One Identity Starling Join and configuration through Active Roles Managing One Identity Starling Connect Configuring linked mailboxes with Exchange Resource Forest Management Configuring remote mailboxes for on-premises users Migrating Active Roles configuration with the Configuration Transfer Wizard Managing Skype for Business Server with Active Roles
About Skype for Business Server User Management Active Directory topologies supported by Skype for Business Server User Management User Management policy for Skype for Business Server User Management Master Account Management policy for Skype for Business Server User Management Access Templates for Skype for Business Server Configuring the Skype for Business Server User Management feature Managing Skype for Business Server users
Exchanging provisioning information with Active Roles SPML Provider Monitoring Active Roles with Management Pack for SCOM Configuring Active Roles for AWS Managed Microsoft AD Azure AD, Microsoft 365, and Exchange Online Management
Azure tenant types and environment types supported by Active Roles Using Active Roles to manage Azure AD objects Unified provisioning policy for Azure M365 Tenant Selection, Microsoft 365 License Selection, Microsoft 365 Roles Selection, and OneDrive provisioning Changes to Active Roles policies for cloud-only Azure objects
Managing the configuration of Active Roles
Connecting to the Administration Service Managed domains Using unmanaged domains Evaluating product usage Creating and using virtual attributes Examining client sessions Monitoring performance Customizing the Console Using Configuration Center Changing the Active Roles Admin account Enabling or disabling diagnostic logs Active Roles Log Viewer
SQL Server replication Using regular expressions Administrative Template Configuring federated authentication Communication ports and URLs used by Active Roles Integrating Active Roles with other products and services Active Roles Language Pack Active Roles Diagnostic Tools Active Roles Add-on Manager

Configuring a Text entry type

You can add a text string to the value that you are configuring with a Text entry type.

To configure a Text entry type

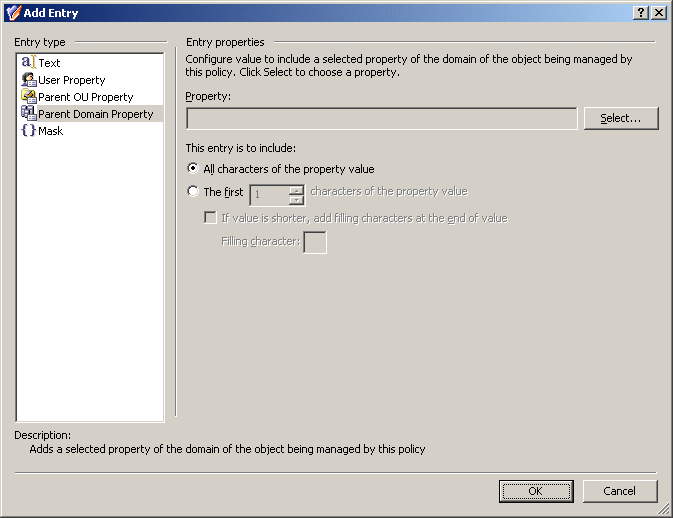
  1. In the Add Entry window, under Entry type, click Text.

  2. In Text value, type the text string you want the value to include.

  3. Click OK.

Configuring an <Object> Property entry type

With this entry type, you can include a certain property (or a part of a property) of the object that is under the control of the policy. In these instructions, <Object> stands for the type of object, such as User, Group, or Computer.

To configure an <Object> Property entry type

  1. In the Add Entry window, under Entry type, click <Object> Property.

  2. Click Select.

  3. To search for the object property, either enter it in the Look for Property search field, or browse for it in the Object Property list.

    TIP: If you do not see the Object property that you need, to expand the Object property list, select Show all possible properties.

  4. Click the property to include in the value, then click OK.

  5. Decide whether you want the entry to include the entire or a part of the property.

    • If you want the entry to include the entire property, select All characters of the property value.

    • If you want the entry to include a part of the property, select The first, and enter the number of characters to include in the entry.

      (Optional) To fill the missing characters in the value of the property with a predetermined character if the value is shorter than specified, select If value is shorter, add filling characters at the end of value, and enter a character in Filling character.

  6. Click OK.

Configuring a Parent OU Property entry type

With this entry type, you can configure a value to include a certain property (or a part of a property) of an Organizational Unit (OU) in the hierarchy of containers above the object that is managed by the policy.

To configure a Parent OU Property entry

  1. In the Add Entry window, under Entry type, click Parent OU Property.

    Figure 60: Add Entry: Parent OU Property

  2. Click Select.

  3. To search for the object property, either enter it in the Look for Property search field, or browse for it in the Object Property list.

    TIP: If you do not see the Object property that you need, to expand the Object property list, select Show all possible properties.

  4. Click the property to include in the value, then click OK.

  5. Decide whether you want the entry to include the entire or a part of the property.

    • If you want the entry to include the entire property, select All characters of the property value.

    • If you want the entry to include a part of the property, select The first, and enter the number of characters to include in the entry.

      (Optional) To fill the missing characters in the value of the property with a predetermined character if the value is shorter than specified, select If value is shorter, add filling characters at the end of value, and enter a character in Filling character.

  6. Specify how far the parent OU is from the managed object:

    • To use the property of the OU in which the object resides, select Immediate parent OU of the object being managed by this policy.

    • To use the property of a parent OU of a different level, select More distant parent OU and then, in Level, specify the level of the OU.

      A lower level means a greater distance from the managed object in the hierarchy of containers above that object. For example, OU level 1 is the immediate child OU of the domain.

  7. Click OK.

Configuring a Parent Domain Property entry type

With this entry type, you can configure a value to include a certain property (or a part of a property) of the object's parent domain.

To configure a Parent Domain Property entry type

  1. In the Add Entry window, under Entry type, click Parent Domain Property.

    Figure 61: Add Entry: Parent Domain Property

  2. Click Select.

  3. To search for the object property, either enter it in the Look for Property search field, or browse for it in the Object Property list.

    TIP: If you do not see the Object property that you need, to expand the Object property list, select Show all possible properties.

  4. Click the property to include in the value, then click OK.

  5. Decide whether you want the entry to include the entire or a part of the property.

    • If you want the entry to include the entire property, select All characters of the property value.

    • If you want the entry to include a part of the property, select The first, and enter the number of characters to include in the entry.

      (Optional) To fill the missing characters in the value of the property with a predetermined character if the value is shorter than specified, select If value is shorter, add filling characters at the end of value, and enter a character in Filling character.

  6. Click OK.

Documentos relacionados

The document was helpful.

Selecione a classificação

I easily found the information I needed.

Selecione a classificação