
Creating the virtual machines
This example uses two virtual machines and follows a typical production installation of Cloud Access Manager. For example, one machine for the proxy host and another machine for the Security Token Service (STS) host. Additional hosts can be added later if you need to increase capacity.
To create a typical production installation of Cloud Access Manager
-
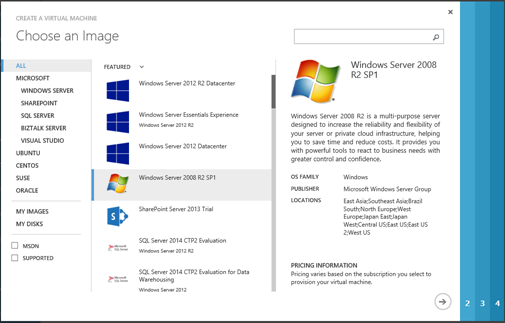
Create a new virtual machine for the proxy host using the FROM GALLERY wizard. Select the Windows Server 2008 R2 SP1 Windows Azure image.
- On the Configuration tab for the first virtual machine, set the size of the virtual machine to medium or higher.
-
On the Configuration tab for the second virtual machine, set the Region/Affinity group/Virtual network field to the name of the virtual network you created earlier.
NOTE: This cannot be easily changed after the virtual machine has been created.
-
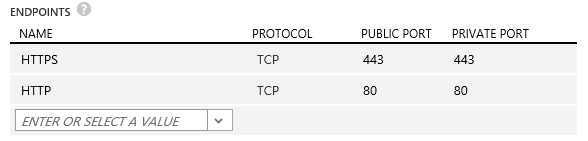
On the Endpoints tab, add HTTP and HTTPS endpoints to allow users to access the proxy from the Internet.
- Repeat the process to create a new virtual machine for the STS host; no Endpoints are required for the STS host.
- Power up both virtual machines ensuring they can be accessed using the Remote Desktop client. To test connectivity over the virtual private network (VPN), connect using the private IP address rather than the public IP address for the virtual machine.

Preparing Cloud Access Manager hosts
To prepare the Cloud Access Manager
- Join the Security Token Service (STS) host to your Active Directory domain using the normal procedure.
- Log in to the STS host as a domain admin and install Microsoft SQL Server 2012.
- You do not need to join the proxy host to the domain.
Cloud Access Manager configuration
To configure Cloud Access Manager
- Perform a standard production installation as described in the One Identity Cloud Access Manager Installation Guide.
- When you configure the wildcard DNS subdomain to use with Cloud Access Manager, the wildcard subdomain should resolve to the public Virtual IP (VIP) address of the proxy host. The VIP can be obtained from the Windows Azure UI by navigating to the Virtual Machine for the proxy host.
- Add the external wildcard DNS subdomain to your internal DNS. Ensure that it resolves to the internal/private IP address of the proxy host. This will allow users on the on-premise network to access Cloud Access Manager over the virtual private network (VPN) connection instead of through the Internet.