Support Kiosk
An Appliance Administrator triaging a Hyper-V or VMware virtual appliance that has lost connectivity or is otherwise impaired can use the Support Kiosk even when the virtual appliance is in quarantine. For more information, see What do I do when an appliance goes into quarantine.
- On the web management console, click
 Support Kiosk.
- Select any of the following activities:
-
Appliance Information
This is read-only. You can re-run setup to change networking information.
- Power Options
You can reboot or shutdown the virtual appliance.
- Enter the reason you want to reboot or shutdown the virtual appliance.
- Click Reboot or Shutdown.
-
Admin Password Reset
The Bootstrap Administrator is a built-in account to get the appliance running for the first time. The default credentials (admin/Admin123) should be changed once Safeguard is configured. If you lose the password, you can reset it to the default using the challenge response process below.
Challenge response process
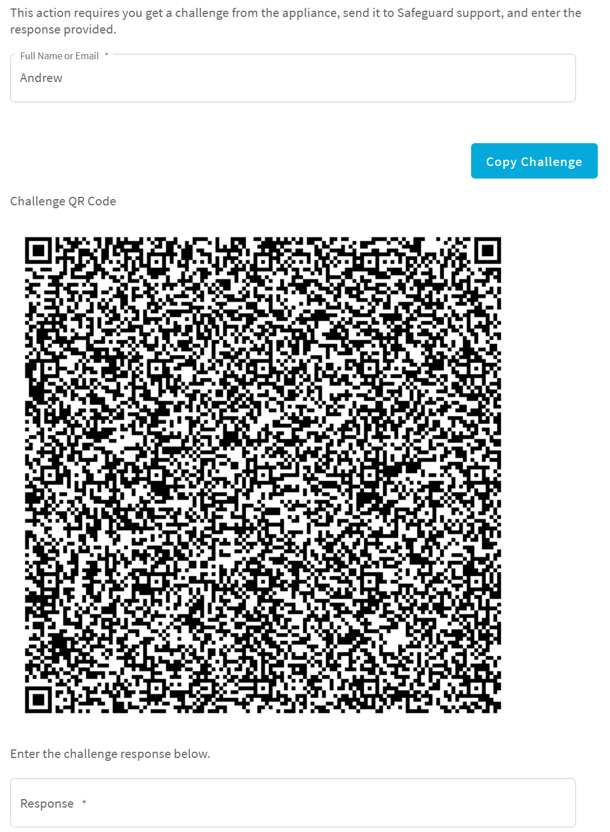
- In Full Name or Email, enter your name or email to receive the challenge question.
- Click Get Challenge.
- To get the challenge response, perform one of the following (see the illustration that follows).
- Click Copy Challenge. The challenge is copied to the clipboard. Send that challenge to Safeguard support. Support will send back a challenge response that is good for 48 hours. Do not refresh your screen.
- Screenshot the QR code and send it to Support. Support will send back a challenge response that is good for 48 hours. Do not refresh your screen.
d. After the response is accepted, click Reset Password.
- Support Bundle
A support bundle includes system and configuration information sent to One Identity Support to analyze and diagnose issues. You can download a support bundle or save the bundle to a Windows share location which you have already set up. To generate a support bundle:
- Select Include Event Logs if you want to include operating system events. Unless requested by support, it is recommended to leave this unchecked because it takes much longer to generate the support bundle.
-
Create the support bundle using one of these methods:
- If you are connected via the browser not the display, you can click Download, navigate to the location for the download, and click OK.
- To copy the bundle to the share:
- Enter the UNC Path, Username, and Password.
- Select Include Event Logs, if appropriate.
- Click Copy To Share. A progress bar displays. The operation is complete when you see The bundle was successfully copied to the share.
- Diagnostic package
Appliance Administrators can execute a trusted, secure appliance diagnostics package to help solve issues with configuration, synchronization, and clustering, as well as other other internal challenges. The appliance diagnostics package is available from the web Support Kiosk, not the Serial Kiosk (Recovery Kiosk). The appliance diagnostics package can be used even when the appliance is in quarantine. To protect against external threats, Safeguard rejects illegitimate appliance diagnostics packages. The manifest file in the appliance diagnostics package lists criteria that may include the minimum Safeguard version, appliance ID, and expiration time-stamp UTC. New product code and database changes are not included in an appliance diagnostics package.
- To load for the first time, click Upload, select the file that has an .sgd extension, then click Open.
- If the upload criteria is not met, the appliance diagnostics package is not uploaded and a message like the following displays: The minimum Safeguard version needed to run this diagnostic package is <version>.
- If the upload is successful, the Diagnostic Package Information displays with a Status of Staged. Select Execute and wait until the Status changes to Completed.
- Once uploaded, you can:
- Select Download Log to save the log file. Audit log entries are available through the Activity Center during and after execution and are part of the appliance history.
- If the Expiration Date has not passed, you can select Execute to execute the appliance diagnostics package again.
- Select Delete to delete the appliance diagnostics package, the associated log file, and stop any appliance diagnostics package that is running. Before uploading a different appliance diagnostics package, you must delete the current one because there can be only one appliance diagnostics package per appliance.
-
Factory Reset (hardware appliance)
Perform a factory reset to recover from major problems or to clear the data and configuration settings on a hardware appliance. All data and audit history is lost and the hardware appliance goes into maintenance mode. For more information, see Performing a factory reset.
A virtual appliance is reset by the recovery steps to redeploy and not a factory reset. If you are attached to the console of a virtual machine, you will not have the Factory Reset option. The options are only available for hardware.
- Lights Out Managment (BMC) (hardware appliance)
The Lights Out Management feature allows you to remotely manage the power state and serial console to Safeguard for Privileged Passwords using the baseboard management controller (BMC). When a LAN interface is configured, this allows the Appliance Administrator to power on an appliance remotely or to interact with the Recovery Kiosk.
For more information, see Lights Out Management (BMC).
Cloud deployment considerations
Safeguard for Privileged Passwords can be run from the cloud.
Before you start: platforms and resources
When setting up a virtual environment, carefully consider the configuration aspects such as CPU, memory availability, I/O subsystem, and network infrastructure to ensure the virtual layer has the necessary resources available. See One Identity's Product Support Policies for more information on environment virtualization.
Platforms that have been tested with the cloud deployments follow.
For these deployments, the minimum resources used in test are 4 CPUs, 10GB RAM, and a 60GB disk. Choose the appropriate machine and configuration template. For example, when you click Create in the Azure Marketplace, default profiles display. You can click Change size to choose a different template.
Restricting access to the web management kiosk for cloud deployments
The web management kiosk runs on port 9337 in AWS and Azure and is intended for diagnostics and troubleshooting by Appliance Administrators.
|

|
CAUTION: The Management web kiosk is available via HTTPS port 9337 for cloud platforms (including AWS and Azure). The Management web kiosk gives access to functions without authentication, such as pulling a support bundle or rebooting the appliance. In AWS, all ports are denied unless explicitly allowed. To deny access to port 9337, the port should be left out of the firewall rules. If the port is used, firewall rules should allow access to targeted users. |
Azure: Block port 9337
Use the following steps to block access to port 9337 in Azure.
- Navigate to the virtual machine running Safeguard for Privileged Passwords.
- In the left hand navigation menu select Networking.
- Click Add inbound port rule.
- Configure the inbound security rule as follows:
Source: Any
Source port ranges: *
Destination: Any
Destination port ranges: 9337
Protocol: Any
Action: Deny
Priority: 100 (use the lowest priority for this rule)
Name: DenyPort9337
- Click Add.
AWS: Block port 9337
Use the following steps to block access to port 9337 in AWS.
- From the EC2 Dashboard, navigate to the EC2 Instance running Safeguard for Privileged Passwords.
- Select the instance.
- In the Description tab, locate the Security groups field then click the name of the security group.
- Select the Inbound tab.
- Click Edit.
- Remove any existing rules and add the following rules:
- Type: Custom TCP Rule
Protocol: TCP
Port Range: 655
Source: Anywhere
Description: Cluster VPN
- Type: Custom UDP Rule
Protocol: UDP
Port Range: 655
Source: Anywhere
Description: Cluster VPN
- Type: HTTPS
Protocol: TCP
Port range: 443
Source: Anywhere
Description: Web API
- Type: Custom TCP Rule
Protocol: TCP
Port Range: 8649
Source: Anywhere
Description: SPS Cluster
- Click Save.
AWS deployment
Safeguard for Privileged Passwords (SPP) can be run in the cloud using Amazon Web Services (AWS).
To access the shared Amazon Machine Image (AMI) from AWS, contact your One Identity Salesperson and provide them your AWS Customer Name and Customer ID. The AMI will be shared with you and you will be provided the AMI ID. Refer to this AWS article for information on finding and using the shared AMI: Finding and Using Shared AMIs.
Disk size considerations
Safeguard for Privileged Passwords (SPP) deploys with a minimal OS disk size. You should increase the size of the OS disk based on your estimated usage and budget. SPP on hardware comes with 1TB of disk. You can use more or less than this depending on how many assets, accounts, and daily users you expect to have. 500GB is a minimal production disk size and 2TB is the maximum.
- Deploy SPP.
- Verify you can log in.
- Shut down the VM (stopped and deallocated).
- Disk size can be handled through Amazon Elastic Compute Cloud (Amazon EC2). For more information, see Getting Started with Amazon EC2.
When you start up the VM, SPP automatically resizes the OS disk volume to use the available space.
AWS security considerations
Running Safeguard for Privileged Passwords (SPP) in AWS comes with some security considerations that do not apply to the hardware appliance. We recommend:
Static IP address required
Configure the SPP VM with a static IP address in AWS. In AWS, the IP address must not change after the VM is deployed. If you need to change the IP address, take a backup, deploy again, and restore the backup. You can script the VM deploy to pick up an existing virtual NIC with the IP address configuration. For details, see the Amazon Virtual Private Cloud (VPC) documentation.
Deployment steps
AWS automatically licenses the operating system during the deployment with an AWS KMS.
Larger deployments warrant larger sizing choices. Safeguard for Privileged Passwords hardware appliances have 32GB of RAM and 4 processors with at least 1TB of disk space.
View or change the cloud virtual appliance setup
You can view or change the virtual appliance setup.
You can use the Safeguard for Privileged Passwords web management kiosk on port 9337 for diagnostics and troubleshooting.
You can also check the system logs via AWS:
- To view the system log from AWS, select Actions, then Instance Settings, and then Get System Log.
- Log in via https://<your IP>:9337
To patch to a new version, use the desktop client or API.
Azure deployment
Safeguard for Privileged Passwords (SPP) can be run in the cloud using Azure. A version of Safeguard for Privileged Passwords is available in the Azure Marketplace and an Azure Virtual Machine (VM) is required. See Windows virtual machines in Azure for details of setting up your VM.
When using Azure, Safeguard for Privileged Passwords is available on HTTPS X0. The Azure deployment does not use the MGMT service. The Recovery (Serial) Kiosk is used to view appliance information, Administrator password reset, power restart or shut down, and generating a support bundle.For more information, see Recovery Kiosk (Serial Kiosk).
Disk size considerations
Safeguard for Privileged Passwords (SPP) deploys with a minimal OS disk size. You should increase the size of the OS disk based on your estimated usage and budget. SPP on hardware comes with 1TB of disk. You can use more or less than this depending on how many assets, accounts, and daily users you expect to have. 500GB is a minimal production disk size and 2TB is the maximum.
- Deploy SPP.
- Verify you can log in.
- Shut down the VM (stopped and deallocated).
- Follow Microsoft’s guidance for increasing the disk size: How to expand the OS drive of a virtual machine.
When you start up the VM, SPP automatically resizes the OS disk volume to use the available space.
Azure security considerations
Running Safeguard for Privileged Passwords (SPP) in Azure comes with some security considerations that do not apply to the hardware appliance. We recommend:
Static IP address recommended
Configure the SPP VM with a static IP address in Azure. In Azure, the IP address must not change after the VM is deployed. If you need to change the IP address, take a backup, deploy again, and restore the backup. You can script the VM deploy to pick up an existing virtual NIC with the IP address configuration. For details, see Microsoft’s Virtual Network documentation.
Deployment steps
Safeguard for Privileged Passwords is deployed from the Azure Marketplace. Azure automatically licenses the operating system during the deployment with an Azure KMS.
The Azure base image includes the required configuration necessary to deploy into Azure following Microsoft's guidance, Prepare a Windows VHD or VHDX to upload to Azure.
- Log into the Azure portal.
- Under Azure services, click Create a resource.
-
Search for “One Identity Safeguard for Privileged Passwords” and click the tile.
- On the One Identity Safeguard for Privileged Passwords screen, click Create.
- Advance through the resource creation screens. Considerations follow:
- For small deployments, it is recommended to choose at least VM size Standard D2s v3. Larger deployments warrant larger sizing choices. Safeguard hardware appliances have 32GB of RAM and 4 processors with at least 1 TB of disk space.
- You must set an administrator user name and password as part of the image creation, however, SPP will disable this account during initial setup.
- Set public inbound ports to None.
- Choose your Windows licensing option.
- Make sure to enable boot diagnostics and the serial kiosk. The Azure Serial console will be used to provide access to the Safeguard Recovery Kiosk.
- Once you are finished configuring the VM, click Create. Azure will deploy the SPP virtual machine.
- When the virtual machine deployment is finished, SPP will automatically start initializing and configuring itself for the first use. This usually takes between 5-30 minutes, depending on the VM sizing. During initialization, Safeguard will enable the firewall and disable remote access to the VM. You can monitor the progress of initialization from the Azure Serial console. While the initialization is running, do not log in to the VM or power off or restart the VM.
- When initialization is complete, you will see the Safeguard Recovery (Serial) Kiosk on the Azure Serial console screen.
- Log in to the appliance via the web using the default username and password admin / Admin123. You should change the admin password immediately. For more information, see Setting a local user's password.
View or change the cloud virtual appliance setup
You can view or change the virtual appliance setup.
The Administrator uses the Recovery Kiosk (Serial Kiosk) to perform the following.
For more information, see Recovery Kiosk (Serial Kiosk).
To patch to a new version, use the desktop client or API.