
Elements of the main workspace
The main workspace displays the configuration settings related to the selected Main menu item grouped into one or more submenus. Related parameters of a submenu are organized into labeled groups or sections, marked with blue outline 
Figure 34: Main workspace

-
Each page includes one or more orange action buttons. The most common action button is
-
/
Show/Hide details: Displays or hides additional configuration settings and options.
-
Create entry: Create a new row or entry (for example an IP address or a policy).
-
Delete entry: Delete a row or an entry (for example an IP address or a policy).
-
Modify entries or upload files: Edit an entry (for example a host key, a list, and so on), or upload a file (for example a private key). These actions open a pop-up window where the actual modification can be performed.
-
,
Position an item in a list: Modify the order of items in a list. The order of items in a list (for example the order of connections, permitted channels in a channel policy, and so on) is important because when One Identity Safeguard for Privileged Sessions (SPS) is looking for a policy, it evaluates the list from top to down, and selects the first item completely matching the search criteria. For example, when a client initiates a connection to a protected server, SPS selects the first connection policy matching the client's IP address, the server's IP address, and the target port (the From, To, and Port fields of the connection).
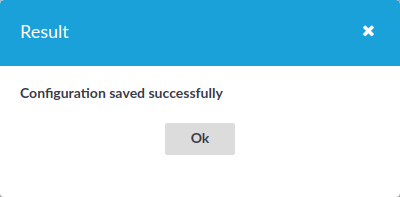
Message window: This pop-up window displays the responses of SPS to the user's actions, for example Configuration saved successfully. Error messages are also displayed here. All messages are included in the system log. For detailed system logs (including message history), see the Troubleshooting tab of the Basic Settings. To make the window appear only for failed actions, navigate to User menu > Preferences and enable the Autoclose successful commit messages option.
Figure 35: Message window
Multiple users and locking
Multiple administrators can access the One Identity Safeguard for Privileged Sessions (SPS) web interface simultaneously, but only one of them can modify the configuration. This means that the configuration of SPS is automatically locked when the first administrator who can modify the configuration opens a configuration page (for example the Basic Settings or the AAA menu).
The warning message displays the username of the administrator locking the configuration as shown in the image below:
Figure 36: Configuration lock by remote administrator
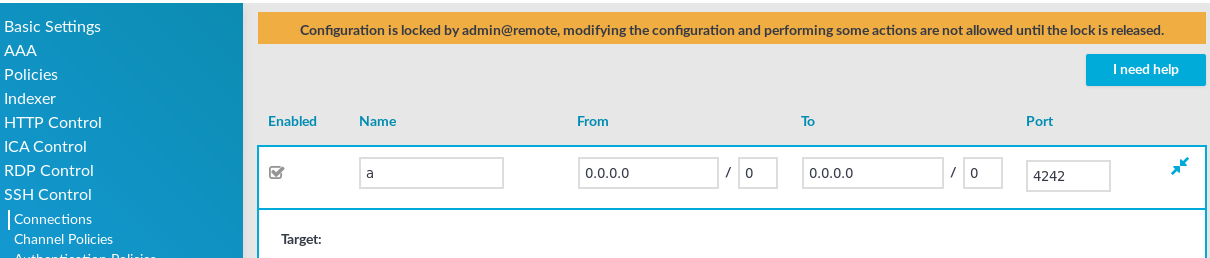
Other administrators can continue as read-only but must wait until the locking administrator navigates to an SPS page that does not require locking, the administrator logs out, or the session of the administrator times out. However, it is possible to access the Search and Reporting menus,
Accessing SPS using the RPC API or starting a transaction in the REST API locks the configuration similarly to accessing SPS from the web interface.
|
|
NOTE:
If an administrator logs in to SPS using the local console or a remote SSH connection, the configuration is also locked. Inactive local and SSH connections timeout just like web connections. For details, see Accessing the One Identity Safeguard for Privileged Sessions (SPS) console. |

Web interface timeout
By default, One Identity Safeguard for Privileged Sessions (SPS) terminates the web session of a user after ten minutes of inactivity. To change value of this timeout, adjust the Basic Settings > Management > Web interface timeout option.
Figure 37: Basic Settings > Management > Web interface timeout — Web interface timeout

Preferences
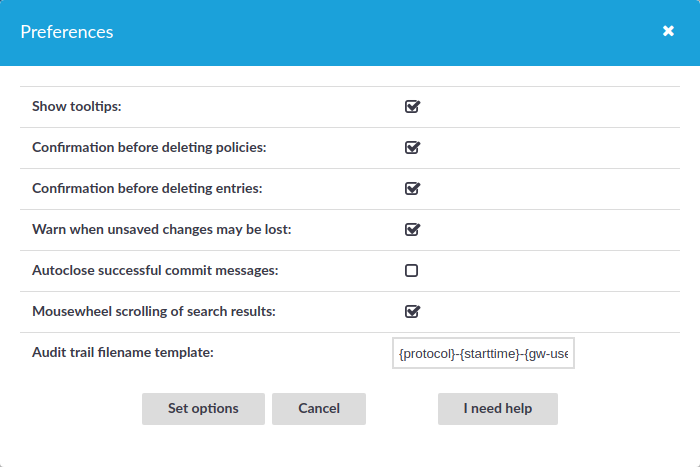
To configure your preferences about the web interface, navigate to User Menu > Preferences.
Figure 38: User Menu > Preferences
-
Show tooltips: Display tooltips for user interface elements to help using the product.
-
Confirmation before deleting policies: Display a pop-up window when you attempt to delete policies to prevent deleting policies accidentally.
-
Confirmation before deleting entries: Display a pop-up window when you attempt to delete entries to prevent deleting entries accidentally.
-
Warn when unsaved changes may be lost: Display a pop-up window to warn when you navigate to another window without committing your changes to prevent losing unsaved changes.
-
Autoclose successful commit messages: General confirmation windows will not appear. (For example, Configuration saved successfully that appears after successfully committing a change). As a result, pop-up windows appear only for failed actions or errors.
-
Mousewheel scrolling of search results: When there are several pages of displayable search results on the Search page, navigate between search result pages with the mousewheel. When turned off, using the mousewheel on the Search page scrolls the whole page.
-
Audit trail filename template:
To change the filename of the audit trails, navigate to User menu > Preferences and change the Audit trail filename template. The default template is {protocol}-{starttime}-{gw-username}-{remote-username}-{dst-ip}.zat. The template can include anything, the keys (inside {} brackets) are replaced with their actual values. These keys are the following:
-
connection-policy: The connection policy
-
dst-ip: Destination IP address
-
dst-port: Destination port
-
gw-username: Gateway username
-
protocol: Protocol
-
remote-username: Remote username
-
session-id: Session ID
-
src-ip: Source IP address
-
starttime: Start time of the session
-