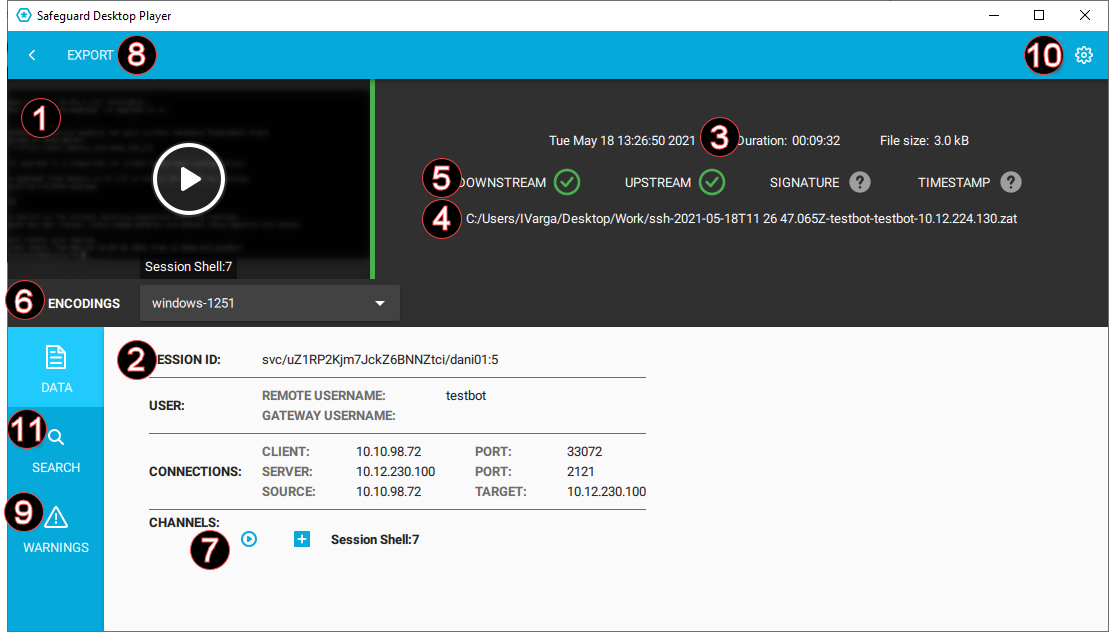
Figure 1: Safeguard Desktop Player > Details page
-
Play the audit trail
Click the thumbnail at the top, on the left, or click
in the Channels section of the screen. To play an encrypted audit trail, you need to have the appropriate certificates. For details, see "Replay encrypted audit trails" in the Safeguard Desktop Player User Guide.
-
Audit trail data
The most important data about the audit trail, including usernames (if available) and IP addresses. To display more metadata about a specific channel in the audit trail, click
in the list of channels. These details include the parameters available on the SPS Search page (for details, see "Using the Search interface" in the Administration Guide), and other parameters, for example, the size of the desktop or the terminal.
-
Date of the recording
Starting date and duration.
-
Location of the audit trail file
Click the path to open the folder in your file manager.
-
Validation results
When you open an audit trail, the Safeguard Desktop Player checks if you can access both the upstream and downstream traffic from the audit trail (you must have access at least to the downstream traffic to replay the audit trail), and validates the digital signature and the timestamp. The
icon means that the trail is not signed or timestamped. For details, see "Validate audit trails" in the Safeguard Desktop Player User Guide.
-
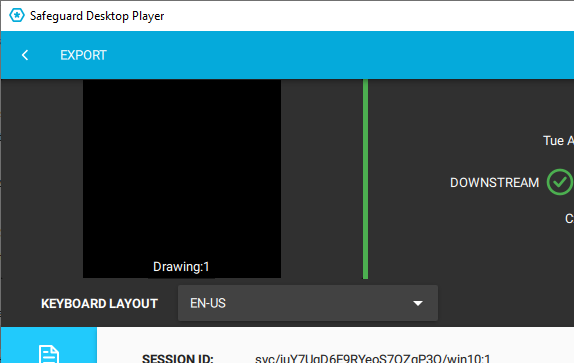
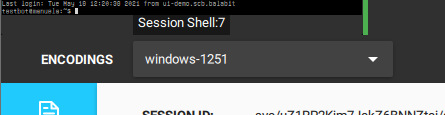
Terminal encoding
When you are replaying terminal-based audit trails, for example, SSH or TELNET, you can set the character encoding of the displayed text. After changing the encoding, click Re-render trail.
-
Replay only this channel
Click
-
Export the audit trail into a video file
The exported files use the WEBM format with the VP8 codec. For details, see "Export the audit trail as video" in the Safeguard Desktop Player User Guide.
-
Warnings and errors
Warnings and errors that occurred during opening and processing the audit trail file.
-
Settings
You can:
-
Import the required certificate to replay an encrypted audit trail. For more information, see Replay encrypted audit trails.
-
Open Preferences, which you can use to set the application language, select a keyboard layout, select how you want to display the window title events on the seeker and in subtitles, and so on. For more information, see Preferences for the Safeguard Desktop Player.
-
Open the documentation in your browser.
-
-
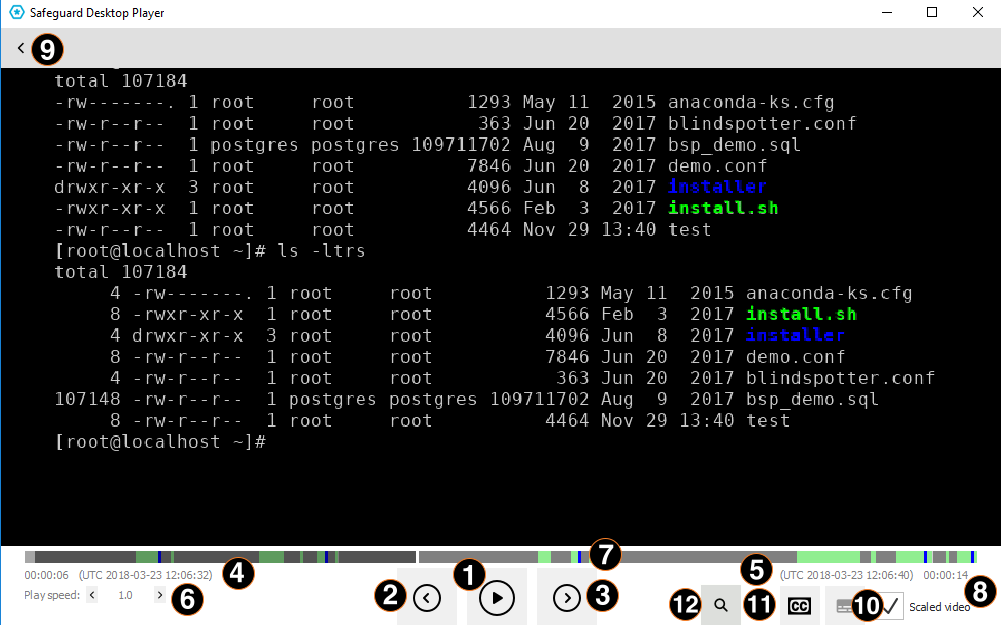
Search in trail content
Search in the contents of the current audit trail, for example, in commands that the user executed in the session, or to find a specific text that was displayed on the screen. Available only for terminal sessions. For details, see Search in the content of the current audit file.
-
Play/pause replay
Start or stop replaying the audit trail. You can also click the video to start or stop replaying.
-
Jump to previous event
User events that occurred in the session (such as window titles that appeared on the screen, commands executed, mouse activity, keystrokes) are marked in the seeker. Click this button to jump to the previous event.
-
Jump to next event
User events that occurred in the session (such as window titles that appeared on the screen, commands executed, mouse activity, keystrokes) are marked in the seeker. Click this button to jump to the next event.
-
Current time and timestamp
Time elapsed since the beginning of the audit trail, and the corresponding date.
-
End time and timestamp
Length of the audit trail and the date when the session ended.
-
Change replay speed
-
Seek preview
Click the seeker to jump to a specific location in the audit trail.
-
Scale video
When enabled, the replayed audit trail is resized to fit the window. Clear to show the original size. You can also double-click on the video to toggle resizing.
-
Back to the summary page
Open the summary page of the audit trail
-
Configure seeker indicators
Click to configure the visibility of indicators for user events on the seeker. Seeker indicators show on a single timeline the user events that occurred during a session. Clicking a seeker indicator takes you to the relevant user event in the audit trail. User events are window titles that appeared on the screen, commands executed, mouse activity, keystrokes, and any on-screen change.
-
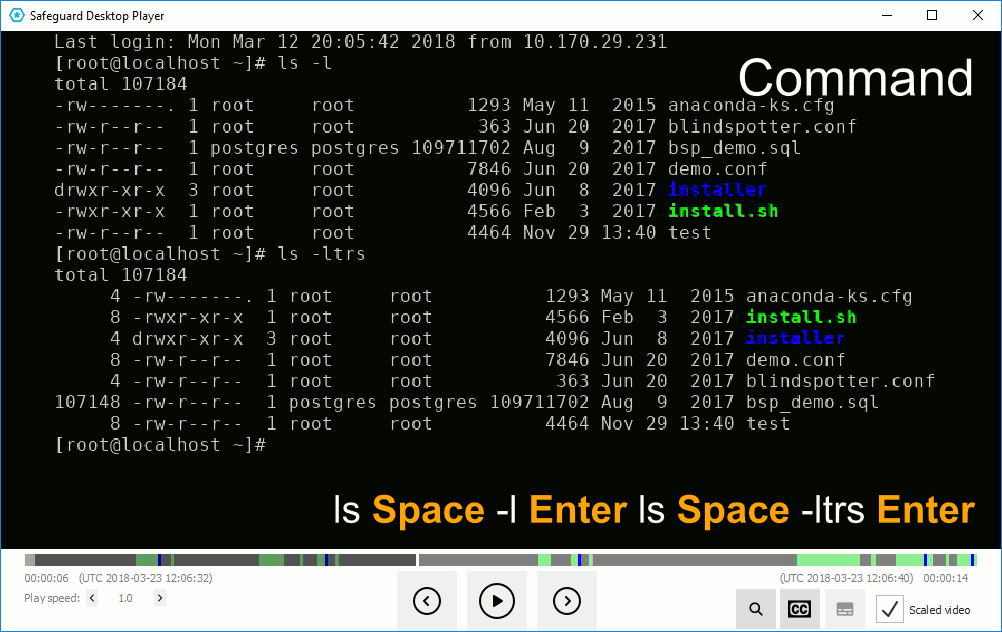
Display subtitles
Click to display subtitles for the video. Subtitles list user events as they occurred in the session. Events that are shown in subtitles are window titles that appeared on the screen, commands executed, mouse activity, and keystrokes.
-
Search in trail content
Search in the contents of the current audit trail, for example, in commands that the user executed in the session, or to find a specific text that was displayed on the screen. Available only for terminal sessions. For details, see Search in the content of the current audit file.

 (Settings) > Preferences.
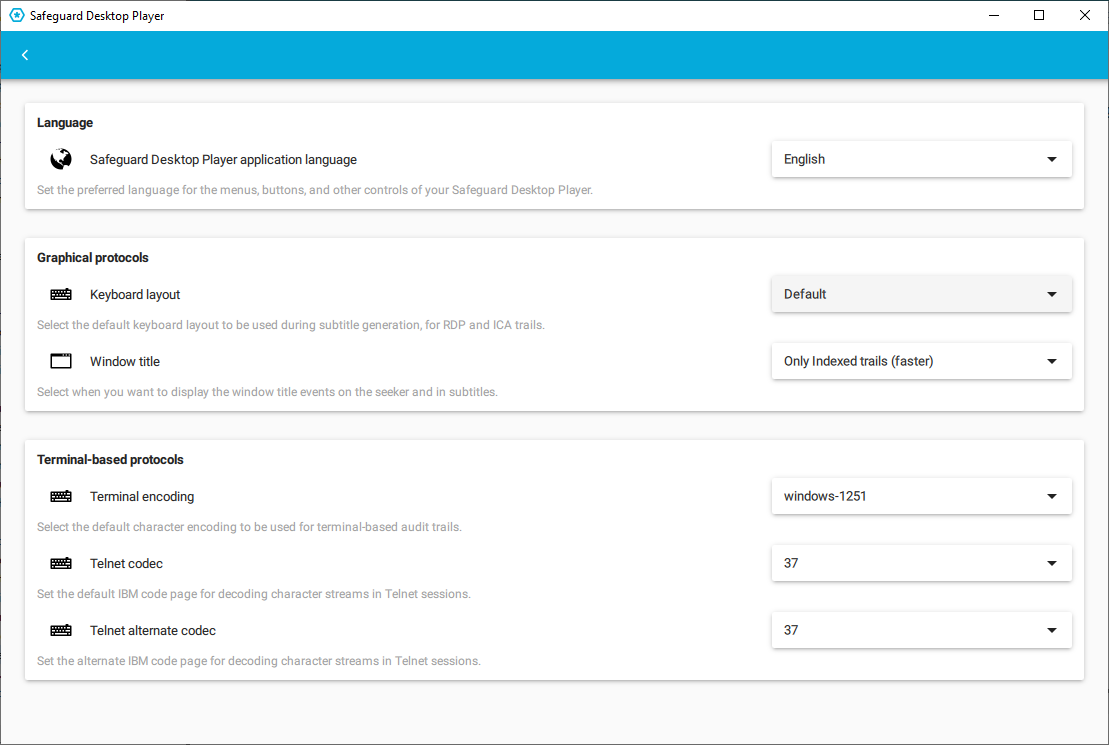
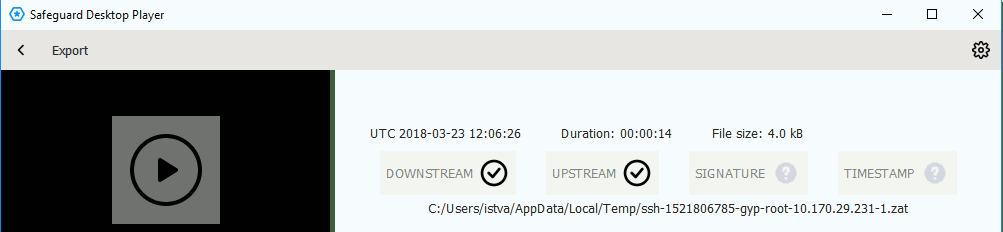
 is displayed if the audit trail is valid.
 is displayed if the timestamp or the signature is invalid, or the Safeguard Desktop Player could not decrypt the downstream traffic.
 . The Configure seeker indicators panel pops up:
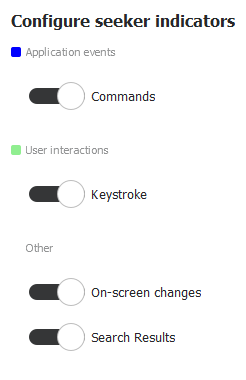
 and
and  buttons.
 . By default, subtitles are not displayed.