This section describes how to deploy syslog-ng Store Box (SSB) on Amazon Web Services.
NOTE: This section uses a number of screenshots for illustration purposes. Note that these are added here for reference only as the look and feel (but not the contents) of the Amazon user interface may change without this guide containing the most recent changes.
To deploy syslog-ng Store Box on AWS
-
Log in to Amazon Web Services.
-
Once logged in, go to INSTANCES > Instances in the left-hand navigation pane, and then click Launch Instance.
NOTE: If you can not find the SSB AMIs you are looking for listed under Community AMIs, you have to copy them first from the publicly available AMIs (located under Services > AWS Management Console > AWS services > EC2, in the US West (Oregon) region by default). For more information about copying SSB AMIs to the region of your choice, see Finding or copying SSB AMIs on Amazon Web Services.
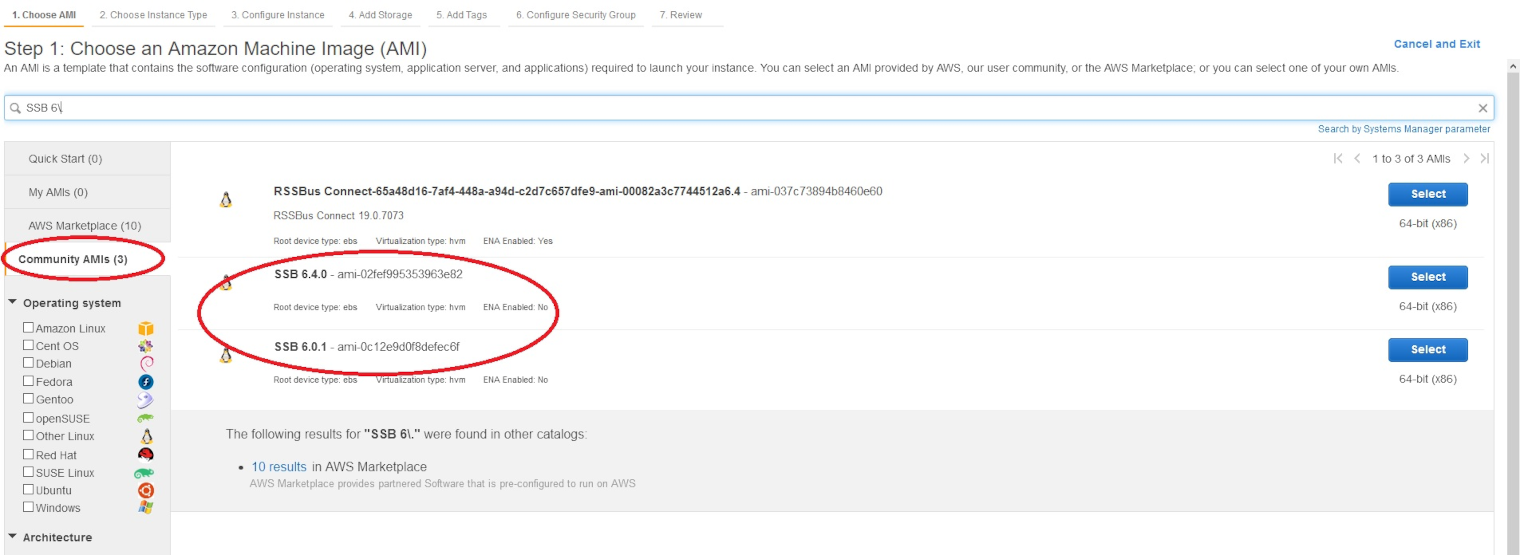
The Step 1: Choose an Amazon Machine Image (AMI) page comes up.
Figure 4: Step 1: Choose an Amazon Machine Image (AMI)
-
Choose an Amazon Machine Image (AMI) that corresponds to the type of Virtual Machine (VM) that you want to launch an instance from.
To choose the AMI that corresponds to the type of Virtual Machine (VM) that you want to launch an instance from
-
Navigate to Community AMIs.
-
Filter the available AMIs for SSB 6.
TIP: The SSB 6\. search expression will filter for the AMIs of all available release versions of SSB within the 6 release set. For more information about release version numbering in SSB, see the description of LTS and Feature releases under the syslog-ng Store Box Product Life Cycle table.
-
Click on the SSB AMI of your choice (for example, SSB 6.0.1), and click the corresponding Select button.
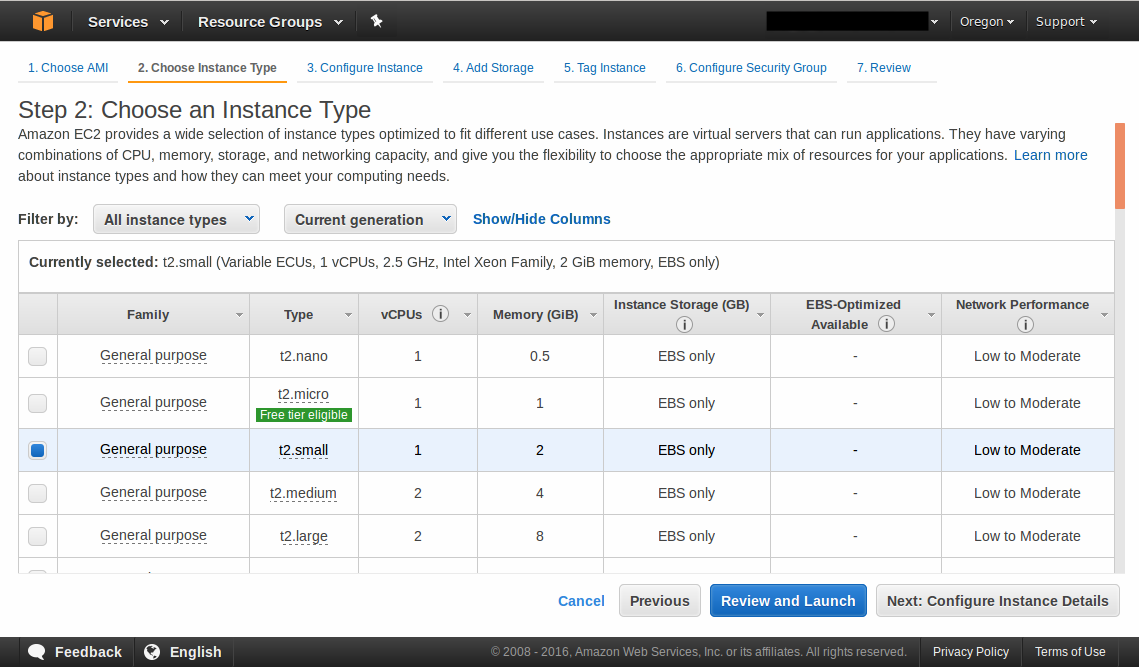
The Step 2: Choose an Instance Type page comes up.
Figure 5: Step 2: Choose an Instance Type
-
-
Choose an instance type:
-
Select an instance type by clicking the checkbox next to it.
The minimum memory requirement is 2 GiB, that is, type t2.small. This instance type is able to handle 10,000 Events per Second (EPS).
The recommended memory requirement is 7.5 GB, that is, type c4.xlarge. The capacity of this instance type is the closest to the physical hardware.
-
Click Next: Configure Instance Details.
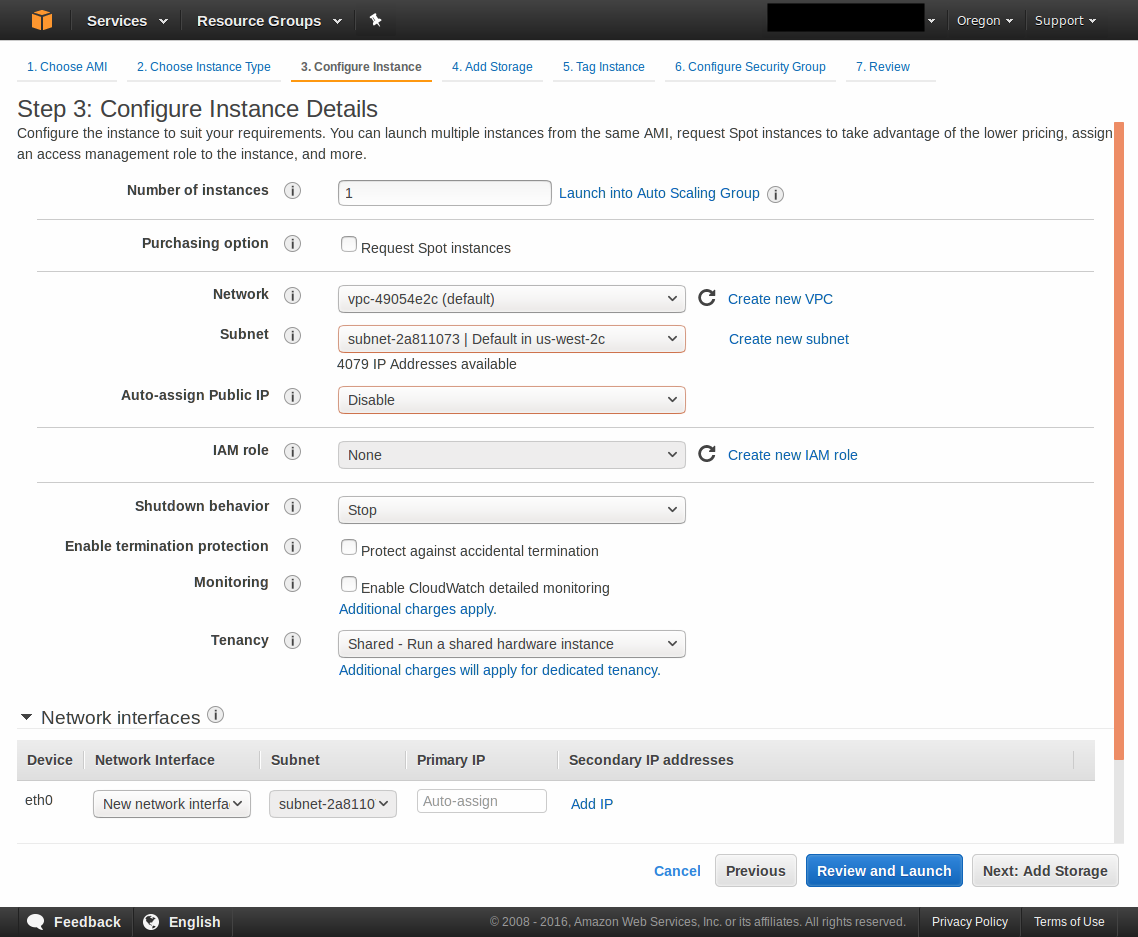
The Step 3: Configure Instance Details page comes up.
Figure 6: Step 3: Configure Instance Details
-
-
Configure instance details:
-
Select the required Virtual Private Cloud (VPC) from the Network list.
-
Choose a subnet to launch the instance into.
NOTE: Exposing SSB to the public Internet during installation is not supported at all, therefore you must use a VPN or jump host to reach your instance and configure it.
As for exposing the logging interface to the Internet after installation, contact our Support Team to discuss your needs and how those could be met.
-
Ensure that the Auto-assign Public IP field is set to Disable or Use subnet setting (Disable). This is required so that you do not get assigned a public IP address.
-
Use the default values for all other fields or change them as required.
-
You can leave the Network interfaces part untouched as using just one network interface will suffice.
Note, however, that if you launch SSB with a single interface configured, then that interface will act as the management interface.
-
Click Next: Add Storage.
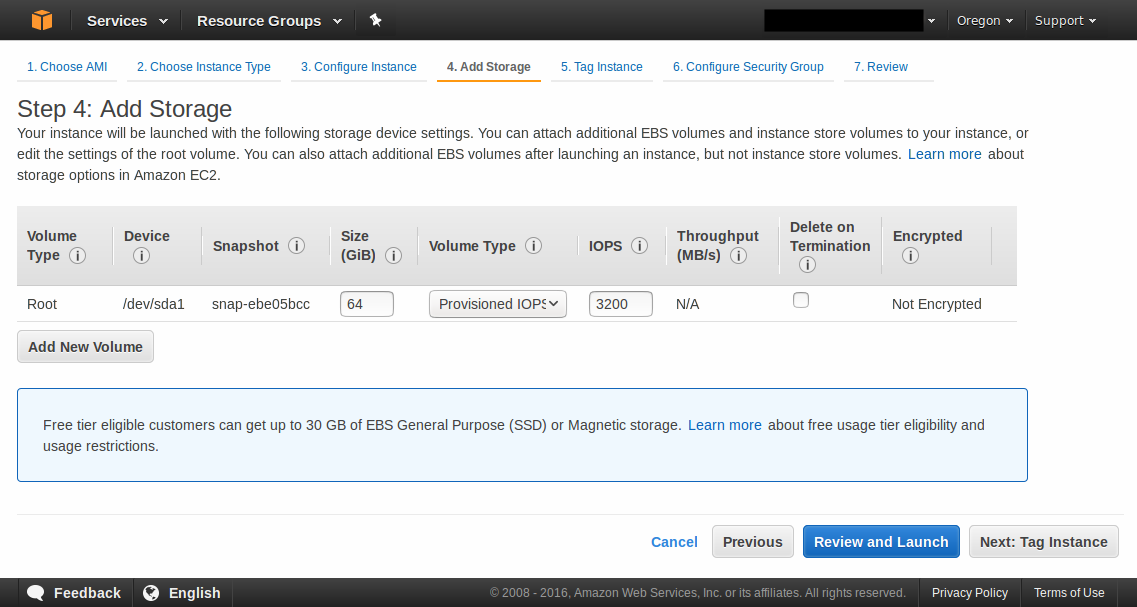
The Step 4: Add Storage page comes up.
Figure 7: Step 4: Add Storage
-
-
Add storage to your instance:
-
Set the size of your instance's store volume.
NOTE: It is important that you choose this value wisely as once you have launched the instance, you will not be able to go back and modify it. The minimum storage size is 8 GiB, while the maximum allowed value is 16 TB (16384 GB).
-
Set the volume type of your instance's store volume.
SSD provides better performance than a Magnetic hard drive, however, it is also more expensive.
The following recommendations apply:
-
If you choose a volume that is larger than 500 GB in size or your SSB is expected to handle volumes of traffic lower than 15,000 EPS, then select volume type General Purpose SSD (GP2). This volume type comes with an I/O credit balance, which will be used when your volume requires more I/O operations per second (IOPS) than the baseline performance I/O level. If you emtpy your credit balance, the maximum IOPS performance of the volume will remain at the baseline IOPS performance level, which may result in slower-than-required performance.
-
If your SSB is required to handle traffic exceeding 15,000 EPS or you choose a volume that is smaller than 500 GB in size, then select volume type Provisioned IOPS SSD (IO1). This volume type does not use a credit model, it allows you instead to specify a consistent IOPS rate.
TIP: Selecting the Delete on Termination checkbox will automatically delete your store volume on terminating the instance. This is useful as this will free up storage place, and you will not have to pay for a store volume you are not using anymore. However, note that deleting the store volume will also delete your logs.
-
-
Click Next: Tag Instance.
The Step 5: Tag Instance page comes up.
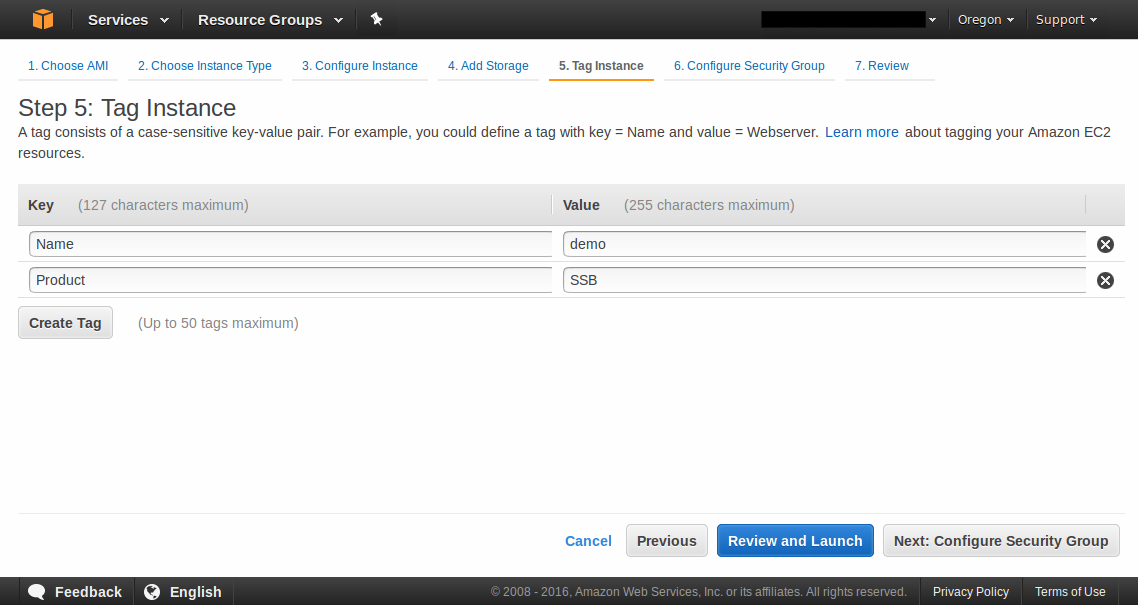
Figure 8: Step 5: Tag Instance
-
-
Create a tag for your instance:
-
Add a meaningful key-value pair that will help you later on to easily identify your instance.
-
ClickNext: Configure Security Group.
The Step 6: Configure Security Group page comes up.
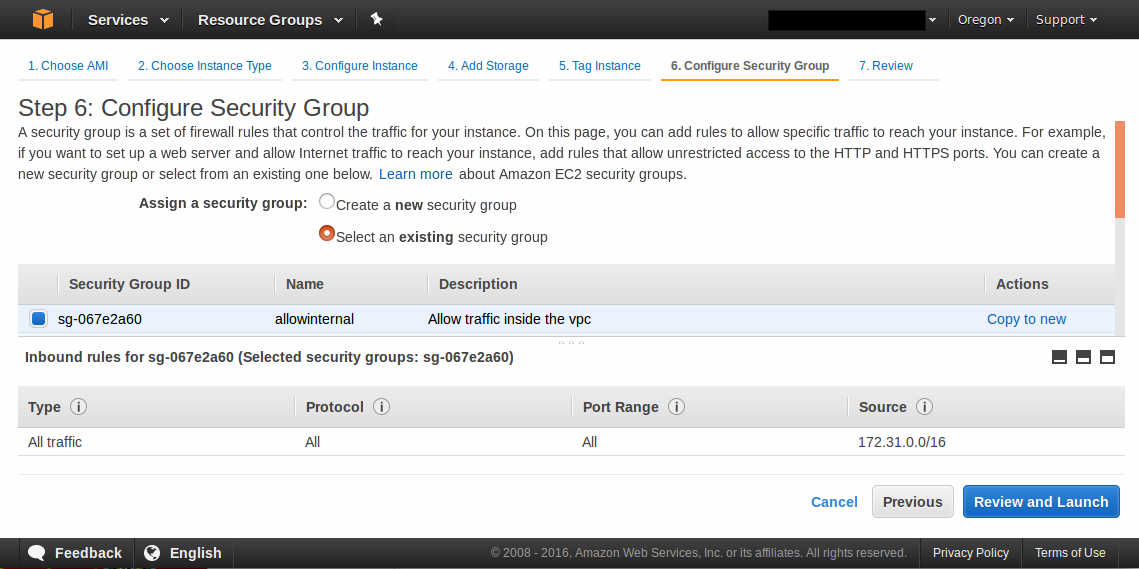
Figure 9: Step 6: Configure Security Group
-
-
Configure security group:
-
Set a new or an existing security group to control how SSB is accessed.
Exposing SSB to the public Internet during installation is not supported at all, therefore you must use a VPN or jump host to reach your instance and configure it. As for exposing the logging interface to the Internet after installation, contact Support to discuss your needs and how those could be met.
To achieve the above: restrict your security group to those users and log clients that access SSB from a secure network, and not over the public Internet. For example, if you are using a jump host, then you need a security group that will allow only your dedicated VPC to connect to your SSB. If there is a VPN to your home network or some other secure network, that can be allowed as well.
-
Click Review and Launch.
The Step 7: Review Instance Launch page comes up.
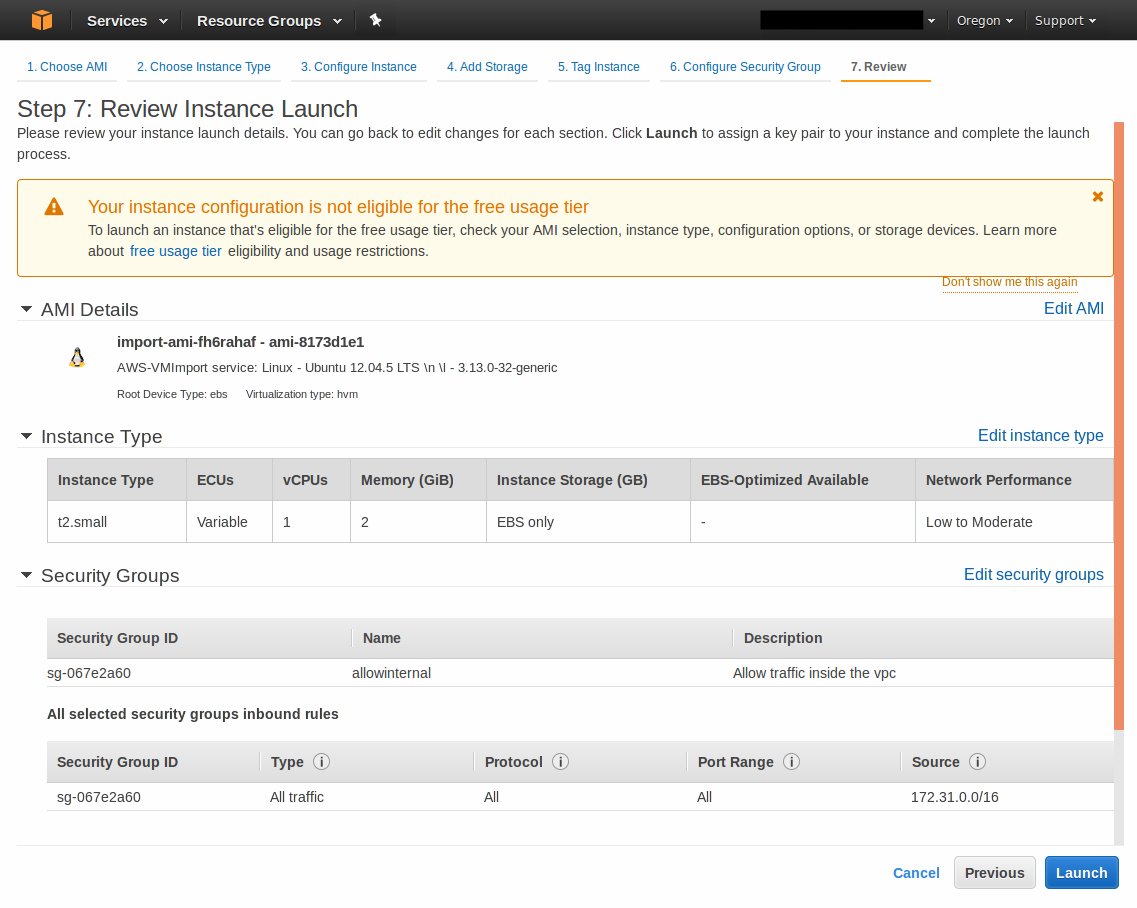
Figure 10: Step 7: Review Instance Launch
-
-
Before launching your instance, double-check whether all details have been set as intended:
-
Ensure that:
-
Under Instance Type, you have at least 2 GiB of memory assigned.
-
Under Instance Details, the Assign Public IP option is set to Disable or Use subnet setting (Disable).
-
-
Make any changes if required.
-
Once you are happy with all settings, click Launch.
The Select an existing key pair or create a new key pair pop-up window comes up.
Figure 11: Step 7: Review Instance Launch — Key pair pop-up window
-
-
On the Select an existing key pair or create a new key pair pop-up window:
-
Select the Proceed without a key pair option.
-
Tick the checkbox that says "I acknowledge that I will not be able to connect to this instance unless I already know the password built into this AMI".
-
Click Launch Instances.
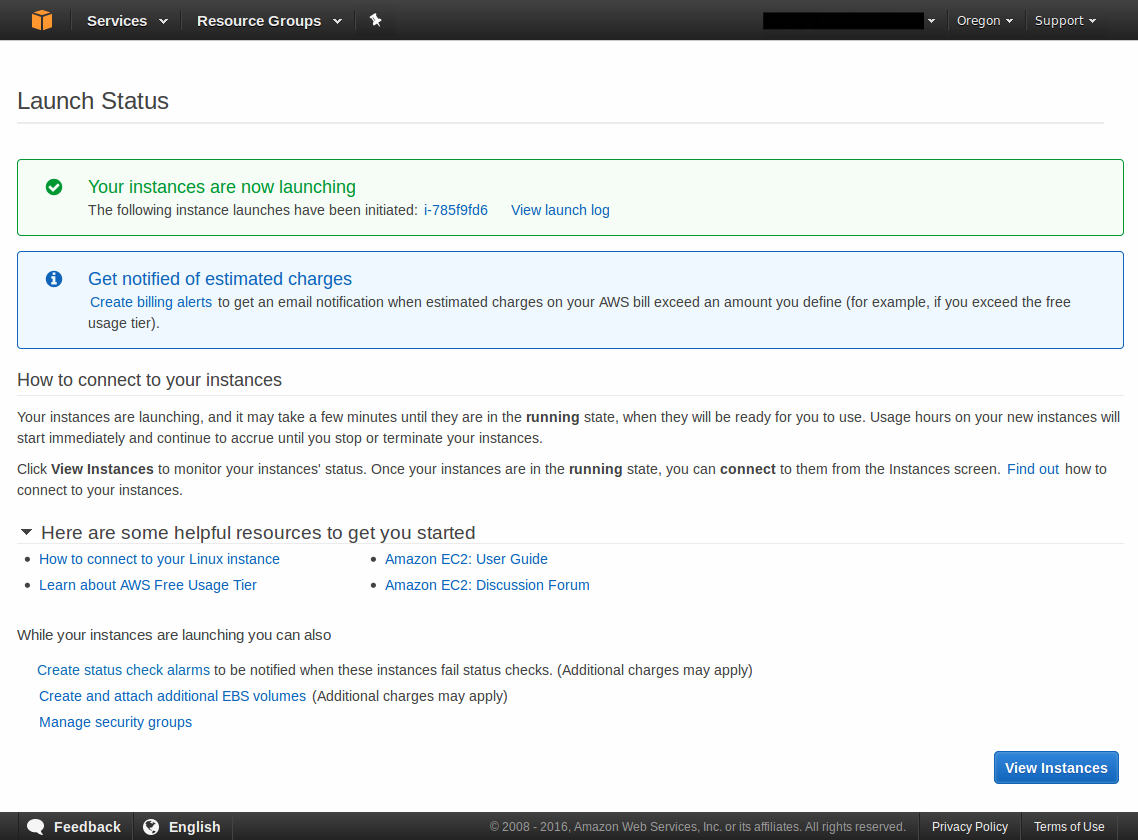
The Launch Status page comes up informing you that your instance is launching.
Figure 12: Launch Status page
-
-
To view your instance's status, click View Instances.
The Instances page comes up, which should now display the instance you have just launched. Depending on the size of the instance, installation may take up to 1-5 minutes.
To access your SSB instance and start configuring it using the welcome wizard, you will need your instance's IP address and the netmask of your chosen subnet, both of which you can obtain from the AWS user interface.
-
SSB expects that the IP address provided will not change, therefore, before retrieving the IP address, perform the following check:
-
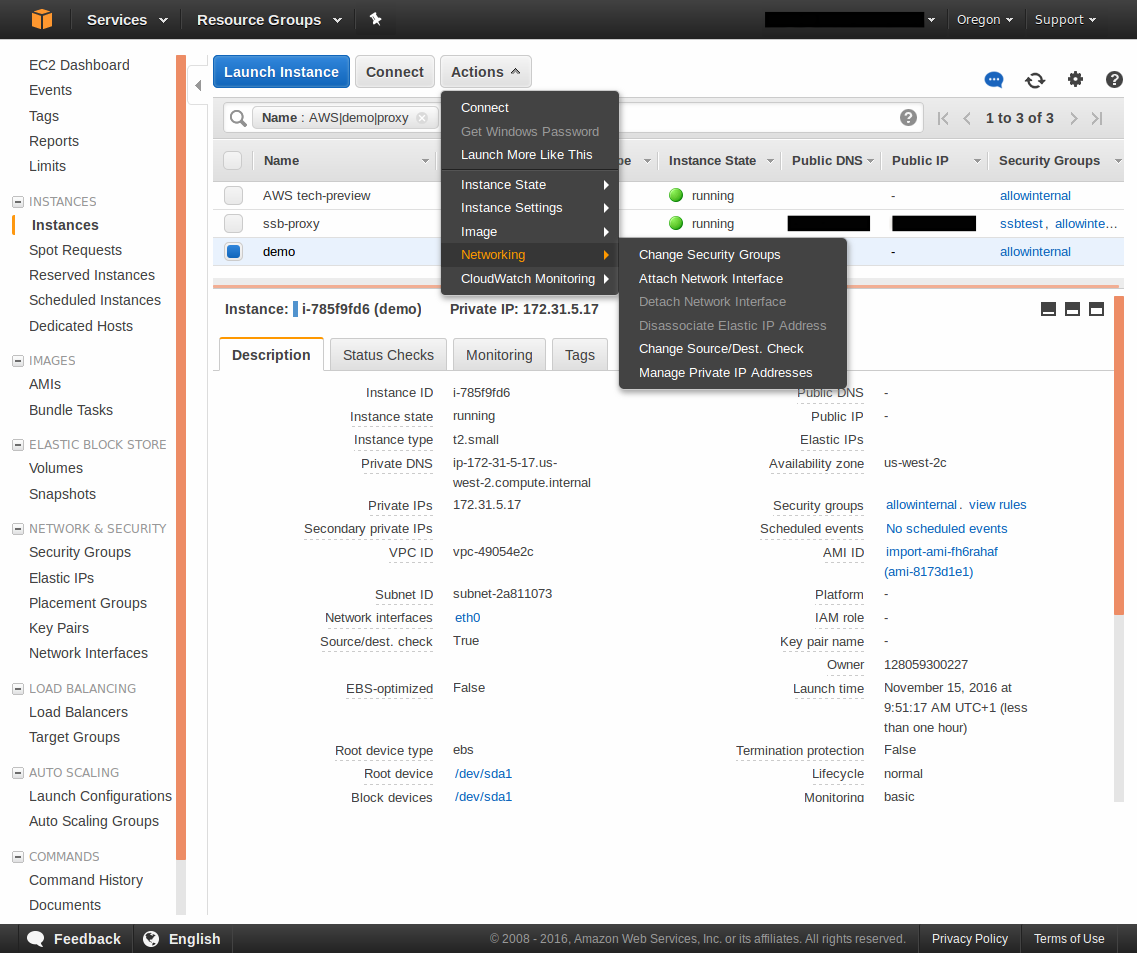
Click the instance you have just added, and select Actions > Networking > Manage Private IP Addresses from the menu at the top.
Figure 13: Instances page — Actions menu
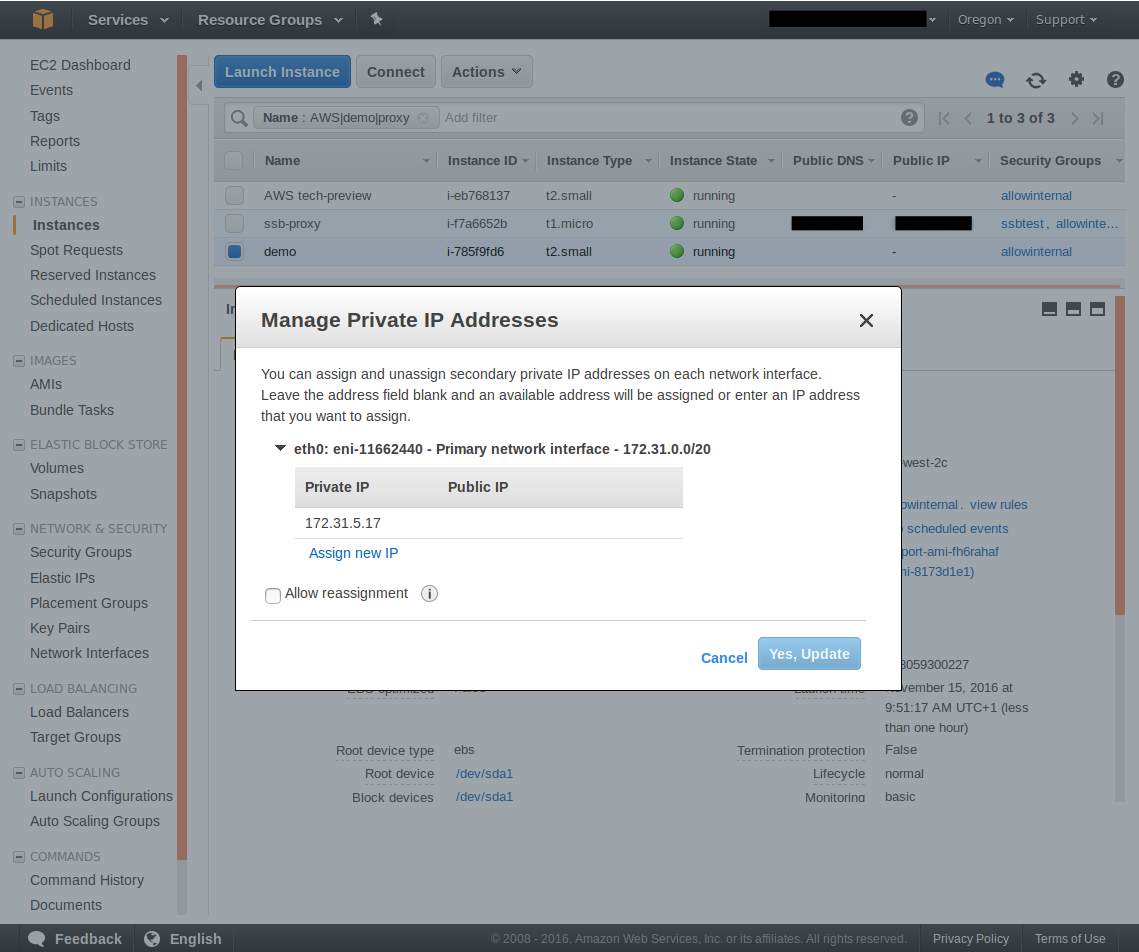
The Manage Private IP Addresses pop-up window comes up.
Figure 14: Instances page — Manage Private IP Addresses pop-up window
-
To ensure that the IP address stays the same, make sure that the Allow reassignment option is unchecked.
Note down the netmask of the subnet you selected (/20 in the example provided) because you will need this piece of information later on, when configuring SSB via the welcome wizard.
-
-
To obtain and use the IP address of the instance:
-
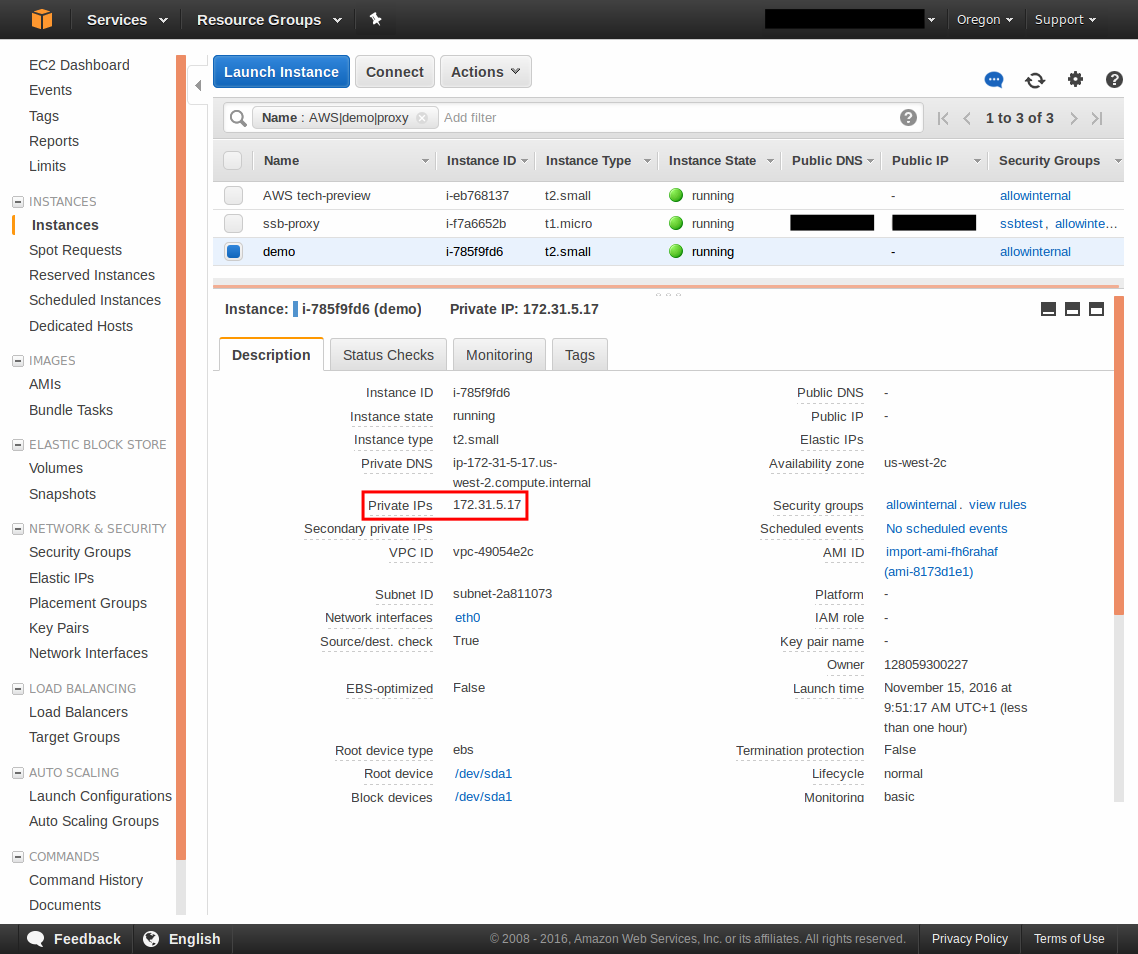
Click the instance on the Instances page.
This will display the description of the instance, including its private IP address.
Figure 15: Instances page — instance description
-
Select the value in the Private IPs field and copy it.
-
Paste this value in the Networking > External interface > IP address field of the SSB welcome wizard.
For detailed information on the SSB welcome wizard, see "The Welcome Wizard and the first login" in the Administration Guide.
-
-
To obtain and use the subnet's netmask:
-
Retrieve the netmask information you noted down earlier in Step 12b.
-
AWS provides the netmask value in CIDR format (for example, /24), while SSB expects this value in the octet format (for example, 255.255.255.0).
Convert the value from the CIDR to the octet format.
-
Enter the result in the Networking > External interface > Netmask field of the SSB welcome wizard.
For detailed information on the SSB welcome wizard, see "The Welcome Wizard and the first login" in the Administration Guide.
-