To configure the Remote Desktop applications of the clients to perform two separate authentications. One of these authentications is on the Remote Desktop Gateway, that is, on One Identity Safeguard for Privileged Sessions (SPS). The other authentication is on the target server. For details on configuring SPS to act as a Remote Desktop Gateway (or RD Gateway), see Using One Identity Safeguard for Privileged Sessions (SPS) as a Remote Desktop Gateway.
Prerequisites
-
SPS must be configured to act as a Remote Desktop Gateway. For details, see Using One Identity Safeguard for Privileged Sessions (SPS) as a Remote Desktop Gateway.
-
The client must use version 6.1 or newer of the Remote Desktop application.
-
The target server must be member of a domain.
-
The logical interface of SPS must be accessible from the client. You might have to add the address of the logical interface to the Windows/System32/Drivers/etc/hosts file to accomplish this.
To configure Remote Desktop clients for gateway authentication
-
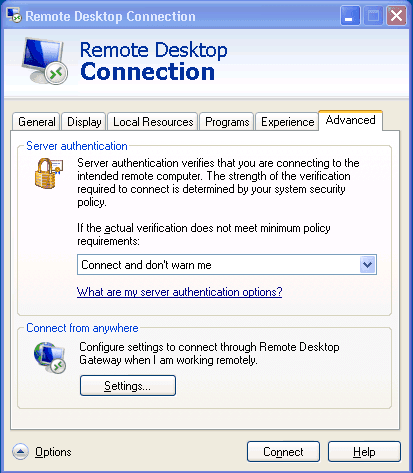
On your Windows client, start the Remote Desktop Connection application and select Advanced > Settings.
Figure 20: Configuring Remote Desktop clients to use SPS as a Remote Desktop Gateway (or RD Gateway)
-
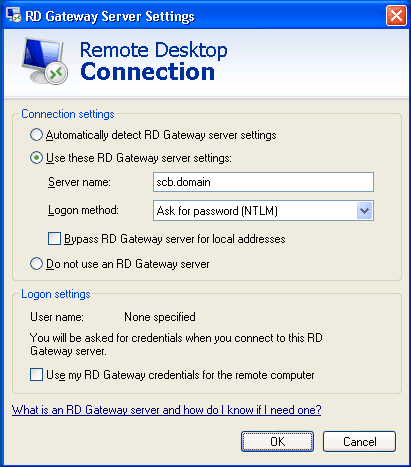
Configure the client to use SPS as its Remote Desktop Gateway. Select Connection settings > Use these RD Gateway settings.
Figure 21: Configuring Remote Desktop clients to use SPS as a Remote Desktop Gateway (or RD Gateway)
-
Enter the address of SPS into the Server name field. Use the address of the SPS's logical interface that you have configured to accept RDP connections.
-
Select Logon method > Ask for password (NTLM).
-
Uncheck the Bypass RD Gateway server for local addresses and Use my RD Gateway credentials for the remote computer options.
NOTE: Technically, gateway authentication is performed even if the Use my RD Gateway credentials for the remote computer option is selected, but the same credentials are used on the gateway and on the remote server.
-
Click OK.
-
Into the Username enter the domain username (for example, exampledomain\exampleusername).
-
Click Connect.
NOTE: Depending on your network environment, it might take up to a minute until the connection is established.