Chat now with support
Chat with Support

One Identity Safeguard for Privileged Sessions 6.0.3 - Administration Guide

Preface Introduction The concepts of One Identity Safeguard for Privileged Sessions (SPS) The Welcome Wizard and the first login Basic settings
Supported web browsers and operating systems The structure of the web interface Network settings Configuring date and time System logging, SNMP and e-mail alerts Configuring system monitoring on SPS Data and configuration backups Archiving and cleanup Forwarding data to third-party systems Joining to One Identity Starling
User management and access control Managing One Identity Safeguard for Privileged Sessions (SPS)
Controlling One Identity Safeguard for Privileged Sessions (SPS): reboot, shutdown Managing Safeguard for Privileged Sessions (SPS) clusters Managing a high availability One Identity Safeguard for Privileged Sessions (SPS) cluster Upgrading One Identity Safeguard for Privileged Sessions (SPS) Managing the One Identity Safeguard for Privileged Sessions (SPS) license Accessing the One Identity Safeguard for Privileged Sessions (SPS) console Sealed mode Out-of-band management of One Identity Safeguard for Privileged Sessions (SPS) Managing the certificates used on One Identity Safeguard for Privileged Sessions (SPS)
General connection settings HTTP-specific settings ICA-specific settings RDP-specific settings SSH-specific settings Telnet-specific settings VMware Horizon View connections VNC-specific settings Indexing audit trails Using the Search interface Searching session data on a central node in a cluster Advanced authentication and authorization techniques Reports The One Identity Safeguard for Privileged Sessions (SPS) RPC API The One Identity Safeguard for Privileged Sessions (SPS) REST API One Identity Safeguard for Privileged Sessions (SPS) scenarios Troubleshooting One Identity Safeguard for Privileged Sessions (SPS) Using SPS with SPP Configuring external devices Using SCP with agent-forwarding Security checklist for configuring One Identity Safeguard for Privileged Sessions (SPS) Jumplists for in-product help LDAP user and group resolution in SPS Appendix: Deprecated features Glossary

Signing certificates on-the-fly

At a number of places, One Identity Safeguard for Privileged Sessions (SPS) can generate the server certificates on the fly. This technique is used for example in SSL-encrypted RDP sessions, RDP sessions that use Network Level Authentication (CredSSP), or SSH connections that use X.509-based authentication.

NOTE:

Note the following points about using signing CAs:

  • Signing CAs require a CA certificate permitted to sign certificates, and also the corresponding private key.

  • These CAs cannot be used to sign audit trails. For details on how to configure the certificates used to sign audit trails, see Digitally signing audit trails.

  • The version of the generated certificates will be the same as the version of the signing CA.

  • SPS ignores the CRL (from the crlDistributionPoints extension) of the signing CA when generating certificates. If you want to include a CRL in the generated certificates, you must set it manually. See the following steps for details.

To create a signing CA

  1. Navigate to Policies > Signing CAs and click .

  2. Select:
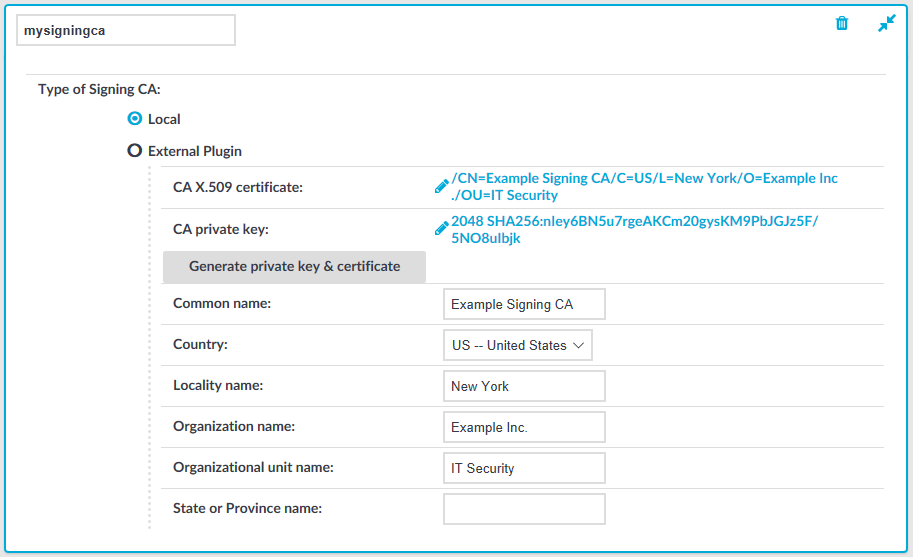
    • Local to use the built-in signing CA solution, and complete the following steps:
      1. Enter a name for the CA into the topmost field.

        Figure 158: Policies > Signing CAs — Creating Signing CAs - Local

      2. To upload a CA certificate and its private key, complete the following steps. Skip this step if you want to generate a CA on SPS.

        1. Click Edit in the CA X.509 certificate field and upload the certificate of the certificate authority. Alternatively, you can upload a certificate chain, where one member of the chain is the CA that will sign the certificates.

        2. Click Edit in the CA private key field and upload the private key of the certificate authority that will sign the certificates.

        3. (Optional) Enter the URL of the Certificate Revocation List (CRL) that you generated using your Certificate Authority in your Public Key Infrastructure (PKI) solution. The URL pointing to this CRL will be included in the certificate. This is the CRL information that will be shown to clients connecting to SPS.

          Note that the CRL list is not generated by the internal CA of SPS. The list must come from your own PKI solution.

        4. Click Commit.

      3. To generate a CA certificate on SPS, complete the following steps:

        1. Enter the Common Name for the CA certificate into the Common Name field. This name will be visible in the Issued By field of the certificates signed by this CA.

        2. Fill the other fields as required, then click Generate private key and certificate.

        3. Click Commit.

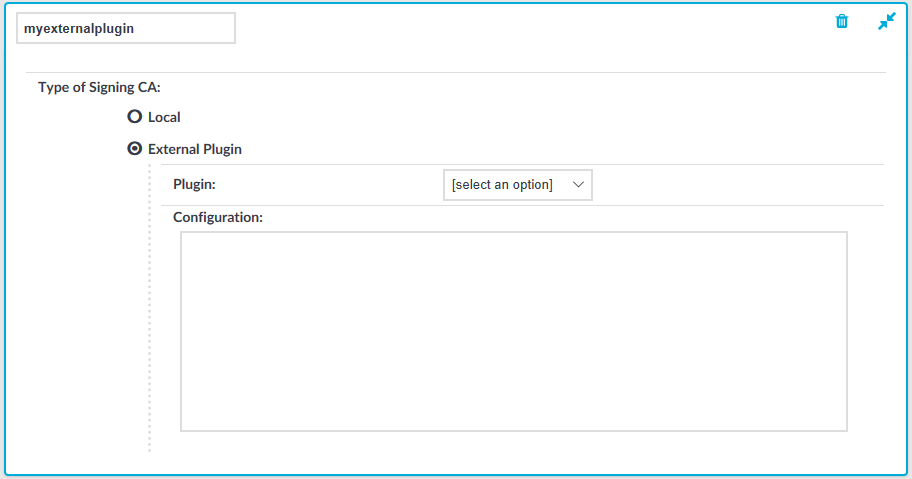
    • External Plugin to use an external signing CA plugin, and complete the following steps:
      1. Enter a name for the CA into the topmost field.

        Figure 159: Policies > Signing CAs — Creating Signing CAs - External Plugin

      2. From the Plugin field, select an uploaded external plugin using the drop-down menu.

        To be able to select from the drop-down menu, you must have an external plugin uploaded in Basic Settings > Plugins > Signing CAs.

        For more information about how to create an external Signing CA plugin, see Creating an external Signing CA.

      3. Optionally, fill the Configuration field as required by the uploaded plugin.

        The input you enter in the Configuration field is passed down to the plugin.

Related Documents

The document was helpful.

Select Rating

I easily found the information I needed.

Select Rating