Logging in to One Identity Safeguard for Privileged Sessions (SPS) and configuring the first connection
Purpose
After finishing the initial configuration of One Identity Safeguard for Privileged Sessions (SPS) using the Welcome Wizard, connections must be configured between the clients and the servers. SPS inspects only the connections that are configured from the web interface, all other connections are forwarded without any inspection.
Steps
To enable a simple SSH terminal or a Remote Desktop session over a transparent and a non-transparent connection
-
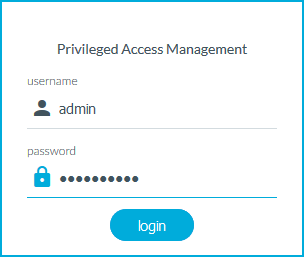
Login to SPS's web interface.
Figure 26: The first login
-
Open the https://IP-address-of-interface-1/ page from your browser to access the web interface of SPS. Replace the IP-address-of-the-interface-1 string with the IP set for interface 1 in the Networking settings section of the Welcome Wizard (see Configuring interface 1) (for example, 192.168.1.1).
-
The certificate created in the Certificate section of the Welcome Wizard (see Creating the web interface certificate) is displayed. Accept it.
-
Log in to the SPS web interface using the displayed login screen.
-
Enter admin into the Login field.
-
Enter the password set in the Users section of the Welcome Wizard (see Setting the administrator password) for the admin user into the Password field.
-
Click Login. The main page of the SPS administration interface is displayed.
-
-
-
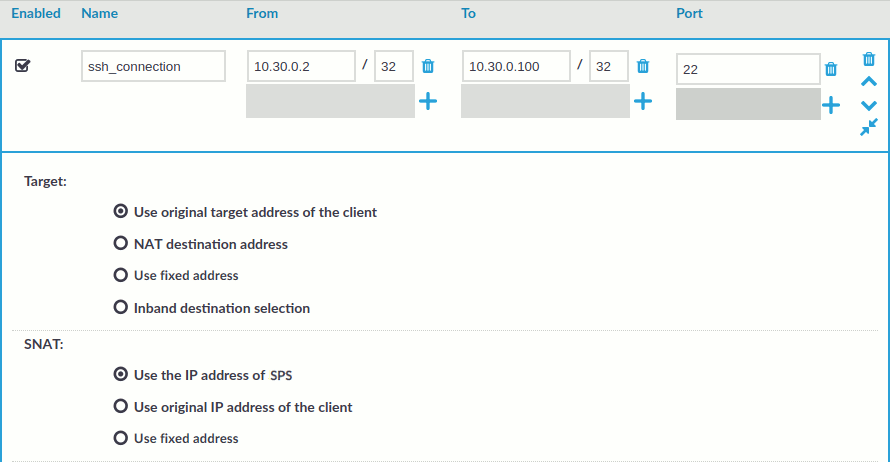
Configure a new transparent connection.
-
-
To configure an SSH connection, select SSH Control > Connections from the Main Menu. Only terminal sessions will be permitted.
-
To configure an RDP connection, click on the RDP Control > Connections from the Main Menu. Only basic Remote Desktop sessions will be permitted (no file-sharing).
-
-
Click the
icon on the right to create a new connection.
-
Enter a name into the Name field that will identify the connection (for example, admin-server-transparent).
TIP: One Identity recommends that you use descriptive names that give information about the connection (that is, they refer to the name of the accessible server, the allowed users, and so on).
-
Enter the IP addresses defining the connection:
Figure 27: <Protocol name> Control > Connections — Configuring an SSH connection in transparent mode
-
Enter the IP address of the client that will be permitted to access the server into the From field.
You can use an IPv4 or an IPv6 address. To limit the IP range to the specified address, set the prefix to 32 (IPv4) or 128 (IPv6).
-
Enter the IP address of the server into the To field.
You can use an IPv4 or an IPv6 address. To limit the IP range to the specified address, set the prefix to 32 (IPv4) or 128 (IPv6).
-
Enter the port number where the server is accepting connections into the Port field.
-
-
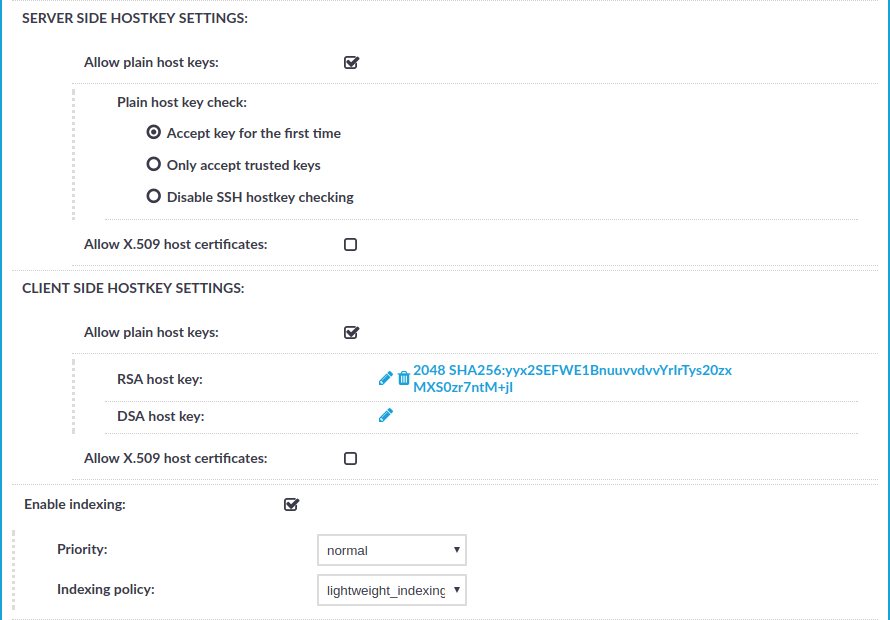
Select Enable indexing.
-
Click
.
This connection allows any user from the client machine to connect to the specified server, but permits only terminal sessions — other SSH channels like TCP forwarding are disabled.
-
-
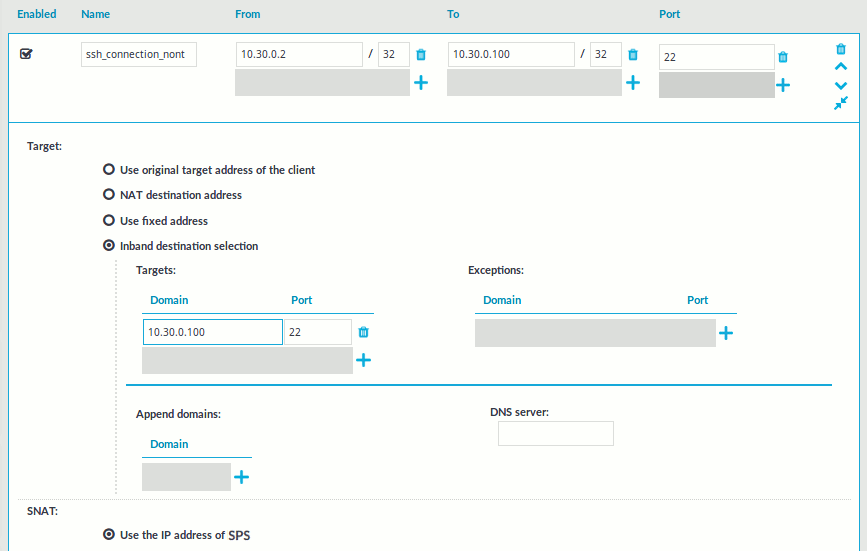
Configure a new non-transparent connection.
-
-
To configure an SSH connection, select SSH Control > Connections from the Main Menu. Only terminal sessions will be permitted.
-
To configure an RDP connection, click on the RDP Control > Connections from the Main Menu. Only basic Remote Desktop sessions will be permitted (that is, no clipboard or file-sharing).
-
-
Click the
-
Enter a name into the Name field that will identify the connection (for example, admin-server-nontransparent).
TIP: One Identity recommends that you use descriptive names that give information about the connection (that is, they refer to the name of the accessible server, the allowed users, and so on).
-
Enter the IP addresses defining the connection:
Figure 28: <Protocol name> Control > Connections — Configuring an SSH connection in non-transparent mode
-
Enter the IP address of the client that will be permitted to access the server into the From field.
You can use an IPv4 or an IPv6 address. To limit the IP range to the specified address, set the prefix to 32 (IPv4) or 128 (IPv6).
-
Enter the IP address of SPS's physical interface 1 into the To field.
You can use an IPv4 or an IPv6 address. To limit the IP range to the specified address, set the prefix to 32 (IPv4) or 128 (IPv6).
-
Enter a port number into the Port field.
-
Enter the IP address of the server into the Use fixed address field of the Target section.
You can use an IPv4 or an IPv6 address.
-
Enter the port number where the server is accepting connections into the Port field of the Target section.
-
-
Select Enable indexing.
-
Click
This connection allows any user from the client machine to connect to the specified server, but permits only terminal sessions — other SSH channels like TCP forwarding are disabled.
-
-
Test the new configuration: try to initiate an SSH or and RDP connection from the client to the server.
-
For the transparent connection, use the IP address of the server (as configured in Configuring a connection in transparent mode).
-
For the non-transparent connection, use the IP address and port of SPS (as configured in Configuring a connection in non-transparent mode).
-
-
After successfully connecting to the server, do something in the connection, for example, execute a simple command in SSH (for example, ls /tmp), or launch an application in RDP (for example, the Windows Explorer), then disconnect from the server.
-
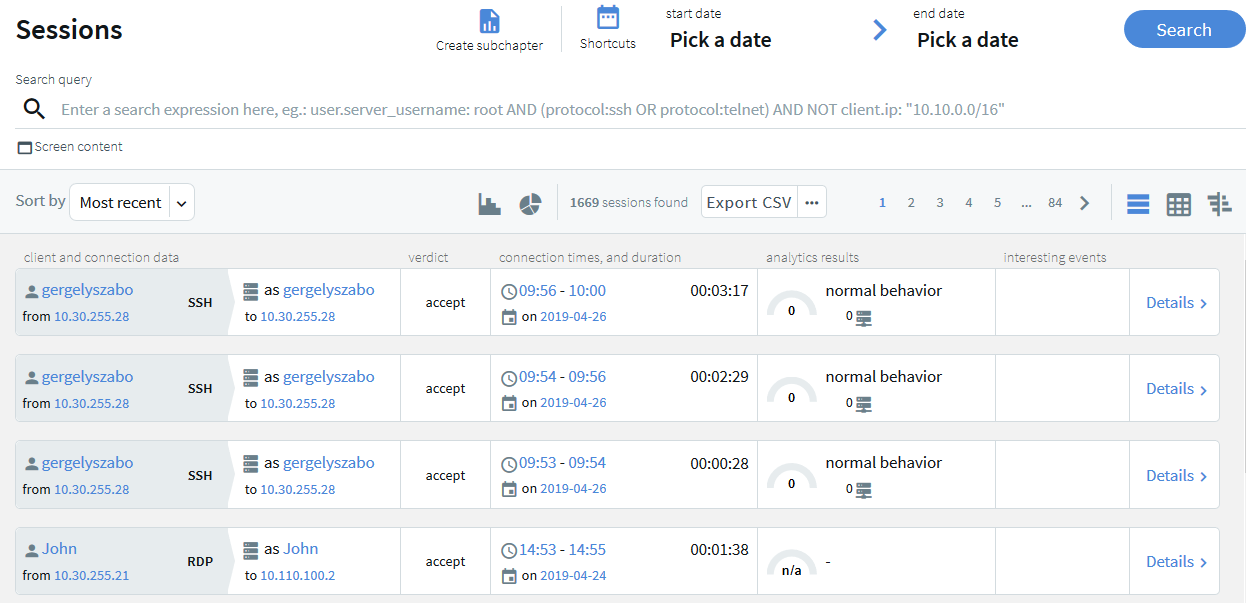
To access the Search interface, navigate to Search.
Figure 29: The Search interface
-
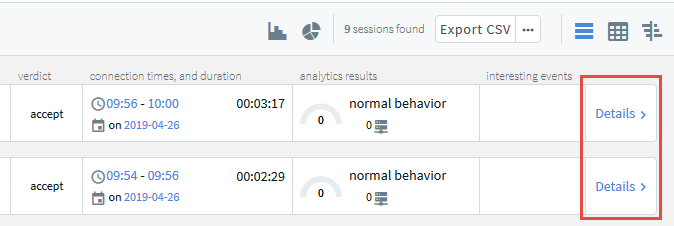
Find the session you want to replay on the Search page.
For more information about search criteria and other search-related options, see Using the Search interface.
Figure 30: Search — Accessing session details
For more information about the session info window and its contents, see Viewing session details.
-
Click
to display the details of the connection.
Alternatively, in the table view, click
.
-
Click
to generate a video file from the audit trail you want to replay. Depending on the load of the indexer and the length and type of the audit trail, this can take several minutes.
When the video is available,
and
. You can use the
- (Optional) If you have encrypted audit trails but the necessary certificates and private keys are not uploaded into your private keystore, you have to upload the keys first. After uploading them, click
. The
-
To replay the video, click
The Player window opens.
-
Play the audit trail, and review your actions.
For more information about audit trails, see sections Encrypting audit trails, Replaying audit trails in your browserand Replaying encrypted audit trails in your browser.