Collecting logs and system information for error reporting
To track down support requests, the One Identity Support Team might request you to collect system-state and debugging information. This information is collected automatically, and contains log files, the configuration file of One Identity Safeguard for Privileged Sessions (SPS), and various system-statistics.
|
|
NOTE:
Sensitive data like key files and passwords are automatically removed from the files, that is, configuration files do not contain passwords or keys. However, if you increase the proxy verbosity level to 8-10 in the Global Options, then for troubleshooting purposes, the logs can contain highly sensitive data, for example, passwords and keys in plain text format. If you are concerned about the presence of sensitive data, check the collected log files before submitting to the Support Portal. The Basic Settings > Management > Verbose system logs > Enable option is not related to the verbosity of log messages: it adds the commands executed by the SPS web interface to the log. |

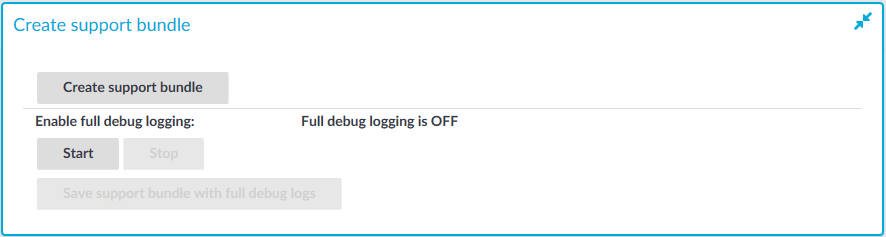
To collect system-state information (also known as a support bundle), navigate to Basic Settings > Troubleshooting > Create support bundle and click Create support bundle, then save the created zip file. The name of the file uses the debug_info-<hostname>YYYYMMDDHHMM format.
To collect information for a specific error
-
Navigate to Basic Settings > Troubleshooting > Create support bundle.
Figure 286: Basic Settings > Troubleshooting > Create support bundle — Collecting debug information
-
Click Start.
NOTE: Starting a full debug logging increases the log level of SPS, and might cause performance problems if the system is under a high load.
For troubleshooting purposes, the logs can contain highly sensitive data, for example, passwords and keys in plain text format. If you are concerned about the presence of sensitive data, check the collected log files before submitting to the Support Portal.
-
Reproduce the event that causes the error, for example connect to a server.
-
Click Stop.
-
Click Save support bundle with full debug logs and save the created zip file. The name of the file uses the debug_info-<hostname>YYYYMMDDHHMM format.
SPS includes the configuration files of any plugins installed. Note that depending on the plugin, these configuration files can contain sensitive information, such as passwords or API keys. In this case, edit the plugin-related files in the plugins directory of the support bundle and delete the sensitive information.
-
Attach the file to your support ticket.