Create a share on the target system
- Ensure the permissions are set to allow the account access
The Share must have correct permissions on the Share and also the correct Security permissions at the file system level. For testing, it is be easiest to configure both for 'Everyone' with 'Full Control' permissions. Once this has been verified working, the permisions can be reduced to what is required and re-tested.
 Enable File Transfer in TPAM
1. From the PSM account | PSM Details | General tab.
- Select "Enable PSM Sessions", and select a RDP proxy connection
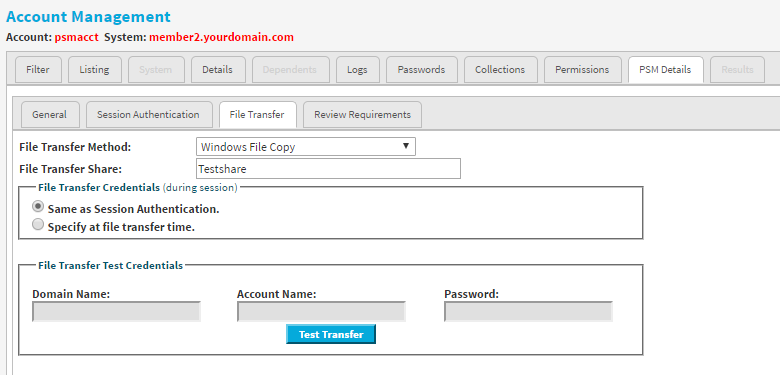
2. From the PSM account | PSM Details | File Transfer tab
- Set the "File Transfer Method" to "Windows File Copy"
- Set the "File Transfer Share" name to the share created. It must be the name of the Windows file share, entered without any leading slashes. In this example Testshare.

Select "Test Transfer", this will attempt a Test Transfer to the target system from the TPAM Console appliance using TCP/445:

NOTE: Test Transfer only tests connectivity from TPAM to the system, if the PSM Affinity is set to a DPA, the DPA will need access to TCP/445 on the target.
3. From the PSM account | PSM Details | General tab.
- Select "Enable File Uploads?" and "Enable File Downloads?":
Using File Transfer
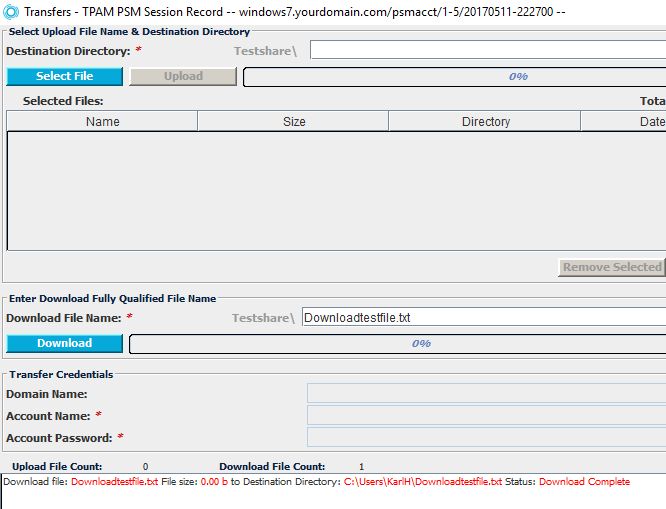
Once within the TPAM PSM session, select the "Controls Menu" from the bottom of applet| File Transfer | Open Dialog:

To download files, enter the complete name of the file you wish to download, select the "Download" button.
To upload "Select File", select a file (or directory) and then click "Upload".


