-
Title
HOW TO: Use Exchange Online with Modern Auth in a Mail Configuration -
Description
In addition to using SMTP or EWS (Exchange Web Services) in mail configurations for sending emails (KB 4257184), Active Roles is able to use Exchange Online with Modern Authentication.
-
Resolution
There are 4 steps to set up a Mail Configuration to use Exchange Online
- Step 1 – Create a certificate
- Step 2 – Create an Azure Application Registration
- Step 3 – Import Certificate into Active Roles Service Account My Store
- Step 4 – Configure Active Roles Mail Configuration
1. Self Signed certificate
a. Open PowerShell ISE
b. Add the following script
$PrivateKey = "<Your Private Key>"$certname = "<Your Certificate Name>"$OutputPath = "<Your output path>\"$cert = New-SelfSignedCertificate -Subject "CN=$certname" -CertStoreLocation "Cert:\CurrentUser\My" -KeyExportPolicy Exportable -KeySpec Signature -KeyLength 2048 -KeyAlgorithm RSA -HashAlgorithm SHA256Export-Certificate -Cert $cert -FilePath "$($OutputPath)$($certname).cer" | Out-null$SecPrivateKey = ConvertTo-SecureString -String "$($PrivateKey)" -Force -AsPlainTextExport-PfxCertificate -Cert $cert -FilePath "$($OutputPath)$($certname).pfx" -Password $SecPrivateKey | Out-null
c. Modify the variables $PrivateKey, $certname and $OutputPath to your required values
d. Execute the script
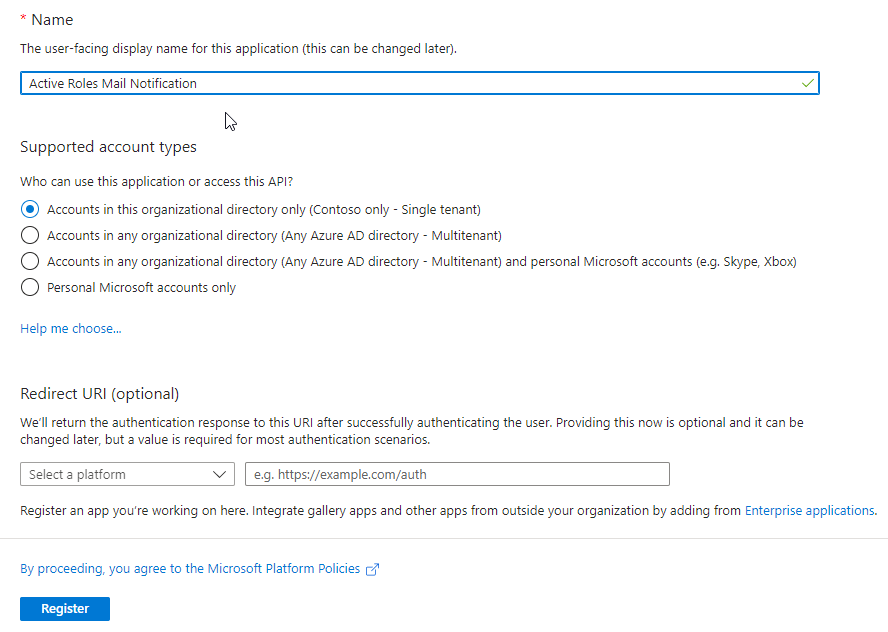
Step 2 – Create an Azure Application RegistrationStep 3 – Import Certificate into Active Roles Service Account My Store1. Log into the Azure Portal (https://portal.azure.com)2. Go to Azure Active Directory3. Select App Registrations4. Click New Registration 5. Enter a name for your custom application, then click Register
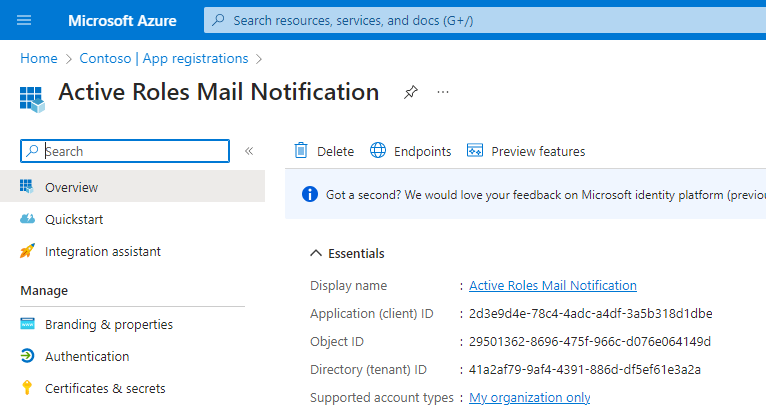
 6. From the Overview of the App, note down the Application (client) ID and the Directory (tenant) ID for later use
7. From the Overview click on the link next to Client credentials
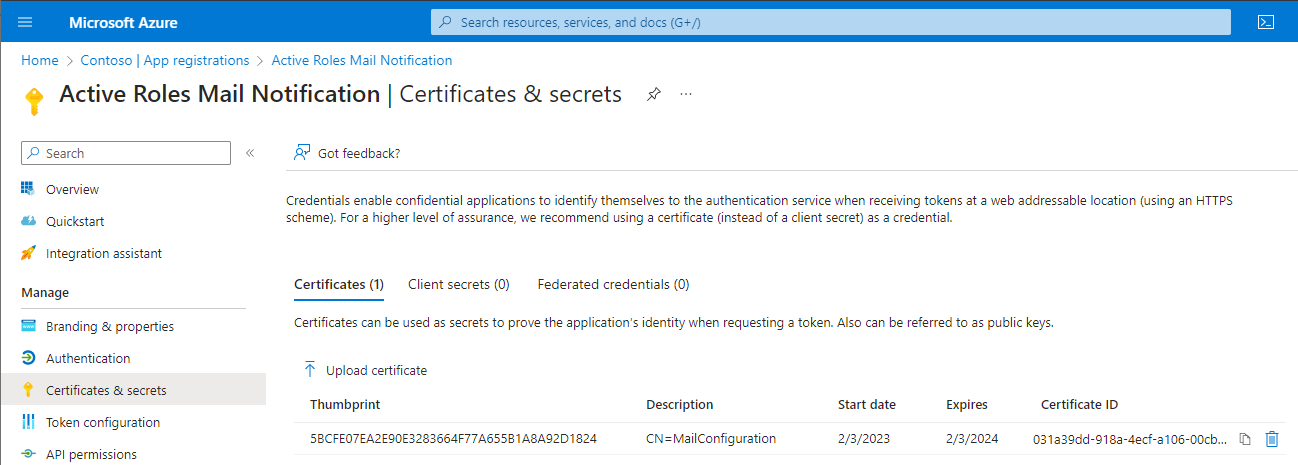
8. Click on Certificates 9. Click Upload certificate
10. Supply the Certificate file (cer) [as created in Step 1 above] and a Description in the provided fields, then click Add
 11. Once the certificate is uploaded, note down the value of the Thumbprint for later use
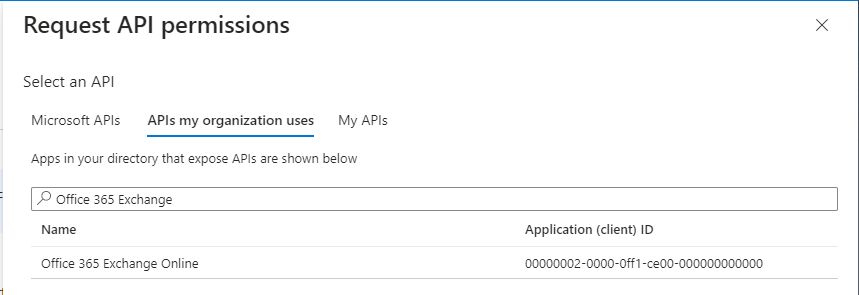
 12. Navigate to API Permissions13. Click Add a permission14. Click APIs my organization uses15. Within the Start typing an API name or Application ID field type Office 365 Exchange Online, then click the entry
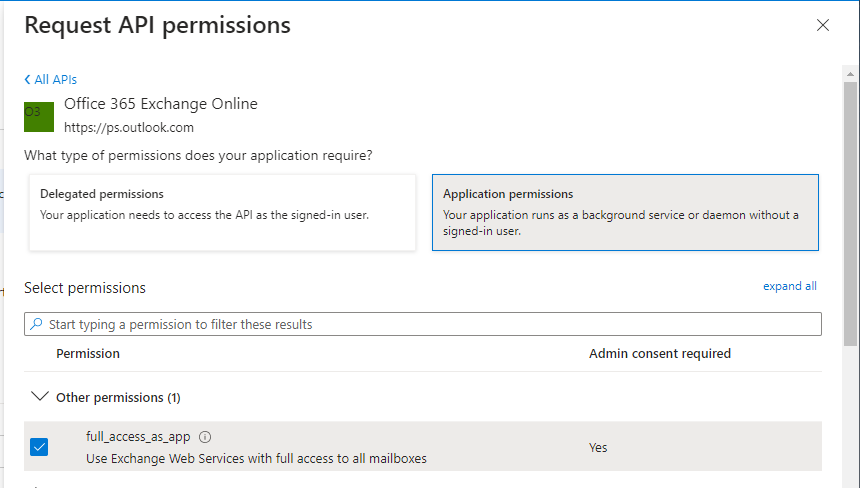
 16. Click Application permissions17. Select full_access_as_app from the Other permissions section and click Add permissions
 18. Click the Grant admin consent button
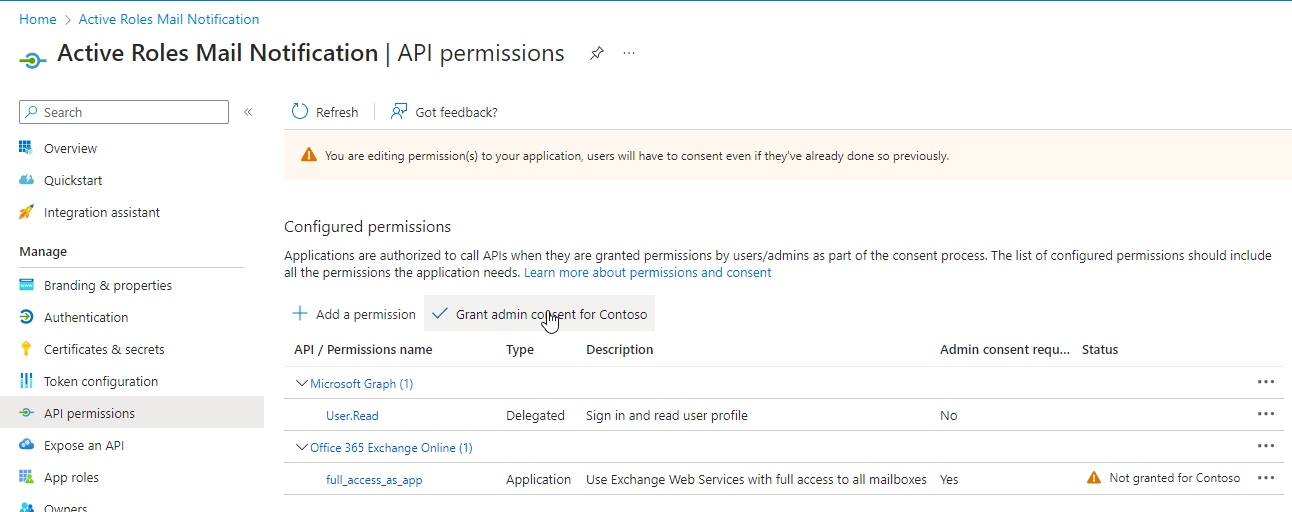 19. Click Yes on the Grant Admin consent confirmation message20. Verify the status now shows as granted
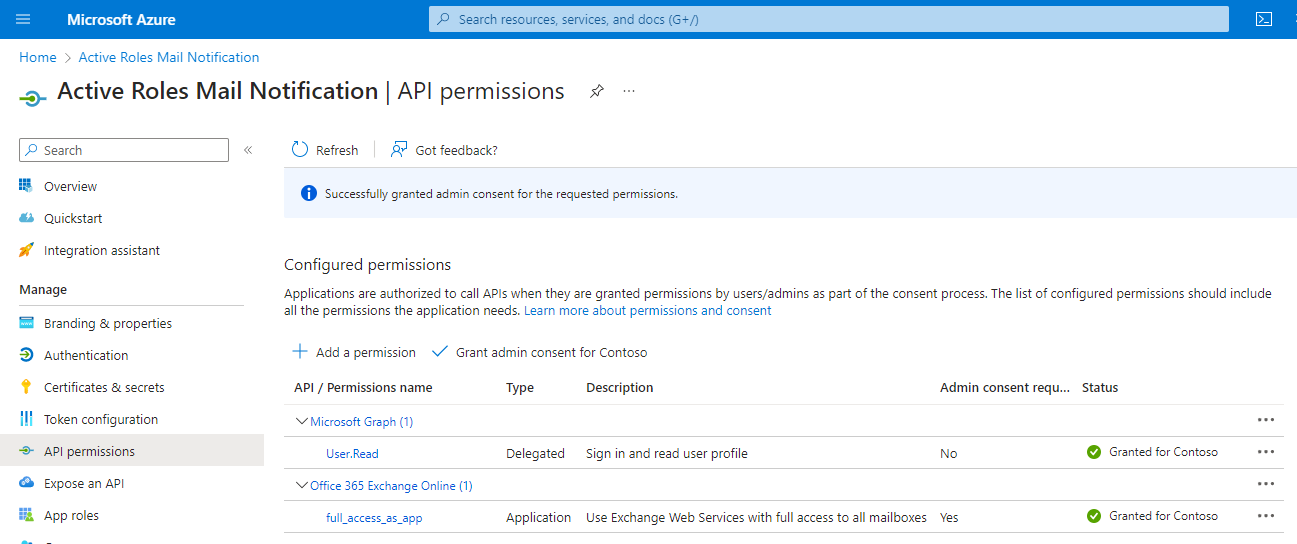 21. Verify the status now shows as granted
1. For each server where the Active Roles Administration server is installed
a. Log in as the Active Roles Service Account
b. Copy the Certificate file (pfx) [as created in Step 1 above] to the server
c. Double-click on the Certificate
d. Select Current User and click Next
e. Click Next
f. Enter the Private Key [as defined in Step 1] in the Password field, then click Next
g. Select Automatically select the certificate store based on the type of certificate and click Next
h. Review the Completing the Certificate Import Wizard page, then click Finish
2. Repeat for each Administration Service server
If the service account doesn't allow interactive logon or is a gMSA account type, please refer to solution 2 on the following KB4370208 or contact Microsoft for further assistance.
Step 4 – Configure Active Roles Mail Configuration1. Open the Active Roles console2. Navigate to Configuration | Server Configuration | Mail Configuration
3. Open the properties of Default Mail Settings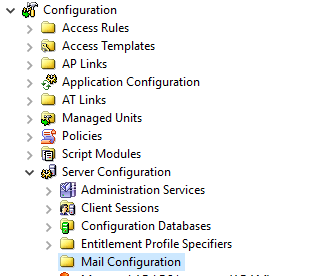
 4. In the properties form, change the value of Settings for the drop-down from SMTP Server to Exchange Web Service
5. Set the Exchange Web Services Address to https://outlook.office365.com/EWS/Exchange.asmx
6. Change the Authentication Type from Basic to Modern
7. Enter the values for the Tenant ID and Client ID as previously noted down in step 5
8. Enter the value for the Certificate thumbprint as previously noted down in step 7
9. Enter the email address of a mailbox that Active Roles will impersonate
10. Click Apply
11. Click Verify Settings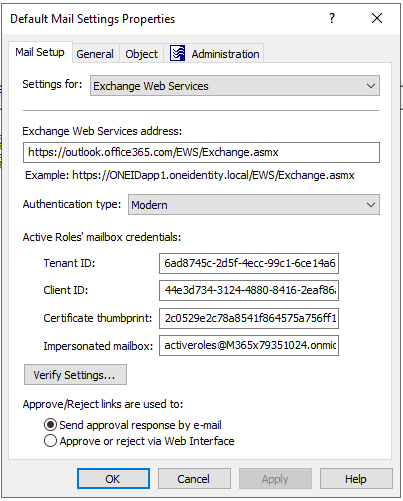
12. Enter your own email address, then click Ok
13. Once the email has been sent by Active Roles, a verified successful message will be shown.If any errors are returned instead of the success message, review the error messages and resolve them. The likely issue may be down to steps 8 to 10 not being completed
