
-
Título
How to: Migrate Active Roles On-Premise Database to Azure SQL Databases -
Descripción
The following Azure SQL Databases variants are supported in Active Roles.
- Azure SQL Database;
- Azure SQL on Elastic pool;
- Azure SQL Managed instance;
-
Resolución
Once the Azure SQL database was previously created and the permissions have been properly configured as per the One Identity Active Roles Administration Guide the following steps should be followed.
Note: Due to a product design (ER 443208), before moving the databases to Azure, take a screenshot of the Web Interface Sites configuration. Be sure to capture the Alias and Configuration Name.
This is necessary because the database migration process will rename the existing entries, and will need this information to revert them afterward.
1 - Open Active Roles Configuration Center and navigate to Administration Service;
2 - Under the Active Roles databases, click Change button;
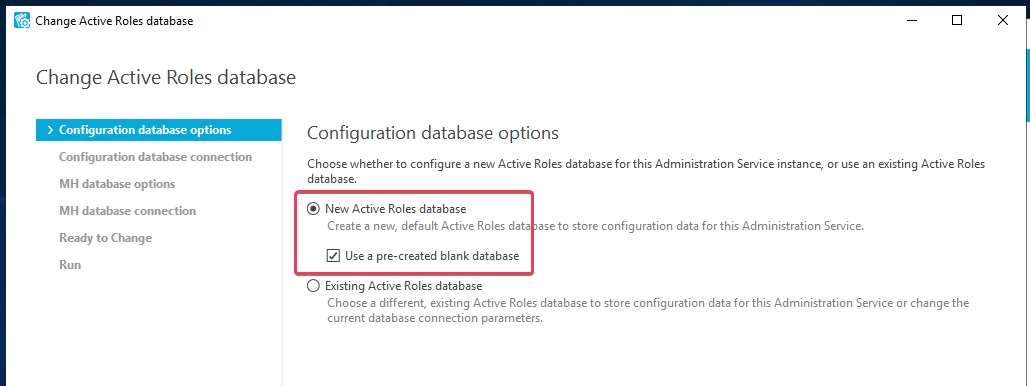
3 - On the Configuration Database option, select New Active Roles database and check the box Use a pre-created blank database and click Next;
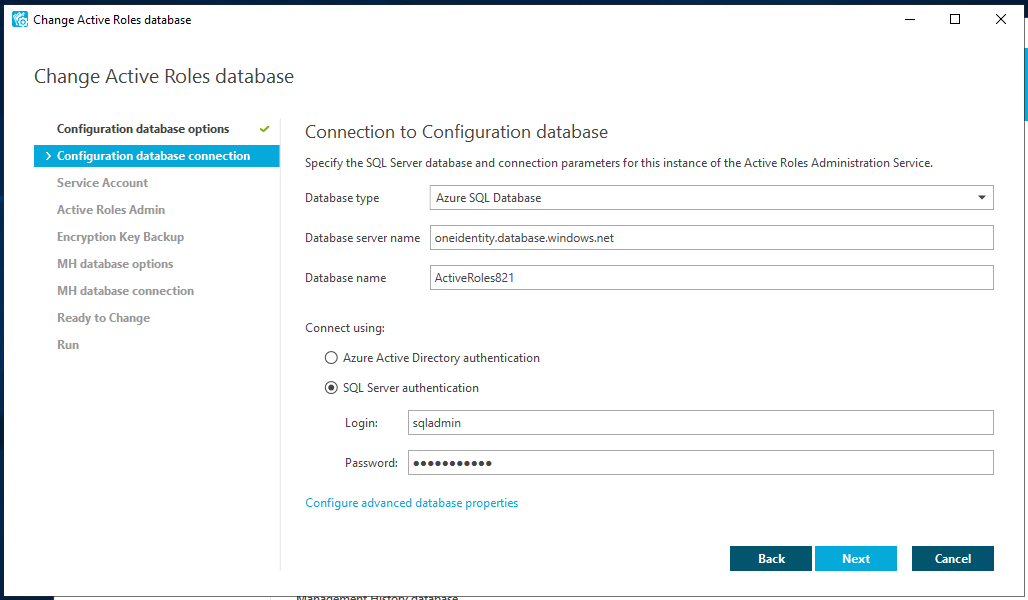
4 - On the Database type select Azure SQL Database from the Connection to Configuration database, enter the correct details for the, Database server name, Database name and credentials used for connecting to Azure SQL;
5 - On the Service Account, configure the service account to be used within Active Roles Administration Service;
6 - On the Active Roles Admin select the Active Roles Administrator group;
7 - On the Encryption Key Backup save the encryption key file as it could be used in the future;
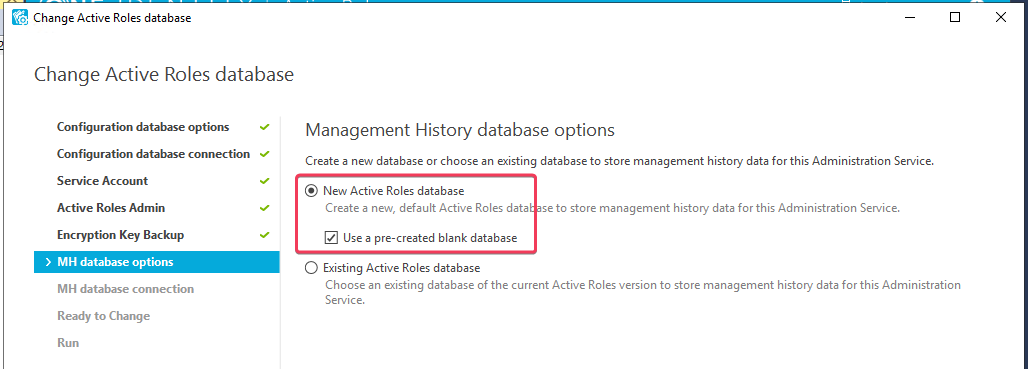
8 - For the Management History database options, select the same options on step 3;
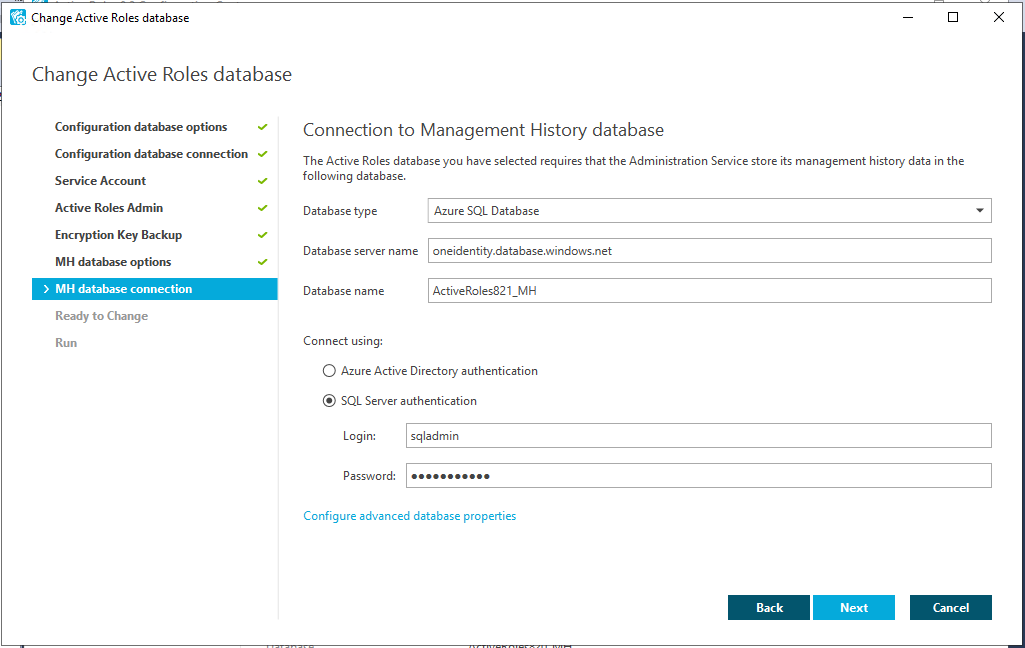
9 - On the Database type select Azure SQL Database from the Connection to Management History database, enter the correct details for the, Database server name, Database name and credentials used for connecting to Azure SQL;
10 - Review the details and click Change and follow the progress, it should not take so long for the configuration to be completed, after that close Active Roles Configuration Center;
11 - Open Configuration Center | Administration Service and start importing by clicking on the button Import Configuration Database;
12 - On the Source database, enter the details where Active Roles was configured;
13 - On the Destination Database use the credentials previously configured and with permission on the Azure SQL Database;
14 - For the Destination database enter the credentials set previously for the Azure SQL Database;
15 - Click next on the Add-on advisor;
16 - Under the Service Association, selec the option to Run Service association immediately if there is only one Active Roles instance running, if multiple servers are running in the environment and if there is a dedicated server to run the services, select the option to Schedule Service association to be executed later on after the last server is migrated;
17 - Should the following error appear, it can be ignored;

18 - Repeat the same steps from 12 - 17 for the Management History DB;
Note: Depending on the size of the databases, it may take some time until the Configuration and Management History Databases' data is copied over to the databases in Azure.