Configuring a new Azure tenant and consenting Active Roles as an Azure application
When installing Active Roles out-of-the-box, the Directory Management > Tree > Azure node of the Active Roles Web Interface only contains an empty Azure Configuration sub-node by default.
To manage Azure Active Directory (Azure AD) objects, you must specify an Azure tenant and configure Active Roles as a consented Azure application for it in the Active Roles Configuration Center.
NOTE: If you have already used an Azure tenant (or tenants) in a previous version of Active Roles, you can import and reconfigure them in two ways:
-
If you perform an in-place upgrade of Active Roles (that is, you install the latest version without uninstalling the previous version of Active Roles first in one of the supported upgrade paths), you can reauthenticate the existing Azure tenants with the Upgrade configuration wizard upon launching the Active Roles Configuration Center after installation.
For more information on reauthenticating Azure tenants this way, see Reconfiguring Azure tenants during upgrade configuration in the Active Roles 8.2 Upgrade Guide. For more information on the supported upgrade paths, see Upgrade and installation instructions in the Active Roles 8.2 Release Notes.
-
If you install a new version of Active Roles to a machine that does not have any earlier versions of the software installed (either because it has been already uninstalled, or it has been installed on another machine), you can import your existing Azure tenant(s) by importing your Azure AD configuration. Following the import, you can reconsent your Azure tenants manually.
For more information on importing existing Azure tenants this way, see Importing an Azure tenant and consenting Active Roles as an Azure application.
Prerequisites
-
The computer where Active Roles Configuration Center is running must already have all Azure-specific prerequisite software installed. If any of the prerequisite software required for Azure AD management are missing, install them with the following steps:
-
Navigate to Dashboard > Azure AD Configuration.
-
Click Install Azure-specific Prereqs.
-
In the table that appears, install any components whose Status is not Installed.
-
To apply your changes, click Apply.
After all prerequisite software are installed, the Install Azure-specific Prereqs link will disappear, and the Azure AD Configuration option will appear.
-
The Active Roles Administration Service must be already running. If Configuration Center indicates that the service is not running, then:
-
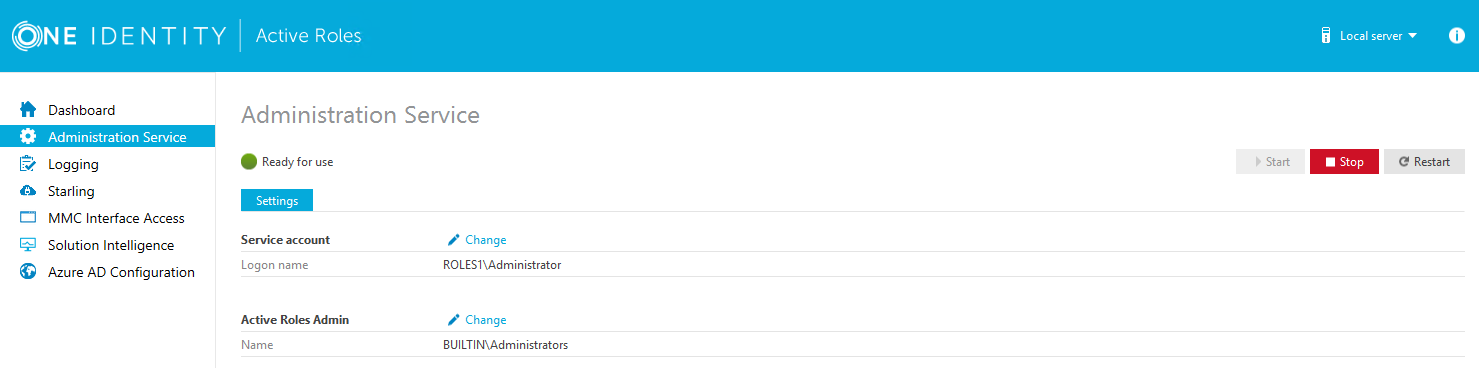
In the Active Roles Configuration Center, navigate to the Administration Service page.
-
Click Start.
To configure a new Azure tenant (or tenants) and set Active Roles as a consented Azure application
-
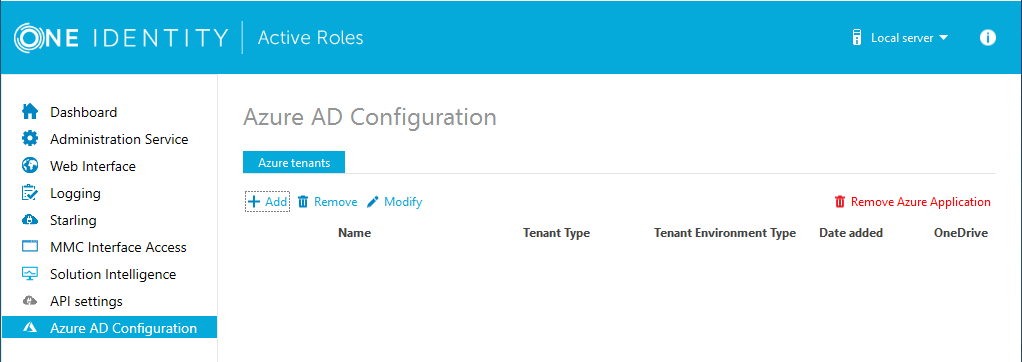
In the Active Roles Configuration Center, on the left pane, click Azure AD Configuration.
-
To start configuring a new Azure tenant, click Add.
-
From the Tenant Type drop-down, select the type of domain assigned to the new Azure tenant:
-
Non-Federated Domain: When selected, on-premises domains are not registered in Azure AD , and Azure AD Connect is not configured. Azure users and Azure guest users are typically created with the onmicrosoft.com UPN suffix.
-
Federated Domain: On-premises domains are registered in Azure AD and Azure AD Connect. Also, Active Directory Federation Services (ADFS) is configured. Azure users and Azure guest users are typically created with the UPN suffix of the selected on-premises domain.
-
Synchronized Identity Domain: On-premises domains may or may not be registered in Azure AD. Azure AD Connect is configured. Azure users and Azure guest users can be created either with the selected on-premises domain, or with the onmicrosoft.com UPN suffix.
-
From the Tenant Environment Type drop-down, select the type of environment you want to configure your Azure tenant in:
For the differences between Azure Cloud and Azure US Government tenants, see Compare Azure Government and global Azure in the Microsoft Azure documentation.
-
Click Next.
-
Authenticate your Azure AD administrator account.
-
If you already used one or more Azure AD administrator accounts on your PC, select your account from the Pick an account list, then provide the account password. If you do not find your account in the list, specify your account by clicking Use another account.
-
If you have not used any Azure AD administrator accounts yet on the PC (for example, because you are configuring a fresh Active Roles installation), specify your account user name in the Sign in field, then provide your password.
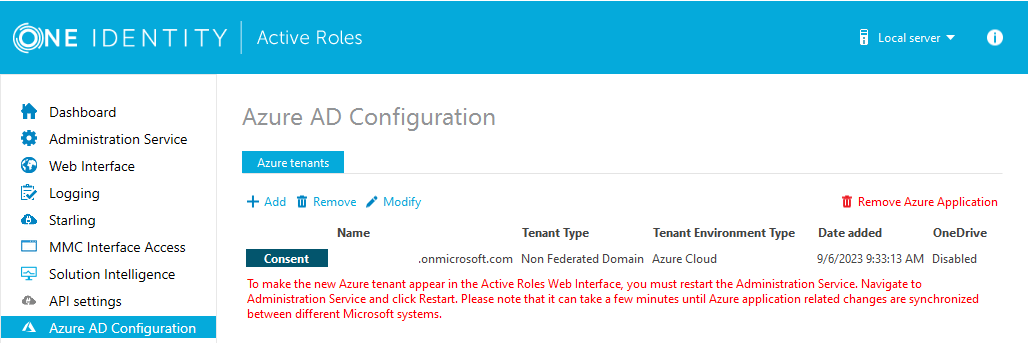
Upon successful authentication, the new Azure tenant appears in the list.
-
To manage the Azure tenant and its contents in the Active Roles Web Interface, you must consent Active Roles as an Azure application. To do so, click Consent next to the Azure tenant.
-
Authenticate your Azure AD administration account again. Depending on the type of Microsoft pop-up that appears (Pick an account or Sign in), either select the Azure AD account you used for adding the Azure tenant, or specify its user name and password again.
NOTE: Make sure to specify the account used for adding the Azure tenant (that is, the account name listed under the Name column of the Azure tenant). Authenticating with another account will result in an error.
-
The standard Microsoft Permissions requested pop-up appears, listing all the permissions required for configuring Active Roles as an Azure application. To finish creating the Azure application, click Accept.
Active Roles then authenticates every Azure AD administrative operation performed in the Azure tenant with a set of generated client ID and client secret.
NOTE: Once you click Accept, Windows may show a Security Warning pop-up with the following message:
The current webpage is trying to open a site on your intranet. Do you want to allow this?
In such cases, clicking either Yes or No could freeze the pop-up dialog, but consenting the Azure tenant will finish without problem.
This issue can occur in case the computer running Active Roles has incorrect browser settings. As a workaround, to get an up-to-date status of the state of the Azure tenant, close and restart the Active Roles Configuration Center after clicking Yes in the Security Warning pop-up.
-
If you have additional Azure tenants to add and consent, configure them as described in the previous steps of this procedure.
-
To make the configured Azure tenant(s) appear in the Active Roles Web Interface, you must restart the Administration Service. To restart the Administration Service, open the Configuration Center, click Administration Service on the left pane, then either click Restart, or first click Stop and then Start.
TIP: After the Azure tenant or tenants are configured, and Active Roles is also set as a consented Azure AD application for it, you can view and modify the configured tenant(s) and their settings at the following locations:
-
To change the domain type or OneDrive provisioning settings of an Azure tenant, in the Active Roles Configuration Center, navigate to Azure AD Configuration, select the Azure tenant, and click Modify. For more information, see Viewing or modifying the Azure tenant type in the Active Roles Administration Guide.
-
To check the connectivity status of the Azure configuration, in the Active Roles Web Interface, navigate to Directory Management > Tree > Azure > Azure Configuration > Azure Health Check. For more information, see Viewing the Azure Health status for Azure tenants and applications in the Active Roles Administration Guide.
-
To check the Azure Licenses Report, in the Active Roles Web Interface, navigate to Directory Management > Tree > Azure > Azure Configuration > Azure Licenses Report. For more information, see Viewing the Azure Licenses Report of an Azure tenant in the Active Roles Administration Guide.
-
To check the Office 365 Roles Report, in the Active Roles Web Interface, navigate to Directory Management > Tree > Azure > Azure Configuration > Office 365 Roles Report. For more information, see Viewing the Office 365 Roles Report of an Azure tenant in the Active Roles Administration Guide.
NOTE: Consider the following when configuring an Azure tenant:
-
When Active Roles is registered as a consented Azure AD application, minimal permissions are assigned to it by default. To add additional permissions to the Azure application, sign in to the Azure Portal and add your required permissions there.
-
Azure Multi-Factor Authentication (MFA) is automatically enforced for Azure users and Azure guest users added to the configured Azure tenant. To disable Azure MFA for the Azure tenant, sign in to the Azure Portal and navigate to Tenant > Properties > Manage Security defaults and set Enable Security defaults to No.
Importing an Azure tenant and consenting Active Roles as an Azure application
If you have previously managed an Azure AD deployment, but you are not upgrading from a previous version of Active Roles via in-place upgrade (for example, because the previous version of Active Roles has been uninstalled before installing the new version), you can import, reauthenticate and consent existing Azure tenants via the Active Roles Configuration Center.
NOTE: Consider the following if you have not used any Azure tenants earlier, or if you installed the latest version of Active Roles via in-place upgrade:
-
If you have installed Active Roles out-of-the-box, and no Azure AD environment has been used previously in your organization, you must specify a new Azure tenant to manage Azure directory objects (such as Azure users, guest users, contacts, M365 groups or Azure security groups). For more information, see Configuring a new Azure tenant and consenting Active Roles as an Azure application.
-
If you perform an in-place upgrade of Active Roles (that is, you install the latest version without uninstalling the previous version of Active Roles first in one of the supported upgrade paths), you can reauthenticate the existing Azure tenants with the Upgrade configuration wizard upon launching the Active Roles Configuration Center after installation.
For more information on reauthenticating Azure tenants this way, see Reconfiguring Azure tenants during upgrade configuration in the Active Roles 8.2 Upgrade Guide. For more information on the supported upgrade paths, see Upgrade and installation instructions in the Active Roles 8.2 Release Notes.
To import and reauthenticate an Azure tenant and set Active Roles as a consented Azure application
-
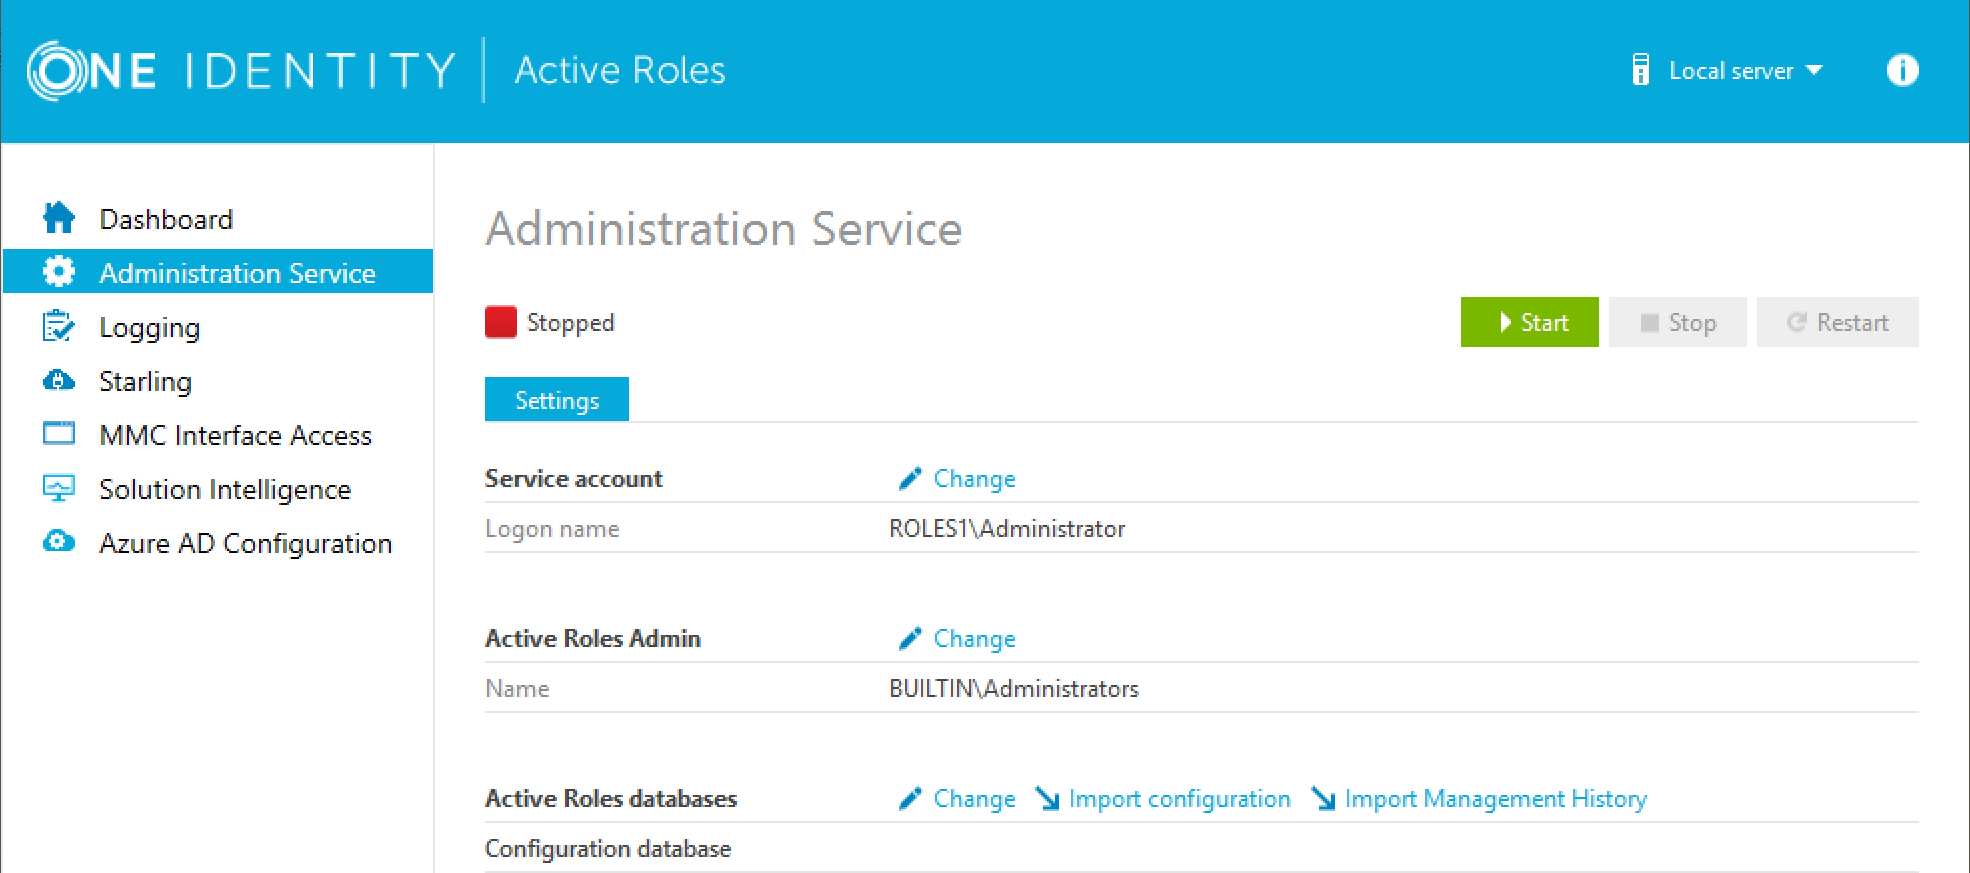
Stop the Active Roles Administration Service. To do so, in the Active Roles Configuration Center, navigate to Administration Service, then click Stop.
-
After the Active Roles Administration Service stopped, open the Import configuration wizard by clicking Active Roles databases > Import configuration.
-
Perform the steps of the wizard. For more information, see Importing configuration data in the Active Roles Upgrade Guide, or Deploying the Administration Service.
|

|
CAUTION: Importing a configuration will overwrite every Azure tenant currently listed in the Azure AD Configuration page with those included in the imported configuration. |
-
After the import procedure finished, start the Active Roles Administration Service by clicking Start in the Administration Service page.
-
In the Active Roles Configuration Center, on the left pane, click Azure AD Configuration.
The list of imported Azure tenants appears.
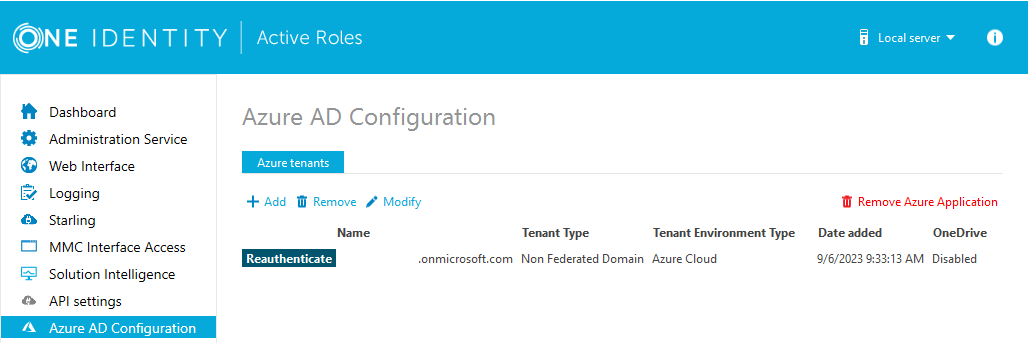
-
To configure an imported Azure tenant, click Reauthenticate.
-
Authenticate your Azure AD administrator account.
-
If you already used one or more Azure AD administrator accounts on your PC, select your account from the Pick an account list, then provide the account password. If you do not find your account in the list, specify your account by clicking Use another account.
-
If you have not used any Azure AD administrator accounts yet on the PC (for example, because you are configuring a fresh Active Roles installation), specify your account user name in the Sign in field, then provide your password.
-
To manage the Azure tenant and its contents in the Active Roles Web Interface, you must consent Active Roles as an Azure application. To do so, click Consent next to the Azure tenant.
-
Authenticate your Azure AD administration account again. Depending on the type of Microsoft pop-up that appears (Pick an account or Sign in), either select the Azure AD account you used for adding the Azure tenant, or specify its user name and password again.
NOTE: Make sure to specify the account used for adding the Azure tenant (that is, the account name listed under the Name column of the Azure tenant). Authenticating with another account will result in an error.
-
The standard Microsoft Permissions requested pop-up appears, listing all the permissions required for configuring Active Roles as an Azure application. To finish creating the Azure application, click Accept.
Active Roles then authenticates every Azure AD administrative operation performed in the Azure tenant with a set of generated client ID and client secret.
NOTE: Once you click Accept, Windows may show a Security Warning pop-up with the following message:
The current webpage is trying to open a site on your intranet. Do you want to allow this?
In such cases, clicking either Yes or No could freeze the pop-up dialog, but consenting the Azure tenant will finish without problem.
This issue can occur in case the computer running Active Roles has incorrect browser settings. As a workaround, to get an up-to-date status of the state of the Azure tenant, close and restart the Active Roles Configuration Center after clicking Yes in the Security Warning pop-up.
-
To make the configured Azure tenant(s) appear in the Active Roles Web Interface, you must restart the Administration Service. To restart the Administration Service, open the Configuration Center, click Administration Service on the left pane, then either click Restart, or first click Stop and then Start.
TIP: After the Azure tenant or tenants are configured, and Active Roles is also set as a consented Azure AD application for it, you can view and modify the configured tenant(s) and their settings at the following locations:
-
To change the domain type or OneDrive provisioning settings of an Azure tenant, in the Active Roles Configuration Center, navigate to Azure AD Configuration, select the Azure tenant, and click Modify. For more information, see Viewing or modifying the Azure tenant type in the Active Roles Administration Guide.
-
To check the connectivity status of the Azure configuration, in the Active Roles Web Interface, navigate to Directory Management > Tree > Azure > Azure Configuration > Azure Health Check. For more information, see Viewing the Azure Health status for Azure tenants and applications in the Active Roles Administration Guide.
-
To check the Azure Licenses Report, in the Active Roles Web Interface, navigate to Directory Management > Tree > Azure > Azure Configuration > Azure Licenses Report. For more information, see Viewing the Azure Licenses Report of an Azure tenant in the Active Roles Administration Guide.
-
To check the Office 365 Roles Report, in the Active Roles Web Interface, navigate to Directory Management > Tree > Azure > Azure Configuration > Office 365 Roles Report. For more information, see Viewing the Office 365 Roles Report of an Azure tenant in the Active Roles Administration Guide.
NOTE: Consider the following when configuring an Azure tenant:
-
When Active Roles is registered as a consented Azure AD application, minimal permissions are assigned to it by default. To add additional permissions to the Azure application, sign in to the Azure Portal and add your required permissions there.
-
Azure Multi-Factor Authentication (MFA) is automatically enforced for Azure users and Azure guest users added to the configured Azure tenant. To disable Azure MFA for the Azure tenant, sign in to the Azure Portal and navigate to Tenant > Properties > Manage Security defaults and set Enable Security defaults to No.
Configuring Active Roles to manage hybrid AD objects
You can use the Active Roles Configuration Center to perform Azure AD configuration tasks, such as adding, removing or modifying Azure tenants for managing their contents in Active Roles. Active Roles also supports the multi-tenant model.
NOTE: Administrative users or users with sufficient privileges only can view Azure configuration.
Configuring Active Roles to manage hybrid AD objects has the following main steps:
-
Configuring an Azure AD tenant.
-
Consenting Active Roles as an Azure AD application.
-
Providing the administrator consent for the Azure AD application.
-
Enforcing the Built-in Policy - Azure - Default Rules to Generate Properties Policy Object to the on-premises Active Directory containers, which are synchronized to Azure AD.
NOTE: After an upgrade, the edsvaAzureOffice365Enabled attribute will not be available for viewing or editing from Organizational Unit > Advanced Properties, or through the relevant Management Shell cmdlet. However, the Organizational Unit container will remain an Azure enabled container, as the Azure policy is already applied.
Active Roles availability on Azure and AWS Marketplace
Active Roles availability on Azure and AWS Marketplace
Active Roles supports deployment on the Amazon Web Services (AWS) and Azure platforms via Active Roles Marketplace images, using your organization subscription.
The marketplace images contain Active Roles running on Windows Server 2022 Datacenter Edition.
NOTE: Amazon Marketplace does not offer AWS EC2 instances preinstalled with Active Roles. You must deploy the EC2 instances first, then install and configure Active Roles manually on them.
