Deleting shopping centers
If you want to delete a shopping center, delete all shops first.
To delete a shopping center
-
Select the IT Shop | IT Shop category.
-
Select the shopping center template in the result list.
-
Delete all shops.
-
Click  in the result list.
- Confirm the security prompt with Yes.
Detailed information about this topic
Templates for automatically filling the IT Shop
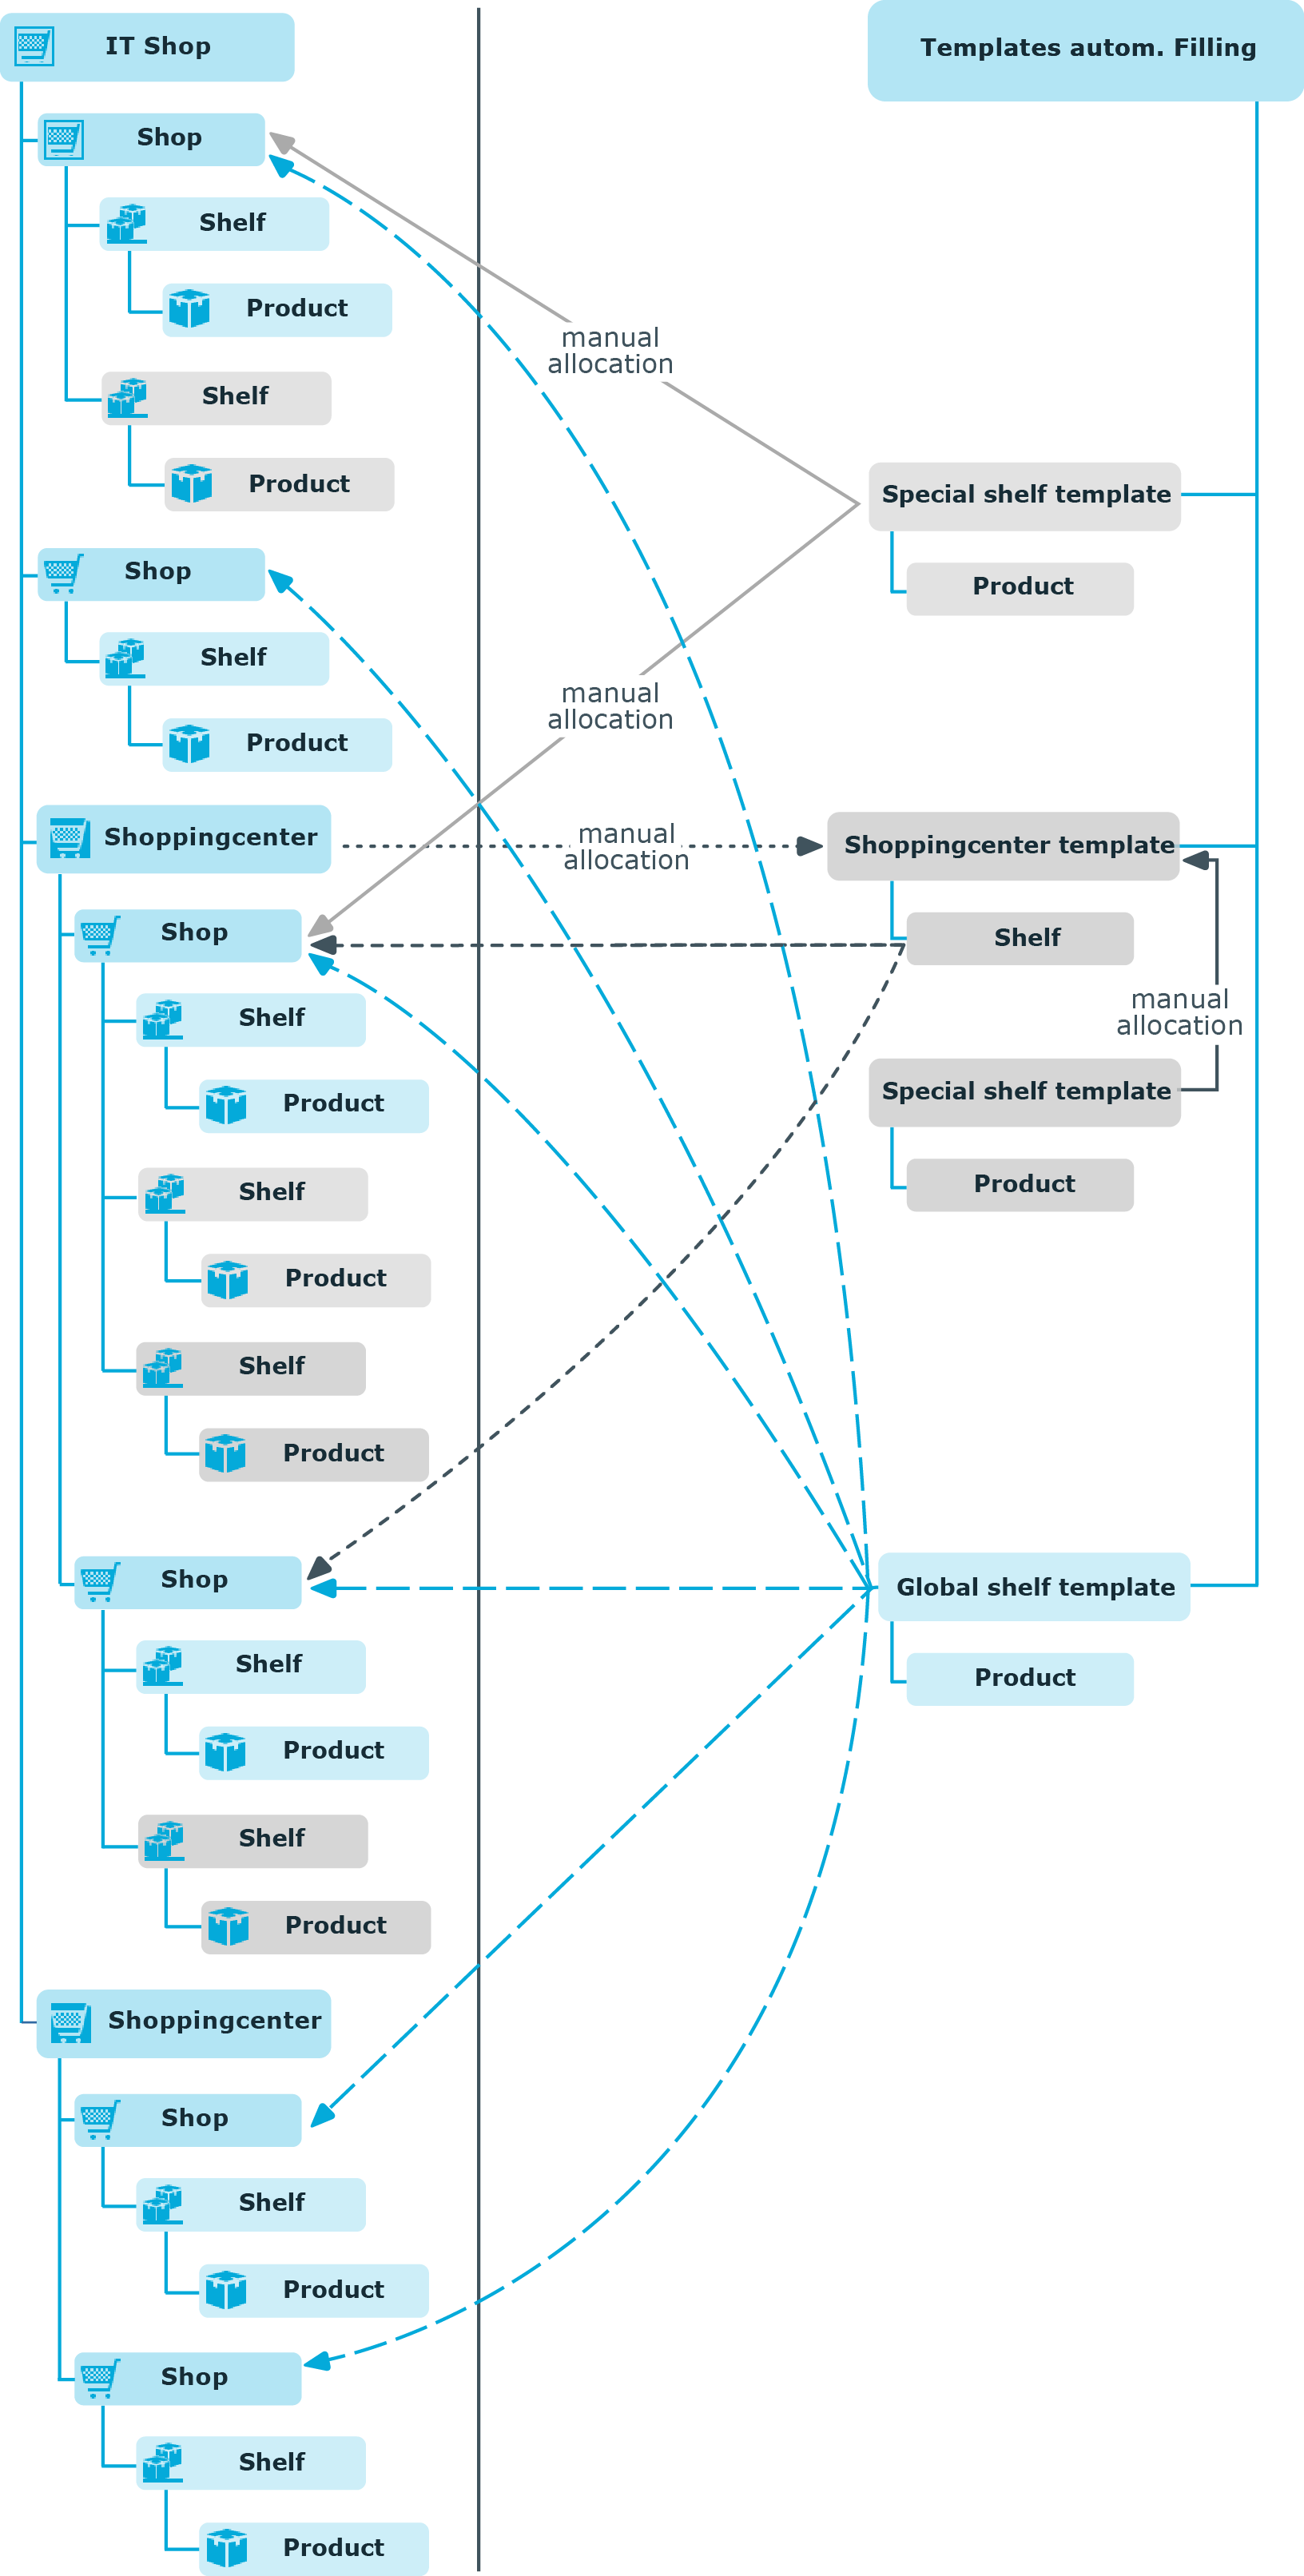
You can create templates for setting up shelves automatically. Use templates when you want to set up shelves in several shops or shopping centers with the same products.
Table 74: Templates overview
|
Global shelf templates |
A global shelf template is automatically distributed to all shops within the IT Shop solution. A corresponding shelf with products is added to each shop. If a new shop is created within the IT Shop solution, the global shelf template is immediately applied to the shop.
NOTE: Global shelf templates are not distributed to default shops. |
|
Special shelf templates |
A special shelf template is manually assigned to one or more shops. A corresponding shelf with products is added in these shops. A special template can be distributed additionally to shopping center templates. |
|
Shopping center templates |
A shopping center template references one or more shopping centers. You can only assign shopping center template to shopping center. Once you assign a special shelf template to a shopping center template, a corresponding shelf is added to all the shops in the shopping center. |
In order to simplify understanding, these templates are given the umbrella term shelf templates in the following.
To use shelf templates
The following is valid for all shelf templates:
-
If a template is modified, the changes are passed on to all shelves created from this shelf template.
-
If a shelf template is deleted, all the shelves that originated from it are deleted from the shop. Outstanding requests are completed.
-
Shelf templates can only be deleted when their assigned products and approval policies have been removed.
The following diagram illustrates the shelf templates that can be set up, their assignments, and the resulting IT Shop solution.
Figure 12: Assigning shelf templates
Using shelf templates in an IT Shop solution
To create different shelf templates and implements in an IT Shop solution, do the following:
Global shelf templates
-
Create a global shelf template.
-
Assign products and approval policies to global shelf template.
The global shelf template is automatically reproduced in all shops in IT Shop. The shelves that created are linked to the global shelf template from which they originate. The products are transferred from the template to the shelf that is created from the template.
NOTE: Global shelf templates are not distributed to default shops.
Special shelf template
-
Create a special shelf template.
-
Assign products and approval policies to the special shelf template.
-
Assign the special shelf template to one or more shops.
The special shelf template is automatically copied to all shops in the IT Shop. The shelves that created are linked to the special shelf template from which they originate. The products are transferred from the template to the shelf that is created from the template.
Shopping center template
-
Create a shopping center template.
-
Create a special shelf template.
-
Assign products and approval policies to the special shelf template.
-
Assign the special shelf template to the shop center template.
-
Assign the shopping center template to the desired shopping centers.
The special shelf template is automatically copied to the shopping center template. Subsequently, the shelf created form the shopping center template is distributed to all the shops in the shopping center. The shelves that are created obtain a link to the shelf that they originated from.
Detailed information about this topic
Editing shelf templates
To edit a shelf template
-
In the Manager, select the IT Shop | Shelf templates category.
-
In the result list, select a mail template in and run the Change master data task.
- OR -
Click  in the result list.
-
Edit the shelf template's master data.
- Save the changes.
