Selecting a dynamic entry
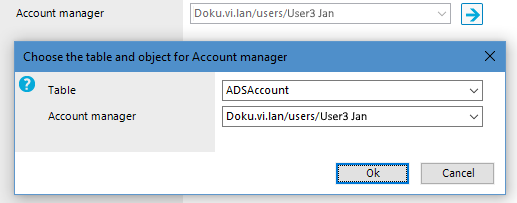
Some foreign key relationships are identified dynamically in One Identity Manager. There are two steps to selecting a dynamic foreign key.
-
Specify the table in which the object should be identified.
-
Select the actual object.
Figure 20: Selecting dynamic entries
To specify a dynamic entry:
-
Click  next to the field.
-
Under Table, select in the table in which to identify the object.
-
Select the actual object from the next list.
-
Click OK.
Setting a date
As well as manually entering a date, you can copy a date into the input field from the control. Open the control using the [...] button beside a date input field.
Figure 21: Control for setting a date
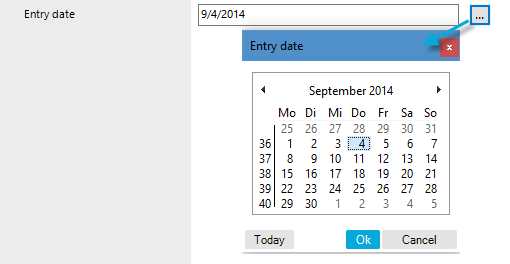
The title bar of the control repeats the name of the corresponding input field.
To select a date:
-
Today's date is identified by a colored border. Click Today to select today's date.
- OR -
Select the date using the calendar.
-
Select the month and year using the arrow beside the Month year control or click the Month year control.
-
Select the day by clicking in the calendar.
- Click OK.
Editing login hours
This control is used, for example, to configure the daily login hours for a user account.
Figure 22: Login time control
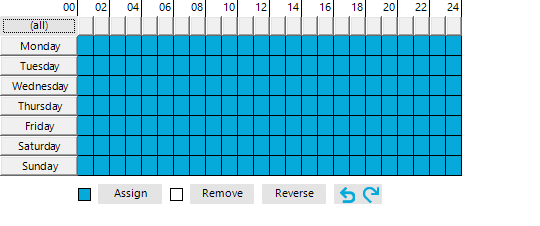
The calendar shows a 7-day week, each box represents one hour. The configured login times are shown in color, respectively. If a box is filled, login is allowed. If the box is empty, login is denied.
To specify login times
-
Select a time period with the mouse or keyboard.
-
Select Assign to enable login in the selected period.
-
Select Remove to deny login in the selected period.
-
Select Reverse to invert the selected period.
-
Use the arrow keys to reset or repeat a selection.
Layout of object relations
This control element shows the relations between the One Identity Manager database objects (Parent/ChildRelation).
-
Only the assigned elements are displayed in the Remove assignments pane.
You can remove assigned elements here.
-
In the Add assignments pane, you can see all the elements.
Make new assignments or remove existing ones here. If allowed, you can use a filter to further restrict the selection of elements you want to show.
To activate or deactivate an assignment
Figure 23: Displaying assignments in the control element
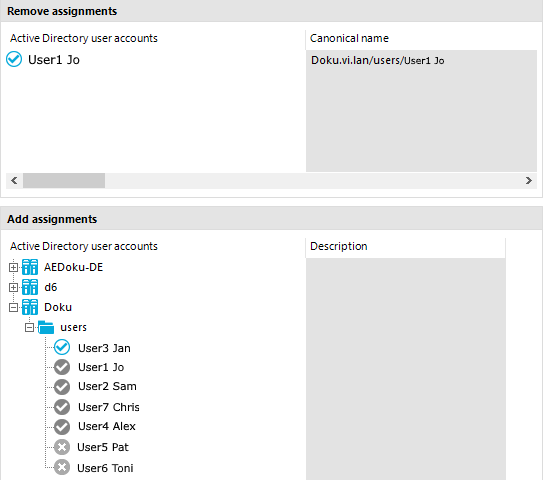
Table 28: Meaning of icons in the control element
|

|
Object is assigned to the selected base object. |
|

|
Object is not assigned to an object. |
|

|
Object is assigned to another object. |
NOTE: In the list, assigned elements come before unassigned elements.
Table 29: Control element context menu items
|
Assign |
Assign object to the selected base object. |
|
Remove |
Remove assignment of object to base object. |
|
Assign child objects |
In a hierarchical structure, assign the selected object and its child objects to the base object. |
|
Remove child objects |
In a hierarchical structure, remove the assignments of the selected object and its child object to the base object. |
|
Assign all objects |
Assign all existing objects to the base object. |
|
Remove all assignments |
Remove all assignments to the base object. |
|
Search |
Opens the search dialog. |
|
Go to object |
Go to the selected object. |
|
Go to assigned object |
Go to this object's assigned base object. |
|
Show objects already assigned to other objects. |
Objects that are assigned to other objects are shown in the Add assignments pane. |
|
Hide objects already assigned to other objects. |
Objects that are assigned to other objects are hidden in the Add assignments pane. |
