Tchater maintenant avec le support
Tchattez avec un ingénieur du support

One Identity Safeguard for Privileged Sessions 7.0.5.1 LTS - Safeguard Desktop Player User Guide

Summary of changes Features and limitations Installing Safeguard Desktop Player First steps Validating audit trails Replaying audit trails Replaying encrypted audit trails Replaying encrypted audit trails from the command line Replaying audit files in follow mode Searching in the content of the current audit file Search query examples Exporting the audit trail as video Exporting the sound from an audit trail Sharing an encrypted audit trail Replaying X11 sessions Exporting transferred files from SCP, SFTP, HTTP, and RDP audit trails Exporting raw network traffic in PCAP format Exporting screen content text Troubleshooting the Safeguard Desktop Player Keyboard shortcuts

Force rendering software

Some video card drivers might have problems with OpenGL rendering: fonts do not appear correctly, or the Safeguard Desktop Player application crashes when started with warnings about the graphics card. If this happens, Safeguard Desktop Player tries to fall back to software rendering, but it might fail to do so.

To force software rendering, start Safeguard Desktop Player using the Safeguard Desktop Player - software rendering item in your application menu, or with the --software command-line option:

  • Windows: player.exe --software

  • Linux: ./player --software

Cannot import CA certificate

On Microsoft Windows, you cannot import CA certificates from a shared drive.

Copy the certificate to a local folder and import it from there.

Also, you must install the Safeguard Desktop Player application locally, you cannot start the player.exe file from a shared drive.

Logging

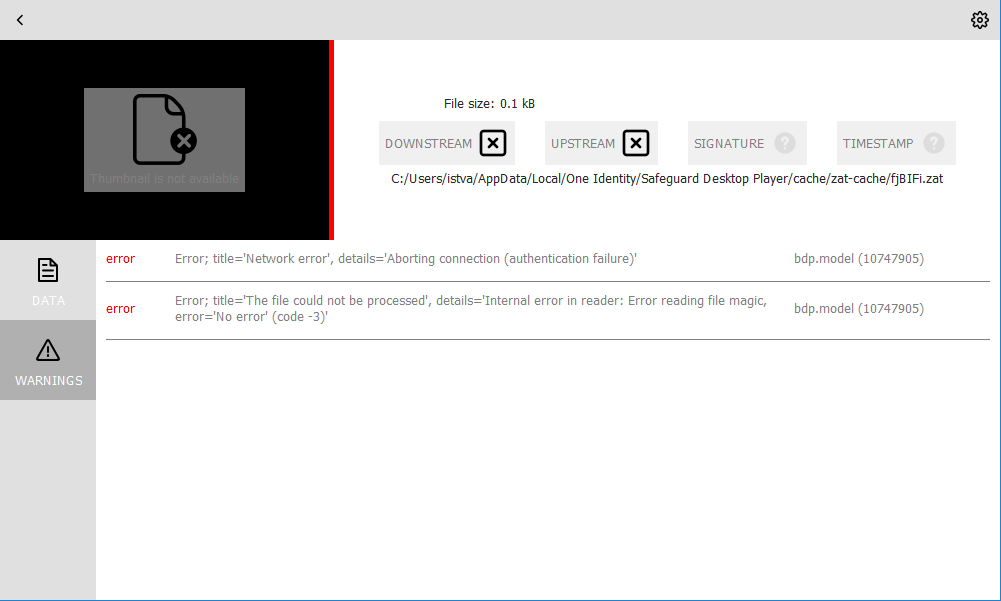
The Safeguard Desktop Player application displays important log messages on the Warnings tab. If you increase the log level of the application above the default, additional log messages are also displayed.

Figure 14: Warnings and logs

To specify the log level of the Safeguard Desktop Player application, use the following command-line parameters.

  • -l or --log-level <number>: Sets the log level of Safeguard Desktop Player. The available values are:

    • 0: Completely disables logging.

    • 3: The default log level.

    • 7: The most verbose level, used for debugging.

    For example, to set the default log level in Windows or Linux, use the following commands:

    • Windows: player.exe --log-level 5

    • Linux: /player --log-level 5

  • -o or --log-output <path-to-logfile>: Specifies the path and file name of the log file.

    For example, to set the path and file name on Windows or Linux, use the following commands:

    • Windows: player.exe --log-output desktop-player.log

    • Linux: ./player --log-output /tmp/desktop-player.log

  • -s or --log-spec <component.name:value>: Specifies different log levels for certain components of the Safeguard Desktop Player.

    For example, to specify the default log level for Safeguard Desktop Player, but specify the verbose level for the bdp.core component, use the following commands on Windows or Linux:

    • Windows: player.exe --log-level 3 --log-spec "bdp.core:7"

    • Linux: ./player --log-level 3 --log-spec "bdp.core:7"

Keyboard shortcuts

You can use the following keyboard shortcuts to control the replay.

  • Play/Pause: SPACE

  • Jump to previous event: p

  • Jump to next event: n

  • Enable video scaling (Scale video): Ctrl + Z

  • Toggle fullscreen replay: f

  • Decrease replay speed: [

  • Increase replay speed: ]

  • Reset replay speed :=

  • Jump backward, short, medium, long: Shift + Left Arrow, Alt + Left Arrow, Ctrl + Left Arrow

  • Jump forward, short, medium, long: Shift + Right Arrow, Alt + Right Arrow, Ctrl + Right Arrow

  • Search in trail content: Ctrl + F

Documents connexes

The document was helpful.

Sélectionner une évaluation

I easily found the information I needed.

Sélectionner une évaluation