Microsoft Active Directory LDS
This option is an LDAP authenticator with pre-configured attributes for use with Microsoft Active Directory Lightweight Directory Service, please see LDAP authentication, for configuration options.
389 Directory Service
This option is an LDAP authenticator with pre-configured attributes for use with 389 Directory Service, please see LDAP authentication, for configuration options.
Novell eDirectory
This option is an LDAP authenticator with pre-configured attributes for use with Novell eDirectory, please see LDAP authentication, for configuration options.
Windows Azure Active Directory authentication
This section describes how you can configure Cloud Access Manager to use Windows Azure Active Directory for authentication. Before you begin you need to configure an application for Cloud Access Manager so it can authenticate users and obtain lists of users and groups. In addition:
- The Azure Active Directory Provider currently supports a single domain and single tenant application in Azure Active Directory, you should have an Active Directory instance created in your Microsoft Azure cloud subscription.
- The free version of Azure Active Directory can be used, but the Azure Active Directory self-serve password management will not be available. In all cases, newly-created users must not have the Force Change Password On Next Login set.
- Users must login with their full Azure Active Directory username, which should resemble an email address containing your full Azure Active Directory domain name. Azure Active Directory domain names should be of the form, <name>.onmicrosoft.com. Any external users added to your Azure Active Directory cannot be authenticated.
|
|
NOTE: A newly-created Azure Active Directory user account is assigned a temporary password. For the user to access Cloud Access Manager, they must first change their password so that it is no longer expired. Cloud Access Manager does not accept logons from users with expired passwords. |
To configure an Azure Active Directory application for use with Cloud Access Manager
- Log in to the Azure management portal.
- From the dashboard navigate to the directory management page.
- Select the Applications tab.
- Click Add in the bottom toolbar and in the dialog that appears, select Add an application my organization is developing.
- Enter a name for the application, this is simply a description. Ensure that WEB APPLICATION AND/OR WEB API is selected and click the arrow to move to the next page.
- Enter http://CloudAccessManager in both the SIGN-ON URL and APP ID URI fields (these values are not used). Click the tick button to complete the dialog.
- When you have created the application, select the Configure tab and scroll down until you see the CLIENT ID field, you will need to copy and save the value here to use when configuring Cloud Access Manager.
- Scroll down to the permissions to other applications section, click the Application Permissions list and check Read directory data.
- Scroll back up to the keys section, select the required duration for the key and click SAVE. At this point you MUST copy and save the key value as it will not be available again and you need it to configure Cloud Access Manager.
- Click VIEW ENDPOINTS in the bottom toolbar, copy and save the MICROSOFT AZURE AD GRAPH API ENDPOINT and OAUTH 2.0 TOKEN ENDPOINT values.
To configure Azure Active Directory authentication
- Log in to the Administration Console and select Add New from the Front-end Authentication section on the home page.
- Select Azure Active Directory, then click Next. The Connection Settings page is displayed.
- In the Client ID field, enter the client ID from the Azure portal.
- In the Application Key field, enter the key that you created in the Azure portal.
- In the Windows Azure AD Graph API Endpoint field, enter the Windows Azure AD Graph API Endpoint from the Azure portal App Endpoints page.
- In the OAuth 2.0 Token Endpoint, enter the OAuth 2.0 Token Endpoint from the Azure portal App Endpoints page.
- When you have entered the required configuration information, click Test Connection to verify the configuration. Click Next.
-
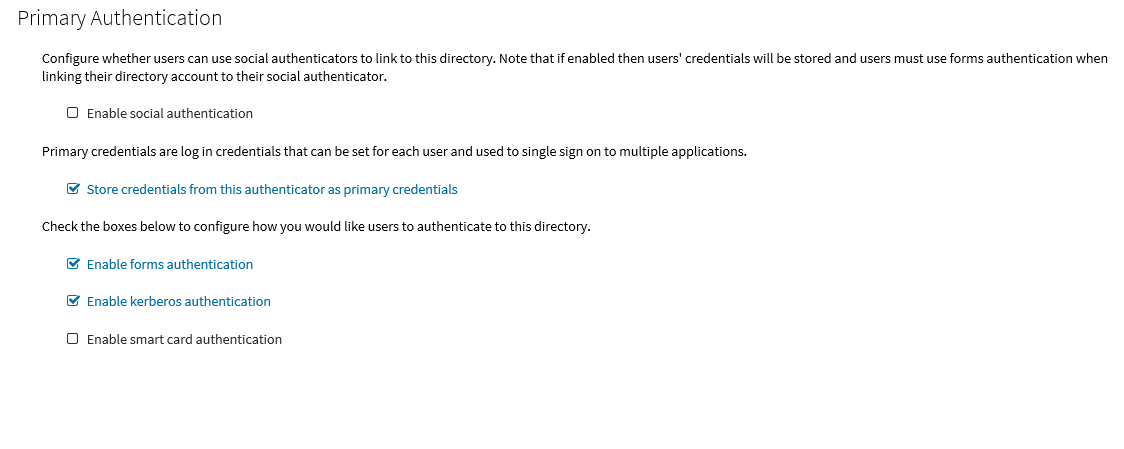
The settings on the Primary Authentication screen are split into three sections. When complete, click Next.
The first section is used to determine whether or not users are allowed to use social authenticators, for example Facebook or Google, and link to the selected authenticator when authenticating to Cloud Access Manager.
The second section determines whether users’ credentials are stored for accessing other applications. If selected, the credentials used to authenticate to Cloud Access Manager are stored as the Primary Credentials in the user’s Password Wallet. Please refer to Primary credentials for details.
The third section is used to determine how users are challenged for their Windows credentials, you must choose at least one option. Cloud Access Manager checks for credentials presented in the following order of precedence:
-
Enable kerberos authentication — Cloud Access Manager will check for a Kerberos ticket generated during Windows domain login and supplied by the browser. If the Kerberos ticket is present and valid, then the user will be successfully logged in.
Successful Kerberos authentication requires correct configuration of the user's browser. Please refer to Microsoft Active Directory authentication for details. In addition some browsers do not support Kerberos authentication. Please refer to the One Identity Cloud Access Manager Installation Guide for browsers that support Integrated Windows Authentication.
- Enable smart card authentication — Users are given the opportunity to present an X.509 certificate in order to log in to Cloud Access Manager. The X.509 certificate may be located on a smart card or in the client computer's certificate store. If the certificate is invalid or expired the login attempt will be rejected. Please refer to the section Configuring smart card authentication for details.
- Enable forms authentication — Users are prompted for their Azure Active Directory username and password using a login form.
NOTE: If you enable social authentication, storing credentials from the authenticator is required, this in turn requires that forms authentication is the only enabled authentication method. Storing credentials is required as Cloud Access Manager needs to verify if the linked account used for primary authentication is still valid, for example the account is not disabled, or the password has not expired when authenticating using a social authenticator. If a user attempts to authenticate with a social authenticator and the linked account is not valid, the user will be prompted to enter the correct credentials for the primary authenticator.
NOTE: If you enable social authentication, we recommend that you set linked accounts to have a long password expiry, this allows seamless authentication using the social authenticator.
-
-
If you require two factor authentication each time users authenticate to Cloud Access Manager, select Use two factor authentication for all applications from the Two factor authentication mode list. Select the method of authentication from the Type of two factor authentication list.
For information on how to configure the various authentication types or how to configure two factor authentication only for specific users or applications, refer to Configuring step-up authentication. When compete, click Next.
-
In the Authenticator Name field, enter the name that will be used to identify the authenticator within Cloud Access Manager, then click Finish.
NOTE: This name will be seen by Cloud Access Manager users during authentication if multiple authentication methods have been configured.
-
You have now created the front-end authentication method. Click Edit Roles.
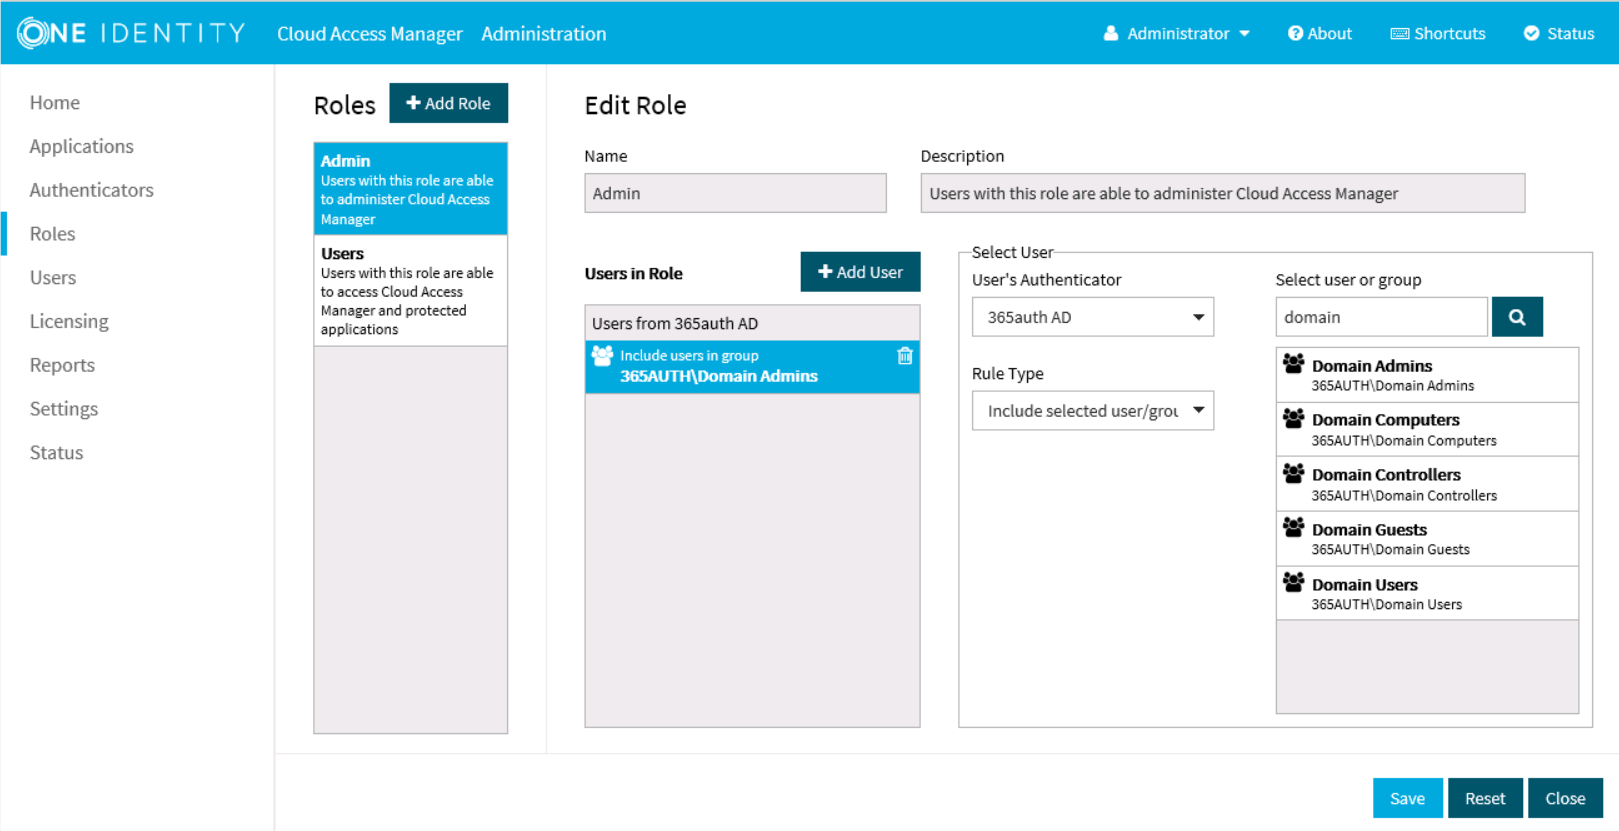
Before Cloud Access Manager administrators and users can log in to Cloud Access Manager using their Azure Active Directory credentials, you must tell Cloud Access Manager how to identify administrators and users based on their Azure Active Directory group membership. For example, the Domain Admins group for Cloud Access Manager administrators and the Domain Users group for regular Cloud Access Manager users.
- Click Admin.
-
Click +Add User.
- Select the new Azure Active Directory authentication method from the list.
- Use the search box to locate the group whose members are to be granted access to the Cloud Access Manager Administration application, then select the group from the list.
- Click Save.
- Now repeat the process for the Cloud Access Manager users. Click Users.
- Click +Add User.
- Select the new Azure Active Directory authentication method from the list.
- Select a group from the list whose members are to be granted access to the Cloud Access Manager application portal.
- Click Save.
Click Close to return to the Cloud Access Manager Administration Console. The configuration is now complete. Cloud Access Manager administrators and users can now log in to Cloud Access Manager using their Azure Active Directory credentials


