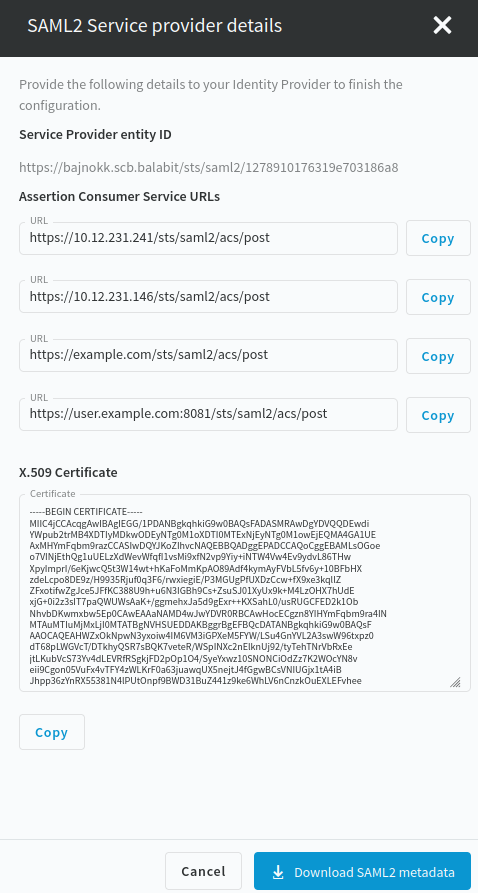
To configure your Identity Provider (IdP) to trust One Identity Safeguard for Privileged Sessions (SPS) as a Service Provider (SP), you must provide the SP metadata XML file of your SPS to your IdP. If your IdP supports the import of SP metadata, then you can choose either of the following methods to download the SP metadata XML file:
-
Download the SP metadata XML file by clicking Users & Access Control > Login Options > SSO Configuration > SAML2 Service Provider details > Download SAML2 metadata on the SPS web interface.
-
Download the SP metadata XML file from your SPS at the following location:
https://<ADDRESS-OF-YOUR-SPS>/sts/saml2/sp-metadata.xml
This file is accessible also for unauthenticated users since it only contains public information about the SAML2 SP configuration.
If your IdP does not support the import of SP metadata, then you must configure your IdP based on the summary of the SAML2 Service Provider details page.
Figure 91: Users & Access Control > Login Options > SSO Configuration > SAML2 Service Provider details

To authenticate SPS users with a SAML2 login method, complete the following steps.
-
Navigate to Users & Access Control > Login Options.
-
To configure a SAML2 login method, select one of the following options:
-
Select an existing SAML2 login option and click Edit.
-
Click Create new login method and select SAML2.
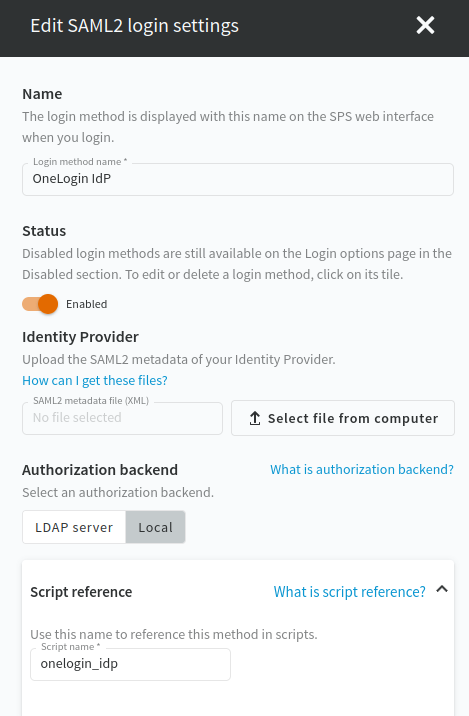
The following figure shows the configuration options of the SAML2 login method.
Figure 92: Users & Access Control > Login options — Configuring SAML2 authentication

-
In the Name field, specify a name for the login option.
-
Upload the SAML2 metadata XML of your Identity Provider.
NOTE: Your IdP metadata file should contain a single SAML2 IdP metadata entity. To support SAML2 login with multiple IdPs, you have to configure additional SAML2 login methods.
-
Select LDAP server or Local as the Authorization backend.
-
(Optional) To add a new LDAP server, click Add new LDAP server under Authorization backend and select one of the server types:
-
Script reference is filled out automatically when you specify the name for the login option. Special characters are automatically replaced with dashes ("-"). The Script name is a unique, human readable ID that is used by the REST API clients to select the login method.
-
To save your modifications, click Commit.
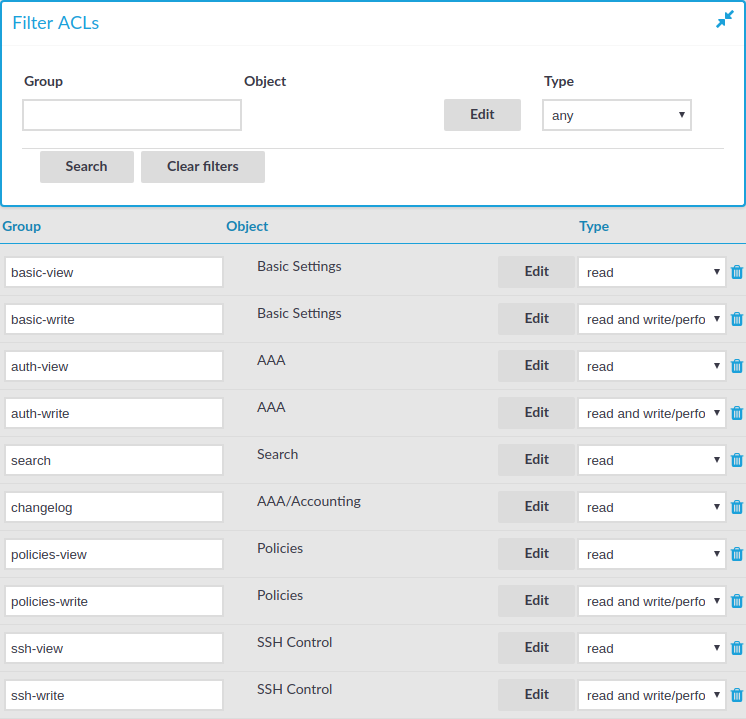
In One Identity Safeguard for Privileged Sessions (SPS), user rights can be assigned to usergroups. SPS has numerous usergroups defined by default, but custom user groups can be defined as well. Every group has a set of privileges: which pages of the SPS web interface it can access, and whether it can only view (read) or also modify (read & write/perform) those pages or perform certain actions.
NOTE: Every group has either read or read & write/perform privileges to a set of pages.
Figure 93: Users & Access Control > Appliance Access — Managing SPS users


The following describes how to assign privileges to a new group.
To assign privileges to a new group
-
Navigate to Users & Access Control > Appliance Access and click  .
.
-
Find your user group. If you start typing the name of the group you are looking for, the auto-complete function will make finding your group easier for you.
-
Click Edit located next to the name of the group. The list of available privileges is displayed.
-
Select the privileges (that is, the pages of the One Identity Safeguard for Privileged Sessions (SPS) interface) to which the group will have access and click Save.
NOTE: To export the configuration of SPS, the Export configuration privilege is required.
To import a configuration to SPS, the Import configuration privilege is required.
To update the firmware and set the active firmware, the Firmware privilege is required.
-
Select the type of access (read or read & write) from the Type field.
-
Click  .
.


 .
. .
.