If your organization has any Azure tenants managed in Active Roles, you must reauthenticate and reconsent each Azure tenant after installing a new version of Active Roles.
|

|
CAUTION: You might experience difficulties with Exchange Online connectivity and managing resources (for example, assigning roles). |
To reauthenticate and reconsent Azure tenants after installing Active Roles
-
After installing Active Roles, from the Windows Start menu, open the Active Roles Configuration Center. The Upgrade configuration wizard will automatically appear.
-
To reauthenticate existing Azure tenants, proceed to the Reauthenticate tenants step and click Reauthenticate next to each Azure tenant.
Figure 3: Reauthenticating Azure tenants

NOTE: Consider the following when reauthenticating existing Azure tenants:
-
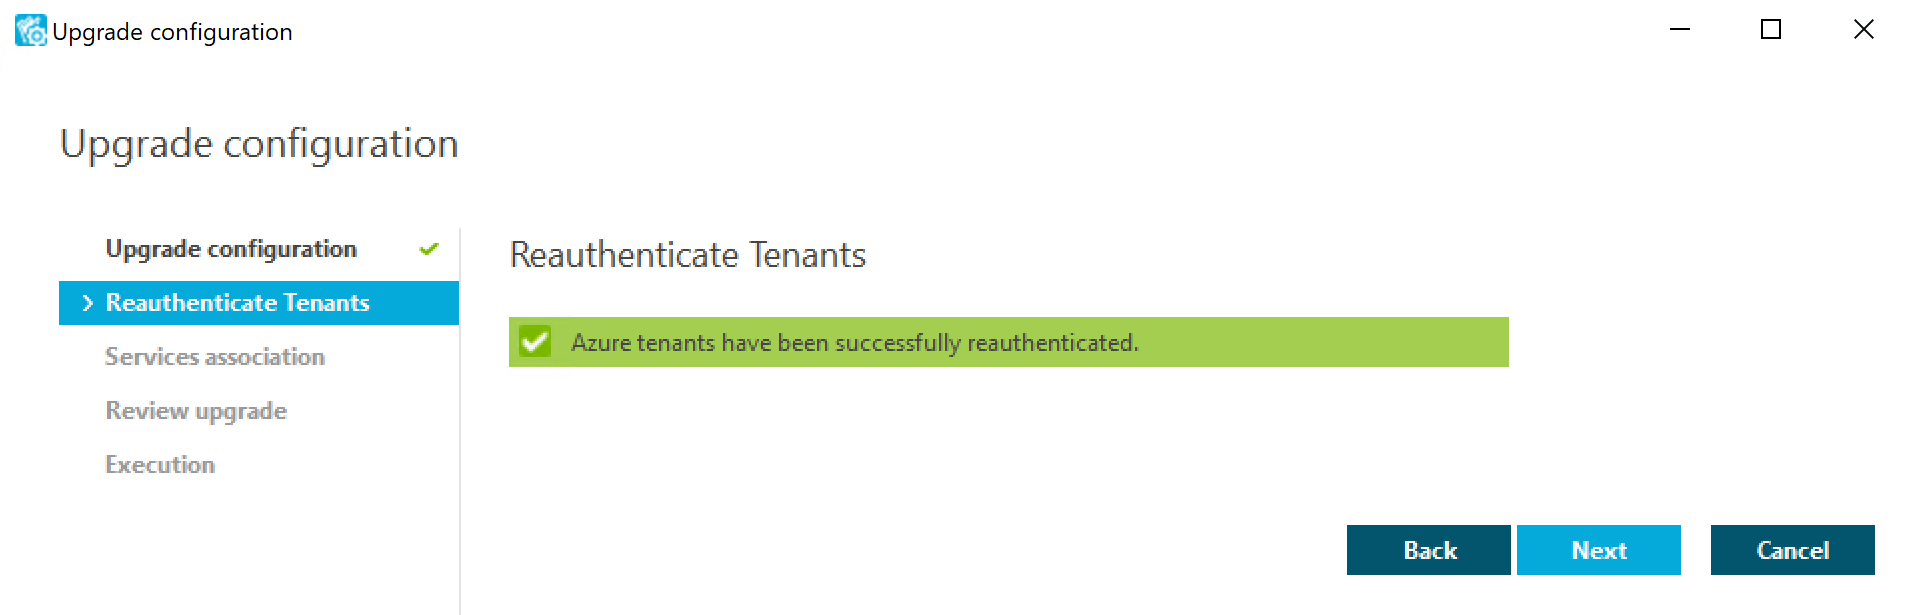
If reauthentication is successful, the Azure tenant will disappear from the list, and the Reauthenticate tenants step shows a confirmation message.
Figure 4: Confirmation message after successfully reauthenticating tenants
-
If reauthentication fails, the Azure tenant will remain in the list. Reauthentication can typically fail if there is a service outage in Azure AD, or in case of internet connectivity issues in your network. If reauthentication keeps failing, try performing it later after completing the Upgrade configuration wizard by removing, readding and consenting the Azure tenants to Active Roles via the Azure AD Configuration tab of the Active Roles Configuration Center.
-
Complete the rest of the steps in the Upgrade configuration wizard.
-
To make the reauthenticated Azure tenants appear in the Active Roles Web Interface, you must restart the Administration Service. Click Administration Service on the left pane, then either click Restart, or first click Stop and then Start.
-
After the Configuration Center restarted successfully, navigate to Azure AD Configuration.
Figure 5: Azure AD Configuration

-
To reconsent Active Roles as an Azure application for the reauthenticated Azure tenants, click Consent in each tenant row.
-
To complete consenting, click Accept on the Microsoft Permissions Requested page that appears.
You can upgrade the Active Roles Web Interface of version 7.5 or later to version 8.2.
Upgrading the Web Interface implies creating a new Web Interface instance of the latest version that has the same Web Interface sites as your Web Interface of an earlier version, with the site configuration data imported from your Active Roles configuration of the earlier version. As a result, the new Web Interface sites inherit all customizations that were made to the menus, commands, forms, and other elements of your Web Interface sites of the earlier version.
NOTE: When an import configuration is performed from Active Roles version 7.5 to 8.2, the Web Interface does not get upgraded. However, the Configuration Center or any client reports the Active Roles Web Interface version incorrectly as 8.2. To upgrade the Web Interface to the latest version, see Creating Web Interface sites and importing configuration.
To create Web Interface sites of the new Active Roles version, you must know which configuration objects your Web Interface sites of the earlier version use. Each site stores its configuration on the Administration Service, in a site configuration object. Upgrading the Administration Service copies the existing site configuration objects to the new Administration Service, retaining the name of each object.
To create a Web Interface site of the new Active Roles version that inherits your existing site customizations, specify the name of the corresponding site configuration object of the earlier version. Active Roles creates a site configuration object of the new version, imports the site configuration data to that object, and the new Web Interface site will use that object, inheriting the configuration of the Web Interface site of the earlier version.
To identify the configuration object of the Web Interface site of the current Active Roles version
-
From the Windows Start menu, open the Active Roles Configuration Center on the computer running the Administration Service instance on which you want to identify the Web Interface sites.
-
On the Configuration Settings main window, on the left pane, click Web Interface.
The Web Interface page is displayed, which lists the Web Interface sites of the current Active Roles version that are deployed on the web server running the Web Interface.
For each Web Interface site, the list provides the following information:
-
IIS Website: The name of the website that holds the web application implementing the Web Interface site
-
Web app alias: The alias of the web application that implements the Web Interface site, which defines the virtual path of that application on the web server.
-
Configuration: Identifies the object that holds the Web Interface site’s configuration and customization data on the Active Roles Administration Service.
-
From the Web Interface page, you can open Web Interface sites in your web browser:
-
Click an entry in the list of Web Interface sites.
-
Click Open in Browser on toolbar.
To identify the configuration object of the Web Interface site of an earlier Active Roles version
-
On the Web server running your Web Interface of the earlier Active Roles version, from the Start menu, open the Web Interface Sites Configuration wizard.
-
On the Web Interface Configuration page, which lists your Web Interface sites of the earlier Active Roles version, click on the site you need, and then click Edit.
You can identify sites by alias, shown in the Virtual Directory column. The alias defines the virtual path used in the address of the Web Interface site on the Web server.
-
In the opening dialog, in the Configuration settings area, under Use existing configuration, in Name, the name of the site’s configuration object is displayed (including the version number). Note down the name.
-
Click Cancel to close the dialog.
Identify the configuration object for each of your existing Web Interface sites, and note down the name of each object. You will need these names when creating the Web Interface sites of the new Active Roles version.
You can also use the Configuration Center to:
-
Create, modify or delete Web Interface sites.
-
Export a Web Interface site’s configuration object to a file.
For more information, see Web Interface management tasks in the Active Roles Administration Guide.
To create a new Web Interface instance of the latest version, perform the following steps.
To create a new Web Interface instance
-
For each Web Interface site of your earlier Active Roles version, create sites based on the configuration objects that your older Web Interface version used. For more information, see Identifying configuration objects.
-
Install and configure the Web Interface instance of the latest Active Roles version, choosing the new Administration Service to which you have imported configuration of your earlier Active Roles version. For more information, see Configuring the initial Administration Service in the Active Roles Installation Guide.
-
On the new Web Interface instance that you installed and configured, create sites based on information you noted previously, importing data from the configuration objects used by your earlier Web Interface version. Those configuration objects were copied to the new Administration Service during configuration data import. For more information, see Identifying the database to import configuration.
-
(Optional) Delete the default sites that were created when you configured the Web Interface in Step 2 if you no longer need to use or customize them. For more information, see Deleting default Web Interface sites.
NOTE: The default sites have the default configuration of menus, commands, forms and other elements instead of any existing site customizations.
|
|
CAUTION: If you no longer need the earlier version of an Active Roles component and want to uninstall it using the appwiz.cpl command, make sure that you uninstall the earlier version (for example, Active Roles 6.9). In the uninstaller, select Modify, and select the components you want to uninstall. |
