Installing the portal
To install the Defender Management Portal
- In the Defender distribution package, open the Setup folder, and then run the Defender.exe file.
- Complete the Defender Setup Wizard. When stepping through the wizard, make sure to select the Defender Management Portal feature for installation.
For more information about the wizard steps and options, see Defender Setup Wizard reference.
After installing the Defender Management Portal, you need to prepare it for first use by specifying a service account. For more information, see Specifying a service account for the portal.
To install the Defender Management Portal from the command line, use the following installation switches
Table 15: Defender Management Console Installation Switches
|
/ADDLOCAL=Web |
Installs Defender Web Interface component only |
|
/SCHEMAINSTALL =0 |
Do not install the Defender Schema extensions. |
|
/SCHEMAINSTALL =1 |
Install the Defender Schema extensions. |
|
/CARINSTALL =0 |
Do not install Defender Control Access Rights. |
|
/CARINSTALL =1 |
Install Defender Control Access Rights. |
| /OUINSTALL =0 |
Do not create the Defender organizational unit. |
| /OUINSTALL =1 |
Create the Defender organizational unit. |
| /PORTNUM=XXXX (Default 8080) |
Set Port Number for Management Portal Web Interface |
| /ADMINGROUP=xxxx |
Set Administrative Group |
NOTE: This list doesn't include standard windows installer options (you can get them by running "msiexec.exe /?")
Configuring SQL Express Server as database for the portal [Optional]
Steps to configure SQL Express Server as database for Management portal
- Install SQL Express Server. For instructions, see Step 0: Install required pre-requisites for Defender.
-
Update the web.config file
-
Navigate to the installation path of Management portal and locate the web.config file in the WWW folder. By default, the file is available in %ProgramFiles%\One Identity\Defender\Management Portal\WWW folder path.
-
In the web.config file, update the below key value to ‘false’:
<add key="isCompactDatabase" value="false"/>
false – to use SQL Express Server
true – to use SQL Compact Server
-
Switch Defender database from SQL Compact to SQL Express using DBSwap tool. For instructions, see DB Migration.
Note: In case of multiple DSS environments, it is recommended that the database type should be same on all the DSS.
Switching to SQL Compact Server database from SQL Express Server database for the portal:
- Update the web.config file
-
Navigate to the installation path of Management portal and locate the web.config file in the WWW folder. By default, the file is available in %ProgramFiles%\One Identity\Defender\Management Portal\WWW folder path.
-
In the web.config file, update the below key value to ‘true’:
<add key="isCompactDatabase" value="true"/>
false – to use SQL Express Server
true – to use SQL Compact Server
-
Restart the Defender Security Server Service.
Note: The data from SQL Express database will not migrated to SQL Compact database when switched back to Compact. However, the older data and settings from Compact (if applicable) should still be available.
Opening the portal
We strongly recommend using HTTPS to access the Defender Management Portal. The secure hypertext transfer protocol (HTTPS) is a communications protocol designed to transfer encrypted information between computers over the World Wide Web. For instructions on how to configure SSL in order to support HTTPS connections from client applications, see the article “Configuring Secure Sockets Layer in IIS 7” at http://technet.microsoft.com/en-us/library/cc771438%28WS.10%29.aspx.
To open the Defender Management Portal
- In your Web browser, go to the following address:
http(s)://<portal computer>:<port>
where
- <portal computer> is the fully qualified domain name of the computer on which the Defender Management Portal is installed.
- <port> is the port number at which the Defender Management Portal can be accessed. You specify this port when installing the Defender Management Portal. The default port is 8080.
- On the Defender Management Portal sign-in page, enter your user name, password, and domain, and then click Sign in.
The Defender Management Portal home page opens.
The options available to you on the Defender Management Portal home page depend on the portal role assigned to the user account with which you sign in to the portal. For more information, see Portal roles.
When you sign in to the Defender Management Portal as a portal administrator, the home page provides all available options and looks as follows:
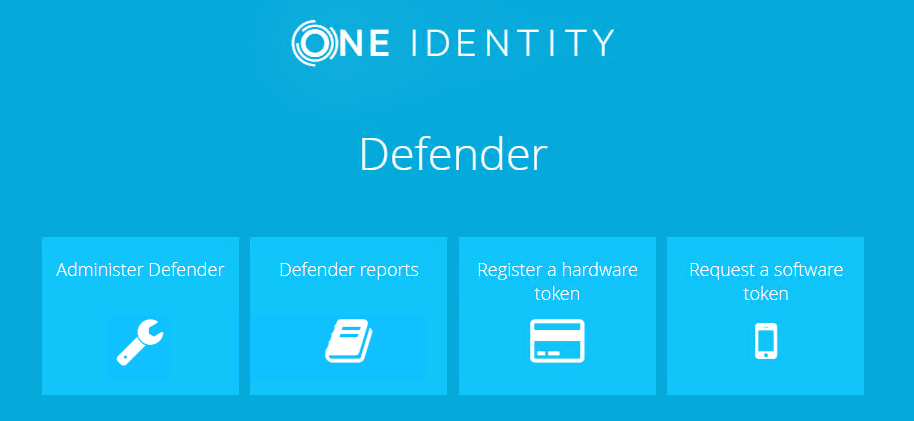
- Administer Defender Allows you to manage the Defender Management Portal configuration, configure self-service for users, manage users and security tokens, diagnose and resolve authentication issues, view authentication statistics, and view information about the Defender Security Servers deployed in your environment.
- Defender reports Allows you to schedule, generate, and view Defender reports.
- Register a hardware token Starts a wizard that guides you through registering the hardware token given to you by your system administrator.
- Request a software token Starts a wizard that helps you to request, download, and activate a software token.
To return to the Defender Management Portal home page from any other page of the portal, in the upper right corner of your current portal page, click the Home button.
Specifying a service account for the portal
After installing the Defender Management Portal, you need to specify a service account for the portal. This account must be a member of the Local Administrators group on the computer where the Management Portal is installed and a member of the Domain Users group in the corresponding domain. By default, the Defender Management Portal uses the service account to do the following:
- Program and assign software tokens requested through the Defender Self-Service Portal.
- Retrieve data for Defender reports from Active Directory.
All other operations are performed under the account used to access the Defender Management Portal.
To specify a service account
- Sign in to the Defender Management Portal as a portal administrator.
For instructions, see Opening the portal.
- On the Defender Management Portal home page, click Administer Defender:
- In the left pane, click the Configuration tab.
- In the right pane, click the Service Account tab.
- Type the credentials of the user account you want to set as a service account for the portal.
- When you are finished, click the Save button to save your changes.
If the specified account does not have the “Log on locally” right, that right is granted to the account automatically after you click the Save button.
