
Users report
The users report displays the:
- Front-end authenticators each user has used to log in to One Identity Cloud Access Manager
- Last time the user logged in.
Date and text search filters can be applied to search for specific users within each front-end authenticator.
Role access report
The role access report displays which applications each Cloud Access Manager role has access to. This report is an amalgamation of the Permissions page from each application configuration.
|
|
NOTE: Specific settings for front-end authenticators and applications alongside dynamic user variables may also affect whether a role gains access to an application. Text search and variable filters can be applied to search for roles and/or applications. |

Customizing One Identity Cloud Access Manager
You can customize the appearance of Cloud Access Manager to meet the needs of your users and to match your corporate branding.
You can easily change common aspects of the look and feel using the Customize Appearance options in the Cloud Access Manager Administration User Interface (UI). For example, you can change the colors, company name and logo in the Admin UI. For more extensive changes, you can manually edit the Cascading Style Sheet (CSS) file that is used to style Cloud Access Manager from the Admin UI. If you cannot achieve the look you require by editing the CSS file, you can also edit the HTML of the Login and Home Realm Discovery (HRD) pages.
You can find the customization settings in the Admin UI under Settings | Customize Appearance.
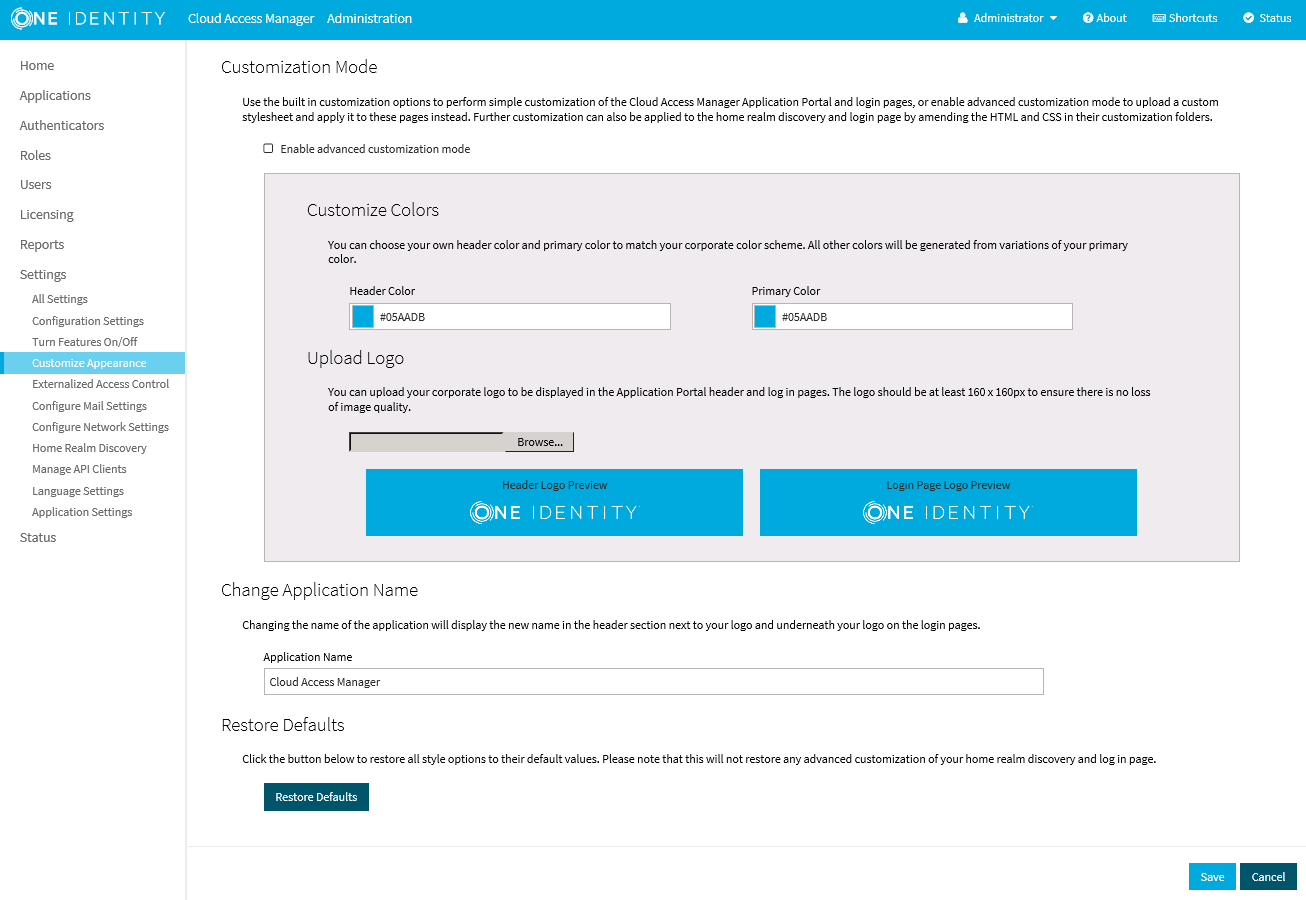
To manually edit the CSS file, select Enable advanced customization mode in the Admin UI. You will then be able to download and upload the CSS file.
If you want to manually edit the HTML for the Login and HRD pages, you need to log in to each of the Security Token Service (STS) hosts and edit the following files manually:
- C:\Program Files\One Identity\Cloud Access Manager\Customization\Login\Login.htm
- C:\Program Files\One Identity\Cloud Access Manager\Customization\HRD\UserIdentity.html
When you edit these HTML files, you must make sure that the changes are applied to each STS host. If you need to include JavaScript or image files, you can place these files in the same directory and reference them using a relative path.