Introduction
This guide describes how to configure Microsoft Office 365 for use with Cloud Access Manager and how to add Microsoft Outlook, Lync, Word, Excel and PowerPoint to the Cloud Access Manager applications portal.
Topics:
Installing Cloud Access Manager
Adding Microsoft Office 365 to Cloud Access Manager
Adding Microsoft Outlook to the Cloud Access Manager applications portal
Adding Microsoft SharePoint to the Cloud Access Manager applications portal
Prerequisites
If required, you can obtain a free 30 day trial of Microsoft Office 365 at:
http://office.microsoft.com/en-gb/try
Make sure the following prerequisites are met before configuring Office 365 for use with Cloud Access Manager
-
You will need:
- An external domain name hosted by a provider that allows you to modify the Domain Name System (DNS) records for your domain. This must include support for adding A, CNAME, SRV and either MX or TXT records.
-
A wildcard Secure Sockets Layer (SSL) certificate signed by one of the Certificate Authorities trusted by Microsoft. Free SSL certificate providers are unlikely to work and self-signed certificates cannot be used.
NOTE: We recommend that you choose a Certificate Authority that is listed in an up-to-date Windows Server 2008/2012 under Third Party Root Certificate Authorities. A regular single hostname certificate can be used, but a wildcard certificate is recommended if you will be using Cloud Access Manager to proxy other applications.
- An external IP address that will be used to forward TCP ports 80 and 443 to the Cloud Access Manager proxy
- To add a wildcard DNS entry for your Cloud Access Manager proxy that resolves to the external IP address of the proxy, for example *.webapps.democorp.co.uk
- A minimum of two hosts; a production two host installation of Cloud Access Manager is required for this configuration of Office 365 for Cloud Access Manager
- A local instance of Microsoft Active Directory
-
A copy of Office 2013 is required on any client browser server where the desktop Office clients will interact with Office 365. It is required to test configuration of the Lync and Outlook clients as described in Adding Microsoft Outlook to the Cloud Access Manager applications portal and Using Microsoft Lync. You can download Office 2013 using your Office 365 account but this may take some time to complete. Earlier versions of Office are also supported by Office 365 (patches may be required), but with degraded functionality.
NOTE: Make sure that the following prerequisites, including the PowerShell execution policy in Step 2, are installed on all STS servers in the Cloud Access Manager deployment.
- The default version of Microsoft .NET Framework and Windows PowerShell supplied with Microsoft Windows Server 2008 R2 or Microsoft Windows Server 2012
- To install Microsoft Windows updates
- Microsoft Online Services Sign-In Assistant, msoidcli_64.msi
-
Windows Azure Active Directory Module for Windows PowerShell, AdministrationConfig-EN.msi
-
The PowerShell execution policy must be set to RemoteSigned using the following command:
PS> Set-ExecutionPolicy RemoteSigned

Installing Cloud Access Manager
To install Cloud Access Manager as a standard two host production system
- Make sure that you have installed Cloud Access Manager as described in the One Identity Cloud Access Manager Installation Guide and that you have configured an Active Directory front-end authentication method as recommended in the One Identity Cloud access Manager Configuration Guide.
- Verify your configuration by confirming that a user on a domain connected workstation can single sign-on (SSO) to the portal without being prompted for their AD credentials, and that the browser shows the portal is using a trusted Secure Sockets Layer (SSL) certificate. The ability to SSO and a signed SSL certificate are required to perform SSO to Microsoft Office 365.
-
For domain connected users the experience with Microsoft Office 365 will be enhanced if Kerberos SSO is enabled on the domain. This allows SSO into Office 365 rich clients, such as Lync and Outlook, without requiring users to re-enter their credentials.
NOTE: Enabling SSO in the browser affects the Primary Credentials functionality in Cloud Access Manager; please refer to the One Identity Cloud access Manager Configuration Guide for details.
Adding Microsoft Office 365 to Cloud Access Manager
To configure Office 365
-
Add the Office 365 application to Cloud Access Manager using the Office 365 template. Follow the steps in the wizard, making sure that you enable provisioning and click Get Additional Options to retrieve your available license plans. Select all of the available license plans.
-
On completion of the wizard, make a note of the federated settings, Relying Party Endpoint URL, Relying Party Realm /Identity, Certificate String and Endpoint URL.
-
Log in to https://portal.microsoftonline.com using your Office 365 administrator credentials and click Domains in the navigation bar.
-
Click Add a domain, then follow the steps in the wizard to register your domain with Office 365.
Depending on which provider is hosting your domain, you may need to manually configure the Domain Name System (DNS) for your domain using the details provided by the wizard.
NOTE: When adding your domain to Office 365 do not make it the default domain. It is not necessary to make it the default domain and it stops the Set-MsolDomainAuthentication powershell command (see step 9) from running successfully.
-
When your domain has been added and verified successfully, close the Office 365 administration console.
-
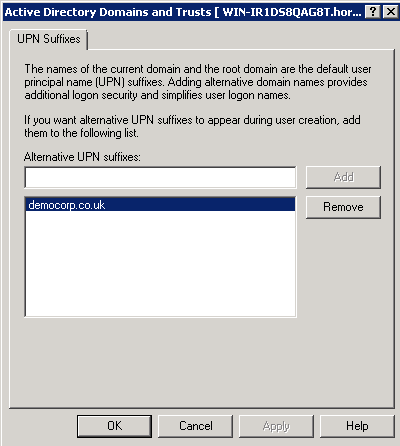
In Active Directory, add your Office 365 domain as a User Principal Name (UPN) suffix using Active Directory Domains and Trusts. Right-click the top node, then select Properties to access the UPN suffixes dialog.
-
Open a PowerShell command prompt.
-
Connect to Office 365 using the following cmdlet which will prompt for your Office 365 administrator credentials.
1 Connect-MsolService -
Run the following command to configure your new domain as a federated domain:
2 Set-MsolDomainAuthentication `–Authentication federated `-DomainName democorp.co.uk `-ActiveLogOnUri https://www.webapps.democorp.co.uk/CloudAccessManager/RPSTS/WSTrust/Service.svc/trust/username `-FederationBrandName "Cloud Access Manager" `-IssuerUri urn:www.webapps.democorp.co.uk/CloudAccessManager/RPSTS `-LogOffUri https://www.webapps.democorp.co.uk/CloudAccessManager/RPSTS/WSFed/Default.aspx `-MetadataExchangeUri https://www.webapps.democorp.co.uk/CloudAccessManager/RPSTS/WSTrust/Service.svc/mex `-NextSigningCertificate "" `-PassiveLogOnUri https://www.webapps.democorp.co.uk/CloudAccessManager/RPSTS/WSFed/Default.aspx `-SigningCertificate "MIIDOzCCAiOg --//-- idCtmMQpRNqT"3 -
Run the following command to verify the domain federation settings:
4 Get-MsolDomainFederationSettings –DomainName democorp.co.ukYou should see the following output:
ActiveLogOnUri : https://www.webapps.democorp.co.uk/CloudAccessManager/RPSTS/WSTrust/Service.svc/trust/usernameFederationBrandName : Cloud Access ManagerIssuerUri : urn:www.webapps.democorp.co.uk/CloudAccessManager/RPSTSLogOffUri : https://www.webapps.democorp.co.uk/CloudAccessManager/RPSTS/WSFed/Default.aspxMetadataExchangeUri : https://www.webapps.democorp.co.uk/CloudAccessManager/RPSTS/WSTrust/Service.svc/mexNextSigningCertificate :PassiveLogOnUri : https://www.webapps.democorp.co.uk/CloudAccessManager/RPSTS/WSFed/Default.aspxSigningCertificate : MIIC8DCCAdigAwIBAgIQALTSvTAuaEIJ2DvWxvPYHTANBgkqhkiG9w0BAQUFADAzMTEwLwYDVQQDDChEZWxsIENsb3VkIEFjY2VzcyBNYW5hZ2VyIEFwcCBPZmZpY2UgMzY1MCAXDTE0MDMwNDAwMDAwMFoYDzIwNT... -
To edit or update the domain federation settings, use the Set-MsolDomainFederationSettings command with the appropriate parameters.
For example, to update the signing certificate:
Set-MsolDomainFederationSettings -DomainName democorp.co.uk -SigningCertificate "MIIC8DCCAdig --//-- SPQTHw9aYYeC"