By configuring the security options you can specify whether CAPTCHA or reCAPTCHA images should be displayed on the Find Your Account page to prevent bot attacks.
reCAPTCHA is a free CAPTCHA service provided by Google.
To start using reCAPTCHA you need to sign up and get reCAPTCHA keys on the following web site: http://www.google.com/recaptcha.
When getting the keys, provide the DNS name of the domain where Password Manager Self-Service sites are installed. If the Self-Service sites are installed in different domains, select the Enable this key on all domains check box to create a global key.
To learn more about using and configuring reCAPTCHA, go to http://www.google.com/recaptcha/learnmore.
To configure security options
- Connect to the Administration site by typing the Administration site URL in the address bar of your Web browser. By default, the URL is http://<ComputerName>/PMAdminADLDS/.
- On the menu bar, click General Settings, then click the Search and Logon Options tab, and select the Self-Service site option from the drop-down list.
- In the Security Settings section select the Show a security image to prevent bot attacks check box to have the Self-Service site display a picture with characters and require the user to enter the characters on the picture. This feature provides enhanced protection against automated attacks.
- Select the Display CAPTCHA radio button if you want the Self-Service site to show CAPTCHA images on the Find Your Account page. Click Settings to configure the following CAPTCHA settings:
- Number of characters Specify the number of characters that will be displayed on a CAPTCHA image.
- Noise level Select the noise level for a CAPTCHA image. The higher the level the more difficult it will be to read the characters.
- Select the Display reCAPTCHA radio button if you want the Self-Service site to show reCAPTCHA images on the Find Your Account page. Click Settings to configure the following reCAPTCHA settings:
- Public key Specify the public key you received when configuring reCAPTCHA on the reCAPTCHA Web site.
- Private key Specify the private key you received when configuring reCAPTCHA on the reCAPTCHA Web site.
- Theme Select a color theme for the reCAPTCHA widget.
- Select the Show a security image every time the search is performed check box to show a CAPTCHA or reCAPTCHA image every time the search is performed on the Find Your Account page of the Self-Service page. Selecting this option increases protection against bot attacks.
- Click Save.
To configure search options
-
Connect to the Administration site by typing the Administration site URL in the address bar of your Web browser. By default, the URL is http://<ComputerName>/PMAdminADLDS/.
|

|
NOTE: When prompted to log in, provide your domain user name in a domainname\username format. |
- On the menu bar, click General Settings, then click the Search and Logon tab, and select the Helpdesk site option from the drop-down list.
- In the displayed text box, specify the attribute of helpdesk operators’ accounts in AD LDS that helpdesk operators should use to log in on the Helpdesk site. For example, userPrincipalName.
- Select the Hide the list of application directory partitions if only one application directory partition is added to the helpdesk scope option if required. If several application directory partitions are included in the helpdesk scope, helpdesk operators will be required to select the corresponding partition before logging in.
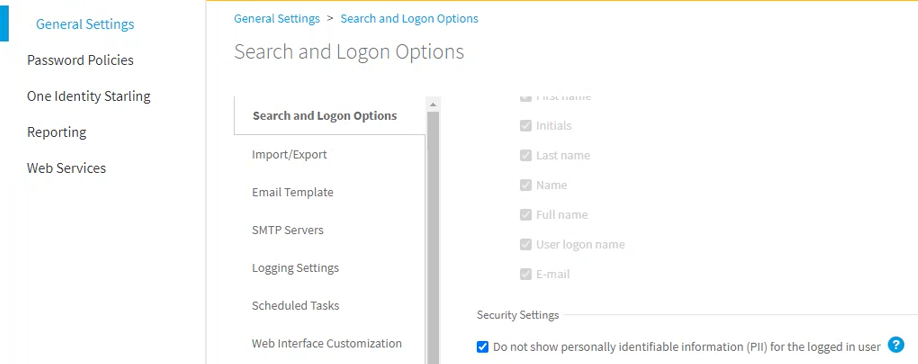
The Password Manager for AD LDS Administration Site offers several security options under General Settings > Search and Logon Options > Security Settings. Use these options to:
By default, the toolbar and the logout pop-up of the Self-Service Site display both the display name and the AD LDS domain name where the user is logged in (in the <User Display Name> (<AD LDS domain>) format). For example:
Sam Smith (ADLDS-domain)
If the security policies of your organization require hiding personally identifiable information (PII) on the user interface, you can configure Password Manager for AD LDS to truncate PII on the Self-Service Site, for example as:
S** S**** (ADLDS-domain)
To hide PII on the Self-Service Site for the logged-in users
-
In the Password Manager Administration Site, navigate to General Settings > Search and Logon Options.
-
Scroll down to Security Settings.
-
Enable Do not show personally identifiable information (PII) for the logged in user.

-
To apply the changes, click Save.
Once you are ready, logging in next time to the Self-Service Site with any user will display truncated PII for the logged-in user.
|

|
NOTE: The amount of user information truncated by the Do not show personally identifiable information (PII) for the logged in user setting is affected by the configured user account search options described in Configuring Search Options for the Self-Service Site
-
Truncating PII with the Do not allow users to search for their accounts option also selected will truncate the entire expanded PII. For example, setting the Users must enter the following user account attribute... > Self-Service Site sub-setting to mail will result in both the user display name and their email address being truncated. For example, Sam Smith (sam.smith@example.com) will be truncated as: S** S**** (s********************)
-
Truncating PII with the Allow users to search for their accounts option also selected will truncate only the user name of the logged-in user, but not the name of the AD LDS instance they are connected to. For example: S** S**** (adlds-instance) |


