
One Identity Safeguard for Privileged Sessions (SPS) Appliance 3500
Unit: 1 U
Drive Bays: 10 x 2.5
Redundant PSU: Yes
NIC:
-
2 x 1GBase-T Ethernet ports
-
2 x 10GBase-T Ethernet ports
IPMI: version 2.0
CPU: 2 x Intel Xeon Silver 4110 2.1 Ghz 8 Core
Memory: 8 x 8GB
HDD: 8 x 2TB + 1 HotSpare
RAID:
- LSI Avago CacheVault Power Module 02 (CVPM02) Kit
- 1 x Broadcom MegaRAID SAS 9361-16i +
RAID Type: RAID 50
Usable Storage: 12 TB
Chassis (W x H x D): 17.2" x 1.7" x 28.5" (437 x 43 x 724 mm)
Weight: 41 lbs (18.6kg)
Wattage IDLE / LOAD: N/A
Electrical: 750W Redundant AC-DC Power Supplies
Operating Temperature: 10°C to 35°C (50°F ~ 95°F)
Non-operating Temperature: -40°C to 60°C (-40°F to 140°F)
Humidity Range: 8% to 90% (non-condensing)
Non-operating Humidity: 5% to 95% (non-condensing)
Compliant to: CE, cCSAus, FCC, VCCI-A
Link to manufacturer documentation
NOTE:The One Identity Safeguard for Privileged Sessions (SPS) Appliance 3500 is equipped with a dual-port 10Gbit interface. This interface has SFP+ connectors (not RJ-45) labeled A and B, and can be found right of the Label 1 and 2 Ethernet interfaces. If you want faster communication, for example, in case of high data load, you can connect up to two 10G SFP+ transceivers. These transceivers are not shipped with the original package and have to be purchased separately.
List of appliance ports

-
Redundant power supplies
-
2x RJ45 10GbE Ethernet ports
-
2x 3.0 USB ports
-
Dedicated IPMI LAN port
-
Serial port
-
VGA port
-
2 x 1GBase-T Ethernet ports
-
2x SFP+ 10GbE ports
One Identity Safeguard for Privileged Sessions Software Installation Guide
This document describes how to install the One Identity Safeguard for Privileged Sessions (SPS) software on a certified hardware. The list of certified hardware is available at One Identity.
Note that installing and reinstalling SPS can take a long time, especially for a HA cluster. There are no supported workarounds for reducing the necessary downtime. One Identity recommends testing SPS in a virtual environment, and using physical hardware only for verifying HA functionality and measuring performance.
Installing the SPS software
The following describes how to install a new SPS on a server.
Prerequisites:
When installing SPS on a physical hardware, make sure that you use a One Identity-supported appliance, and that every hard disk required for the particular appliance is inserted. Installing SPS without the required number of hard disks can cause erroneous behavior.
To install a new SPS on a server
-
Login to your support portal and download the latest One Identity Safeguard for Privileged Sessions installation ISO file. Note that you need to have partner access to download One Identity Safeguard for Privileged Sessions ISO files. If you are a partner but do not see the ISO files, you can request partner access within support portal.
-
Mount the ISO image, or burn it to a CD-ROM.
-
Connect your computer to the IPMI interface of SPS. For details, see the following documents:
For Safeguard Sessions Appliance 3000 and 3500, see the X9 SMT IPMI User's Guide.
-
Power on the server.
-
Login to the IPMI web interface, and boot the One Identity Safeguard for Privileged Sessions installation CD on the server using a virtual CD-ROM. For details, see the following documents:
For Safeguard Sessions Appliance 3000 and 3500, see the X9 SMT IPMI User's Guide.
-
When the One Identity Safeguard for Privileged Sessions installer starts, select Installer, press Enter, and wait until the server finishes the boot process.
TIP: For testing purposes, you can speed up installation at the expense of slowing down RAID synchronization. Add the following kernel parameter to Installer in GRUB:
lazy_itable_init=true
This option defers full filesystem initialization, requiring the kernel to finish it during RAID synchronization, which slows that process down considerably. This is not recommended in a production environment.
-
Installing SPS will completely delete the contents of the hard disks. If you want to proceed installing SPS, enterYESto start the installation process. Depending on the size of the disks, the installation process takes from a few minutes to an hour to complete.
Caution: Hazard of data loss All data on the disks will be deleted.
-
The installer displays the following message: Waiting for RAID sync..., and starts to synchronize the disks of SPS.
-
You are recommended to wait until the synchronization finishes. RAID synchronization is a two-step process, the progress of the active step is indicated on the progress bar. Wait until both steps are completed. Note that this synchronization takes several hours, depending on the size of the hard disks (about 8 hours on the average).
-
To skip the RAID synchronization, pressCtrl+Alt+Deleteto reboot SPS. Note that the system will automatically perform the synchronization after the first boot, but in this case the process will take several days.
-
-
When the installation is finished, the Installation finished successfully message is displayed. Unmount the installation media, then press Ctrl+Alt+Delete to reboot SPS. Wait until the system reboots and displays the IP address it accepts management connections on.
-
If you are installing the slave node of a SPS cluster, skip this step. Enter the IP address displayed in the previous step into your browser and verify that the Welcome Wizard of the One Identity Safeguard for Privileged Sessions is available. (If you have to create an alias IP address for your computer that falls into the 192.168.1.0/24 subnet (for example 192.168.1.10), see "The initial connection to One Identity Safeguard for Privileged Sessions (SPS)" in the Administration Guide.)
NOTE: For details on the supported web browsers and operating systems, see "Supported web browsers and operating systems" in the Administration Guide.
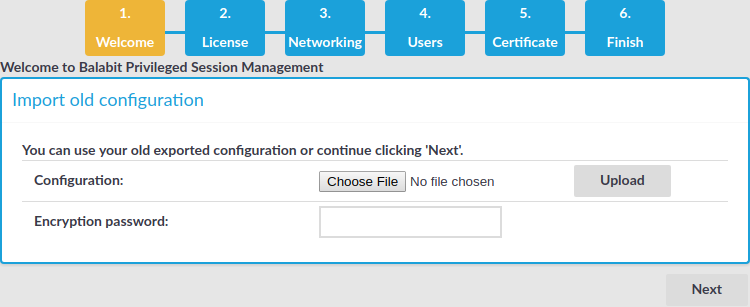
Figure 1: The Welcome Wizard
-
Power off the system.


One Identity Safeguard for Privileged Sessions VMware Installation Guide
This tutorial describes the possibilities and limitations of installing One Identity Safeguard for Privileged Sessions (SPS) 6.0.10 as a virtual appliance under a VMware ESXi server.