
How to install and configure the IBM AS/400® Connector
How to install and configure the IBM AS/400® Connector
The IBM AS/400® Connector is distributed in a standard Microsoft MSI format which contains the required files to install and configure the AS/400 Connector in an existing One Identity Quick Connect environment. The following sections describe:
- Installing the One Identity Quick Connect for IBM AS/400® Connector
- Adding a new IBM AS/400® Connector
- Configuring the IBM AS/400® Connector attributes
- Configuring IBM AS/400® password synchronization
Installing the One Identity Quick Connect for IBM AS/400® Connector
Installing the One Identity Quick Connect for IBM AS/400® Connector
This section describes how to install the IBM AS/400® Connector on Microsoft® Windows Server® 2008 or above, or on an existing installation of One Identity Quick Connect.
To install One Identity Quick Connect for IBM AS/400®Connector software
-
To start the installation for:
-
32-bit systems – double-click the QuickConnectForAS400_x86.msi installation routine.
-
64-bit systems – double-click the QuickConnectForAS400_x64.msi installation routine.
-
-
The Welcome Wizard starts. Click Next.
-
Read the License Agreement, select the I accept the terms in the license agreement box, and then click Next.
-
Enter your name and organization.
-
Click Install.
The files will be copied to your system. On completion of the installation, you will be prompted to restart your One Identity Quick Connect Service.
Verifying the Connector installation
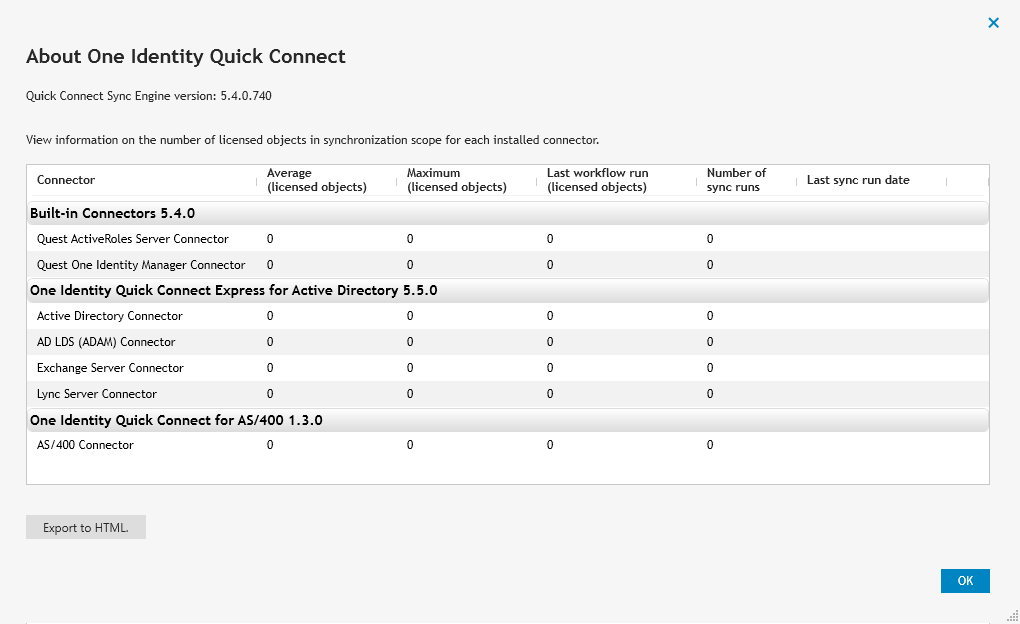
To verify the IBM AS/400® Connector installation, click About in the top right-hand corner of the Quick Connect Console. The About Quick Connect page is displayed. If the installation was successful, the AS/400 connector is included in the list of installed connectors.
Figure 1: About Quick Connect
Adding a new IBM AS/400® Connector
Adding a new IBM AS/400® Connector
The Quick Connect Sync Engine provides an Add Connection wizard. The wizard adds a specific external data source to the One Identity Quick Connect environment and configures a connection to that data system. You can manually start the wizard using the following procedure:
To add an external data source to One Identity Quick Connect
-
In the Quick Connect Administration Console, select Connections.
-
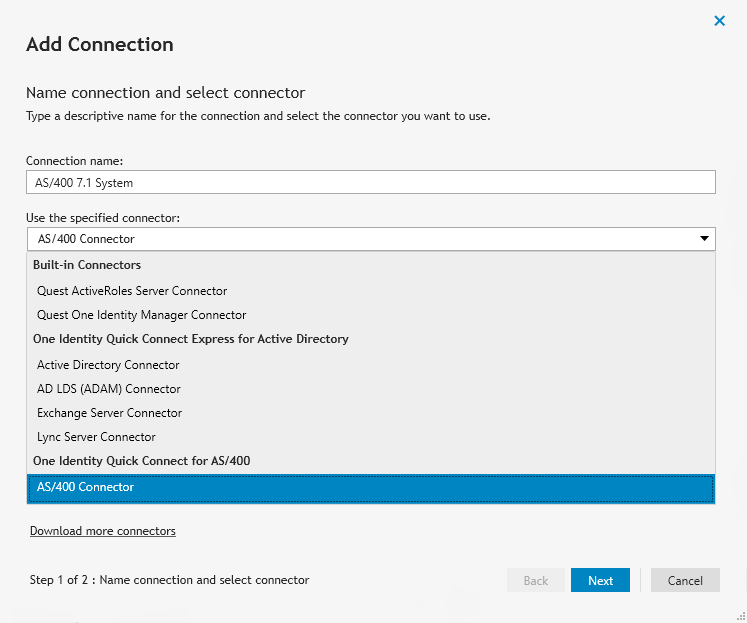
Click the Add connection link. The Name connection and select connector page is displayed:
-
Enter a Connection name.
-
In the Use the specified connector field, choose the AS/400 Connector from the list. Click Next.
-
When establishing a connection to an AS/400 LDAP directory service, the wizard prompts you to complete the Specify connection settings for LDAP directory service.
-
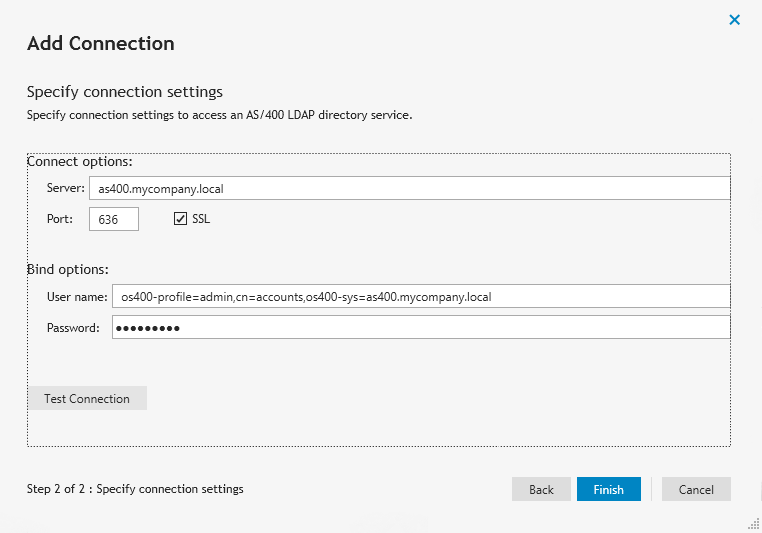
On the Specify connection settings for AS/400 page, specify the AS/400 LDAP service to connect to and the account that the application will use to access the AS/400 LDAP service.
This page is similar to the following screen:
To specify connection settings to access an AS/400 LDAP directory service
-
Open the Specify connection settings for AS/400 page.
-
In the Server field, type the fully qualified DNS name of the AS/400 server running the LDAP service.
-
In the Port field, type the AS/400 LDAP communication port number in use by the service. (The default port numbers are 389 for non SSL and 636 for SSL encrypted data).
-
In the User name field, specify the fully distinguished name (DN) of the account under which the application will access the AS/400 LDAP directory service.
-
In the Password field, specify the password of the user account under which the application will access the AS/400 LDAP directory service. We recommend that you select the SSL check box if synchronizing sensitive data between connectors.
-
Optionally, click Test Connection to verify that the credentials provided can access the AS/400 LDAP service.
-
Click Finish.