Chat now with support
Chat with Support

Safeguard Authentication Services 5.0.4 - SSO for SAP Integration Guide

Prompting for user name and password

By default, Single Sign-on for SAP performs automatic authentication using the credentials of the currently logged-in Windows user. In some situations, you might want users to provide an Active Directory user name and password when logging in to SAP. You can configure Single Sign-on for SAP to display a login prompt whenever a new authentication request is generated.

When you enable authentication prompting, users see an authentication dialog where they must enter an Active Directory user name and password in order to gain access to SAP. The user name can be in any one of these formats:

  • SAM account name (if the computer is joined to the user's domain)
  • <DOMAIN>\<SAM account name>
  • <SAM account name>@<DOMAIN>

Enabling authentication prompts

To enable Active Directory authentication prompting from the Single Sign-on for SAP module

  1. Change the following registry value from 0 to 1.

    On 32-bit machines:

    HKEY_LOCAL_MACHINE\Software\Quest Software\SSO for SAP\Always Prompt

    On 64-bit machines:

    HKEY_LOCAL_MACHINE\Software\Wow6432Node\Quest Software\SSO for SAP\Always Prompt

Configuring SAPlpd on the front-end system

To use SAPlpd with SNC, you must provide the SAPlpd system on the front-end desktop with the local library path and identity information.

To configure SAPlpd on the front-end system

  1. In the Windows directory, create a SAPLPD.INI file, if one does not already exist.
  2. Add the following section to the SAPLPD.INI file:
    [snc]
    enable=1
    identity/lpd=<SNC-Name_of_saplpd>
    gssapi_lib=<drive>:\path\to\your\snclib.dll

    Note: You can omit the gssapi_lib= entry when you have the environment variable, SNC_LIB, configured to be a system environment variable.

    The identity/lpd variable, <SNC-Name_of_saplpd>, is in the SNC form of the user logged in and running SAPlpd. You must use this format: u:samaccountname@realm where sAMAccountName is the SAM-Account-Name of the currently logged in user and example.com is the Active Directory domain name.

    Note: You can also add these settings to the WIN.INI file if you do not want to create the SAPLPD.INI file.

  3. Run SAPlpd.

    A window appears listing the output from the SAPlpd startup:

  4. From the SAPLOPD.LOG – SAPLPD window, select the Options | Secured Connections menu item.  
  5. On the Secured connection dialog, select the Use if possible and Privacy protection of data options and click the Add new connection button to go to the Access Control List maintenance for SAPlpd.

  6. On the Authorized connections dialog, in the Last authenticated connection initiator field, enter the SNC-name of the application servers that will be transferring print jobs to this SAPlpd using SNC.

    This is the value of the snc/identity/as key from the instance profile on the Safeguard Authentication Services-enabled SAP Server. See Enabling SNC on the SAP server.

  7. Click Authorize to add this name to the list of authorized connection initiators.
  8. Close all open SAPlpd dialogs by clicking their OK buttons.

    Your front-end desktop is now configured to securely connect.

Configuring SAPlpd on the SAP server

To configure SAPlpd on the SAP server

  1. Create a new output device (Printer) by navigating to Configuration | Output devices from the Spool Administration screen.

    You can apply these same settings to an existing device.

  2. Click the Device Attributes tab.

  3. Enter the appropriate information:
    • Output Device
    • Short name
    • Device Type
    • Spool Server

    To populate the Spool Server field, click F4 or 
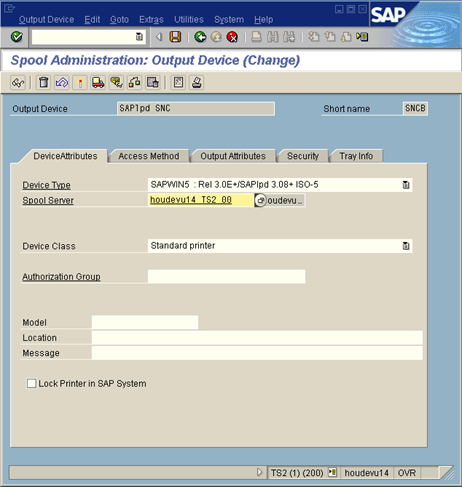
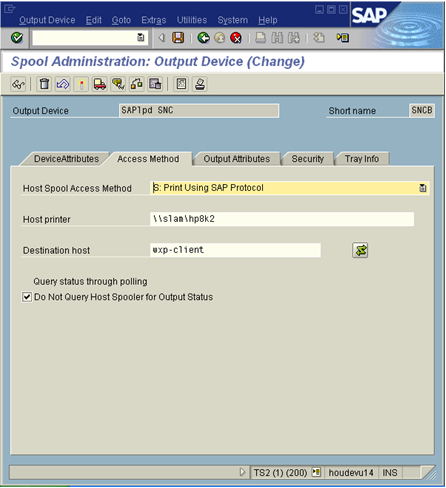
, the folder icon next to the Spool Server field, to list all the application servers with a color-coded background. The application servers running a spool process are highlighted in green.

  4. Click the Access Method tab.

  5. Set the Host Spool Access Method to S: Print Using SAP Protocol.
  6. Enter the host name of the printer.
  7. Enter the host name of the front-end system as the Destination host.
  8. Select the Do Not Query Host Spooler for Output Status option.
  9. Select the Security tab and select a level of security: Only Authentication, Integrity Protection, or Privacy Protection.

  10. Change the Security Mode to Only Use Secure Transfer to specify that you want SNC to be required.
  11. In the Identity of the Remote SAPlpd for the Security System field, enter the SNC name in the format.
    u:samaccountname@realm

    This is the Active Directory user who will be logged in when using this instance of SAPlpd.

  12. Save the changes and exit the Spool Administration screens.
Related Documents

The document was helpful.

Select Rating

I easily found the information I needed.

Select Rating