
Security Analytics Engine Overview
Plugins
Conditions
Introduction
Conditions page
Condition types
Applications
Abnormal Browser
Abnormal Location
Abnormal Time
Associated w/ Malware
Dynamic Blacklist
Restricted Country
Approved Country
Whitelist
Adding and managing conditions
Introduction
Applications page
Adding and managing applications
Adding and managing risk policies
Application wizard
Auditing
Introduction
Auditing page
Filtering the audit events
Configuring the retention settings
Displaying details for an individual audit event
Adding and managing overrides on the Auditing page
Policy Overrides
Fallback Password
Security Settings
Glossary
About Dell
Security wizard pages
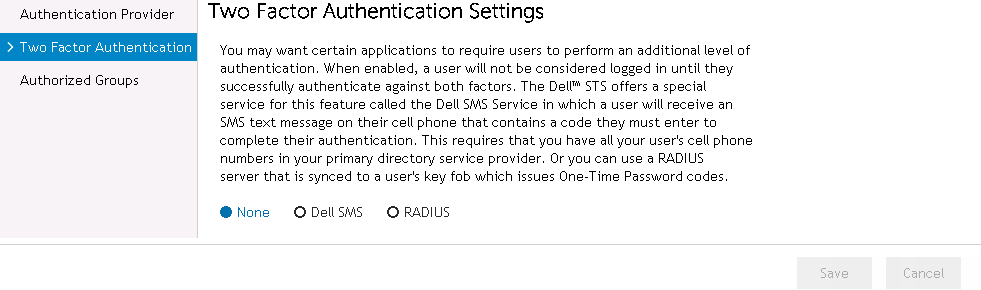
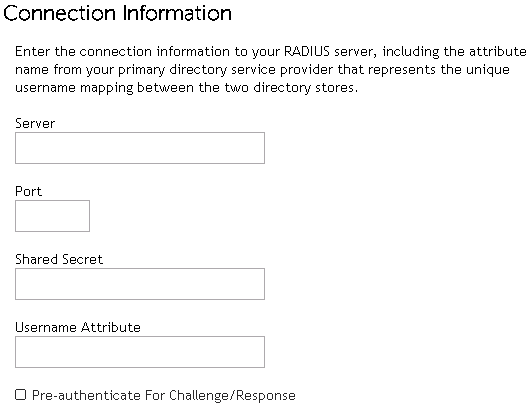
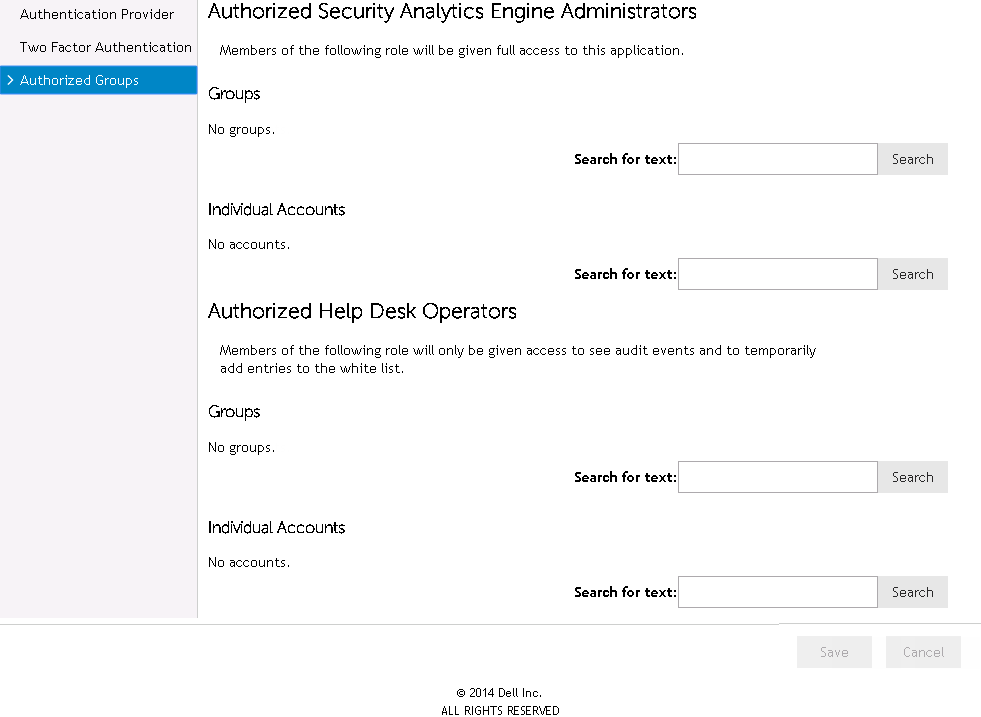
The Security wizard is displayed when the Security Settings link is clicked on the Home page. This wizard is used to enter connection settings to your directory service provider, enable two factor authentication, and assign permissions to groups.
 | |||||||||
|
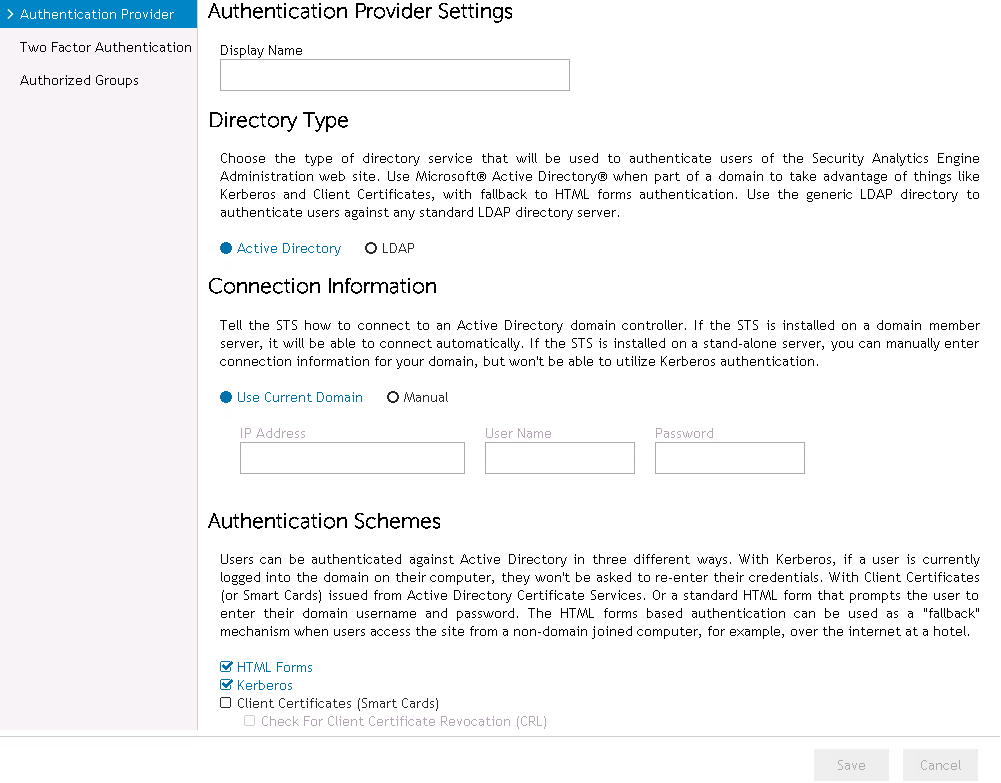
In the Display Name field, enter a name for the authentication provider. This is a display name that is only used within the Administration web pages. | |||||||||
| |||||||||
 | |||||||||
|
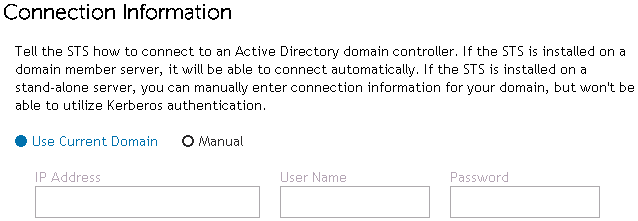
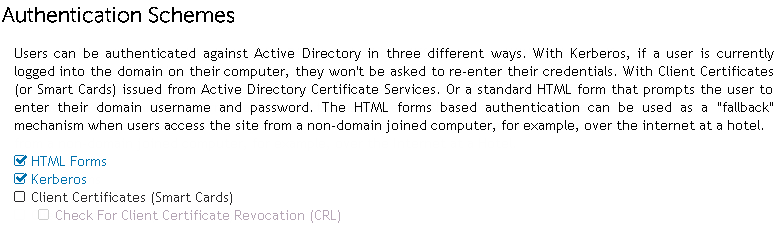
Select this option to connect using the domain member server where the Security Analytics Engine is installed. This option is intended to be used when you install the Security Analytics Engine on a member server of your corporate Active Directory domain in which you want to authenticate users. The Security Analytics Engine Windows® service uses the credentials of the service account (LocalSystem or an account specified during installation) to connect to Active Directory. | |||||||||
| |||||||||
 | |||||||||
 | |||||||||
|
NOTE: This option is NOT available when Manual is selected on the Connection Information pane or when the Security Analytics Engine is installed on a non-domain joined server. | |||||||||
 | |||||||||
|
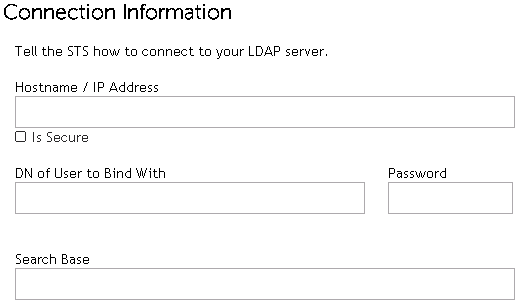
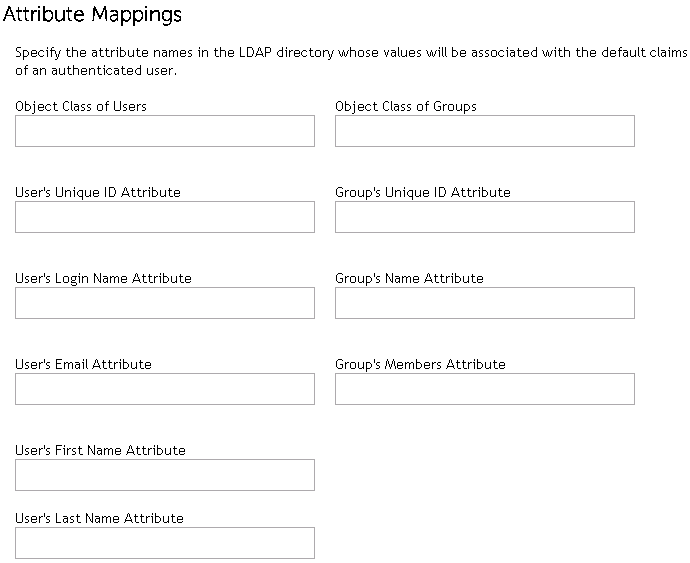
(Optional) Enter the name of an attribute that can be used to uniquely identify a user account. If no value is specified, the object’s distinguished name is used. If you know that the Group’s Member Attribute value contains something other than distinguished names, you need to set the User’s Unique ID Attribute field accordingly.
| |||||||||
 | |||||||||
 | |||||||||
 | |||||||||
 | |||||||||
| |||||||||
|
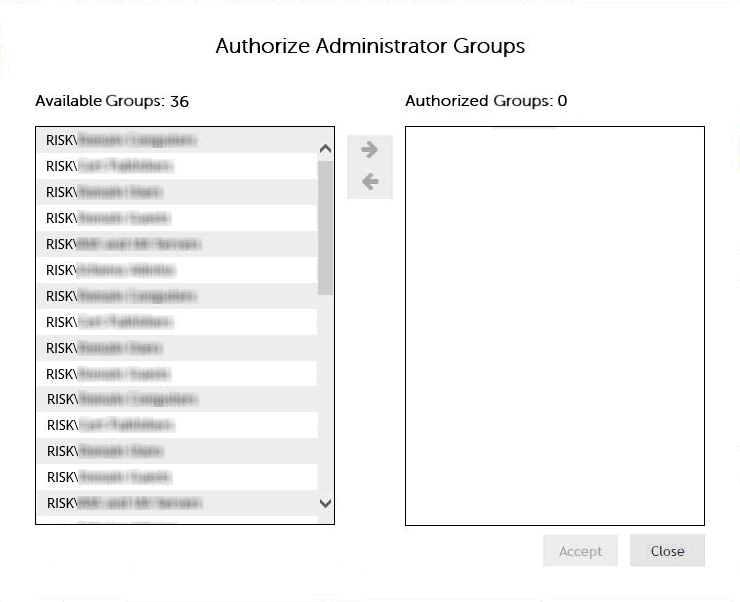
This dialog appears when the Search button is clicked in the Group section of the Authorized Security Analytics Engine Administrators section.
 | |||||||||
|
|
|||||||||
|
|
|||||||||
|
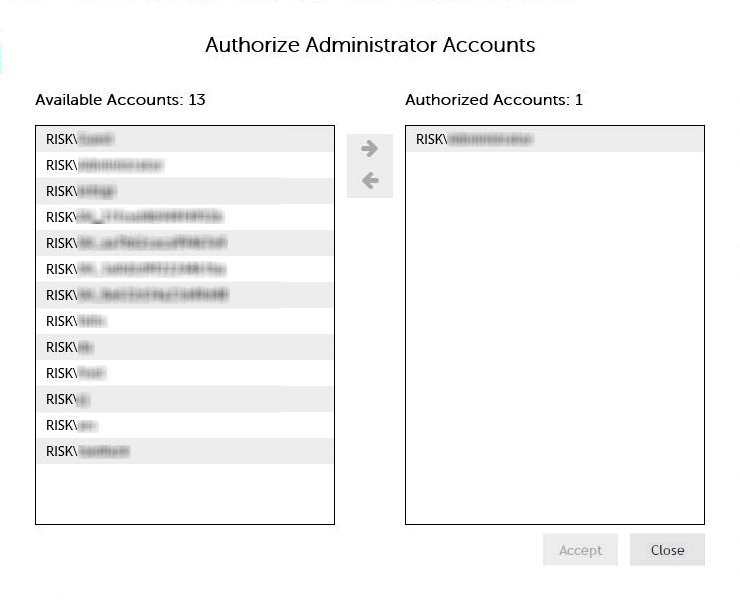
This dialog appears when the Search button is clicked in the Individual Account section of the Authorized Security Analytics Engine Administrators section.
 | |||||||||
|
|
|||||||||
|
|
|||||||||
|
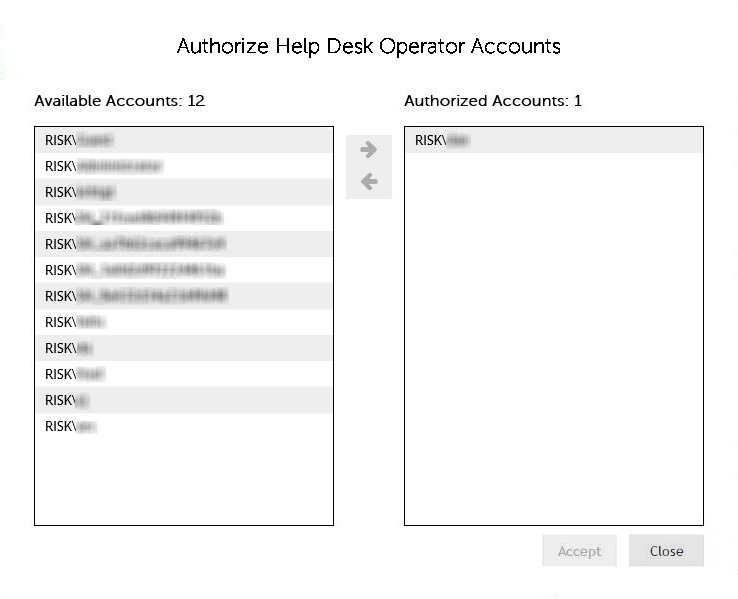
This dialog appears when the Search button is clicked in the Group section of the Authorized Help Desk Operators section.
 | |||||||||
|
|
|||||||||
|
|
|||||||||
|
This dialog appears when the Search button is clicked in the Individual Account section of the Authorized Help Desk Operators section.
 | |||||||||
|
|
|||||||||
|
|
|||||||||
Glossary
About Dell
Dell listens to customers and delivers worldwide innovative technology, business solutions and services they trust and value. For more information, visit www.quest.com.
Product Questions and Sales:
(800) 306-9329
(800) 306-9329