
Step 1: Create A Configuration
Each VDS process runs with a configuration that specifies what to do with the packets of data that it receives. So, the first step needed to run VDS is to create a configuration.
Fig-1: Creating a new Configuration

To create a configuration press the New Config button in the toolbar (on the far left). A file chooser will be shown that allows you to enter a name for the configuration. The default path used to store the configuration is the subdirectory confs within the directory that VDS is installed. Click on the Filename field and write test as the name of your configuration and then click the New Config button. DSGUI will create a minimal default configuration. This configuration will need you to define an input listener, a processing stage and an output DataSource.
Step 2: Create A Listener
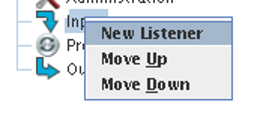
Listeners are the "input" nodes of VDS - where clients connect to. Each listener needs a port number on which it will listen. There are several types of listeners available, allowing VDS to support a variety of different protocols. We will start by creating a Listener that makes use of the LDAP protocol. To create the listener, right-click on the Input node in the configuration tree in the navigation panel on the left side of the GUI. Select New Listener from the pop-up menu as depicted in the image.
Fig-2: Creating a new Listener
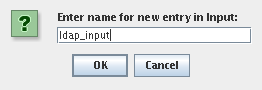
A window will pop up, asking you to enter a name for the new listener. You can choose any name that you wish - in this example, we have used the name ldap_input. Press the OK button.
Fig-3: Entering a Name for your new Listener
You will now see the newly created listener node as a sub-node of the Input node in the configuration tree in the navigation panel. Select the node by clicking on it. The configuration panel will appear on the right-hand side of the GUI window, and will display the various settings that need to be configured for the new listener.
Fig-4: The Listener Configuration Panel
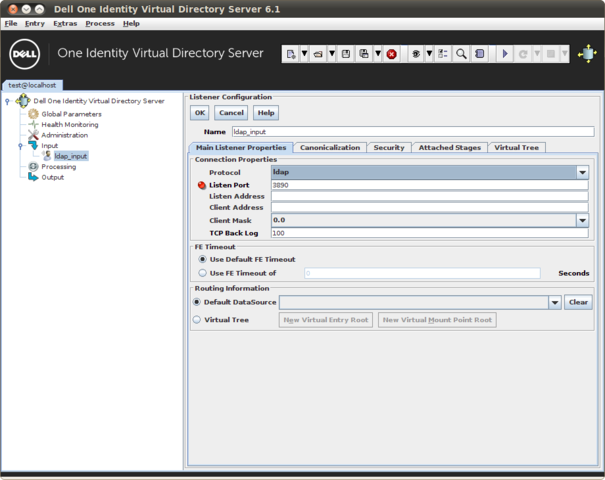
Now configure a port on which VDS should listen. If you are logged in as the root user under UNIX, and if no other server is listening on port 389 on your machine, you can leave the port as 389. Be aware that if you already have an LDAP server running on the same computer that VDS is installed on, it is likely that this LDAP server will already be using port 389, and will conflict with VDS when you attempt to run an instance of VDS with this configuration. In Windows, Active Directory is by default configured to listen at port 389. For this reason, we recommend that you change this setting to port "3890" as a safe alternative, or if you are not the root user on the computer that will run VDS.
The listen address is useful if your machine has multiple IP addresses, and you want VDS to listen only on one address. By default this field is left blank, meaning that VDS will listen on the specified port on all its IP addresses. In this first example, you may leave this field blank.
Leave every other parameter the way it is. Since we have not created a DataSource yet, we cannot yet select the Default DataSource. In the next steps, we will create a DataSource, and then come back to the listener configuration and set the newly created DataSource as the "Default DataSource" for this listener. In a similar way, we will create a processing stage that will need to be attached to the listener later.
Step 3: Create A DataSource
A DataSource defines the "output" for VDS - the back-end servers that VDS can send traffic to.
DataSources are simple to set up and come with useful built-in functionality, such as load-balancing or fail-over facilities. Health checking is also available for DataSources. Last, but not least, it is even possible to use a relational database as a virtual back-end for DataSources. Should you choose to make use of a relational database as a backend, you are able to define one or more tables or views in the database that will be treated as a Virtual Tree to be accessed via LDAP.
In our example configuration, you can proceed by creating a DataSource. Right-click the "Output" node in the tree and then select "New DataSource". You will be asked for a name of your DataSource. You can call this DataSource any name that you like. In our example, we are using the name "ldap_output".
DSGUI will create a sub-node under the "Output" node in the tree, labelled with the name that you provided above. Click on your newly created DataSource node and a configuration panel will appear on the right hand side of the DSGUI window.
The next sections describe how to configure your DataSource. When you are finished editing the form in the configuration panel, click on the "OK" button to commit the changes that you have made to the current node. If you forget to press the "OK" button after configuring the listener, a warning dialog will pop up to ask you whether you want to save your settings to this node. This does not mean that the whole configuration is saved to disk - it just means that the changes you have made are applied to the node that you have been working on. If you choose not to save your changes, they will be discarded, and when you next select your listener, you will see the original listener configuration.
Configure your DataSource
The configuration panel, where you will configure your DataSource settings, will look different depending on the Protocol that you have selected for your DataSource. By default, the protocol is set to LDAP and the configuration panel has four tabs: Servers, Security, Reliability/Performance and Health Check. If you change the protocol to Relational Database, the configuration panel will change to provide alternative settings. In our example, we will stick to working with the default LDAP protocol. In order to keep things simple, we will ignore the Security tab. Since we are only making use of LDAP, and not LDAPS, the SSL settings can be ignored. We will equally ignore the SASL settings as enabling this functionality requires a number of additional system configuration steps that are beyond the scope of this tutorial. In order to complete the configuration of our DataSource, we will need to:
-
Provide the hostname or IP address and the port for each server
-
Configure a Fail-over / Load-balancing strategy
-
Define whether or not to use Connection Pooling
-
Determine whether the Default Health Checking options should be used, or set health-checking parameters specific to the DataSource
Adding Servers to your DataSource
We are almost finished configuring the DataSource. What remains is the essential step of adding at least one server to the DataSource. Make sure that the Servers tab in the configuration panel is selected. When this tab is selected, a tabulated list with three fields is available:
-
Server name
-
Hostname / IP Address of the server
-
Port of the server
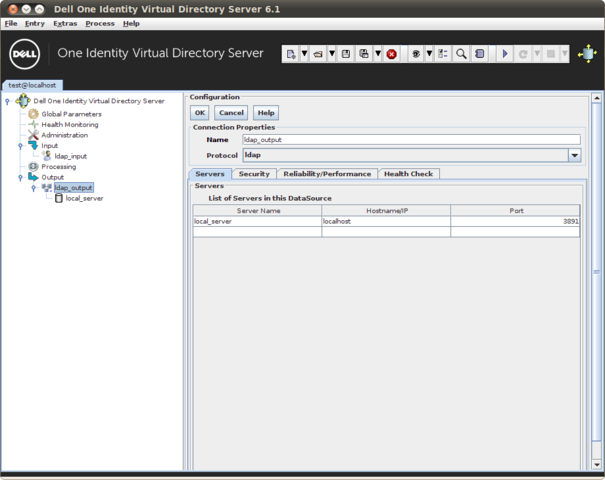
Right click on the DataSource node in the configuration tree and choose "New Server", or right click on the Servers table and insert a new row. Add the host name or IP address and the port of your back-end LDAP and optionally choose a different name for it. In our set-up, and for this example, we are running our LDAP server on the same computer on which we are running VDS, so we will configure the name localhost for the server name with port 3891. Obviously, you should use the host name / IP address as well as the port number for the server on which you are running your example LDAP server, if you have a different setup to ours.
Fig-5: Configuring the List of Servers
When you are finished configuring the DataSource, click on the "OK" button. Your changes will now be applied to the DataSource. Although we will be making no further changes to the DataSource configuration, it is worth having a look at the settings available to you under the other two tabs that we have mentioned.
Configure Fail-over for your DataSource
If you click the Reliability/Performance tab in the configuration panel, you will see a panel that will allow you to configure load-balancing and failover options for the DataSource that you are configuring.
Fig-6: Configuring Reliability / Performance
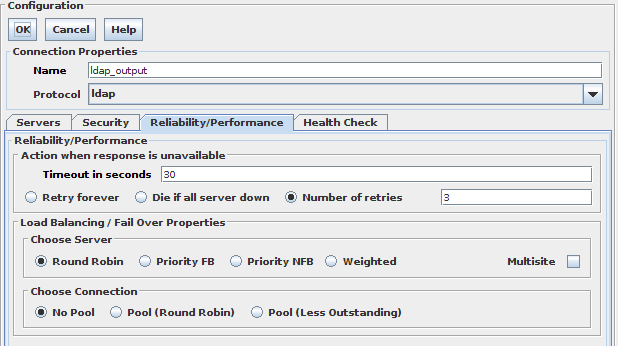
DataSources implement fail-over, load-balancing or multisite facilities with health-checking by default. This functionality is applicable as soon as you have more than one server listed within the DataSource. In our simple configuration, only one server is listed within the DataSource, so it really doesn't matter whether you select fail-over, load-balancing or multisite, as this functionality will not be applied to the DataSource until another server is added.
By default, Round Robin server-choosing algorithm is selected. Leave this setting as it is for now. If you decide to add further servers to this DataSource in the future, you may want to define your failover strategy here.
Configure Connection Pooling
The section entitled Choose Connection will allow you to configure VDS's connection pooling functionality.
Fig-7: Configuring Security
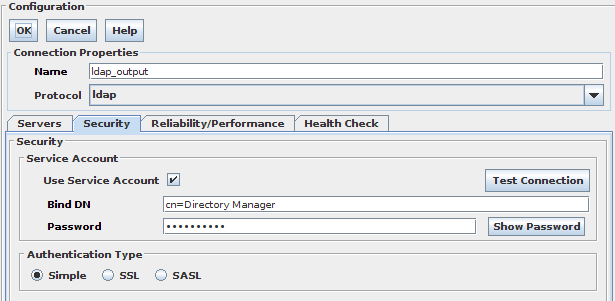
Connection Pooling is a useful feature that can enhance performance dramatically when you have LDAP clients that connect to VDS frequently, and only perform a few operations with each connection.
The main idea behind connection pooling is that VDS will open a number of connections to the back-end servers, and will send requests over these connections. When connection pooling is used, special care must be taken in order to ensure that connection credentials are properly handled. Connection pools need a Service Account set up, and support fixed credentials, SASL and SASL Impersonation. Service Account means that no matter how LDAP clients bind to VDS, each non-bind request (i.e. every LDAP request except for BIND and UNBIND) are sent to the back-end servers using the connection pool. The connection pool is pre-bound using the Service Account supplied. Since this overrides the default permissions based model, this can potentially be dangerous, and should only be used if you know exactly what you are doing - for example, if you implement your own access control within VDS or if you want to make sure that all your LDAP clients have the same privileges.
If you have Kerberos properly configured, you can take advantage of SASL / GSSAPI to preauthenticate connections within your connection pool. You will need to have SASL enabled in your DataSource in order to be able to select this option. This option simply takes advantage of a Kerberos session that has already been established by the host on which VDS is running, and all of the connections that are opened for this connection pool will have the credentials for this Kerberos session.
If you would prefer that connections that are established for the connection pool are authenticated to allow for Kerberos delegation using the S4U Extensions, you are able to use the SASL Impersonation option. Once again, you will need to have SASL enabled in your DataSource in order to be able to select this option. In the Bind DN field, you will need to provide the username of the user that you want to establish the connections as.
In our example configuration, we will not use connection pooling, so you can ensure that the No Pool option is selected.
Step 4: Add A Processing Stage
You will now configure a simple automatic stage that will intercept requests and responses and act on them, in this case to perform logging.
Right click on the "Processing" node in the configuration tree and select "New Stage". Choose a name such as "Logging" and leave the Stage Type as "Automatic", then click on "OK". The stage name will remain in red until attached to a listener.
Fig-8: Set up Logging Stage
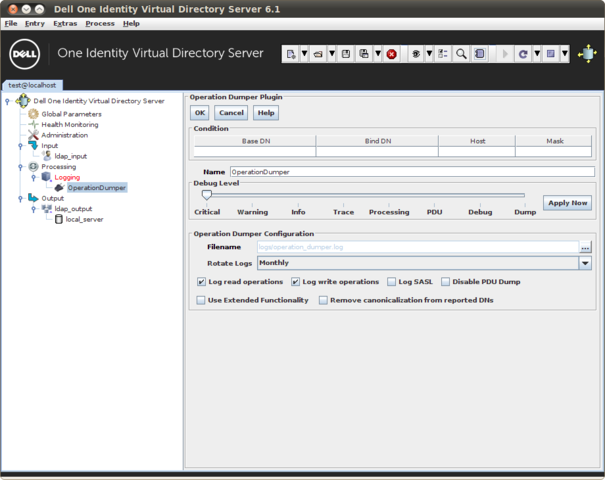
Now you will choose what functionality must be performed by the stage, and you can do it by right-clicking on the stage node in the configuration tree and selecting "Add Plugin". The list of available plugins will be shown with a small description, and you can choose "Operation Dumper" in the "Logging" section. Click on "OK" and the functionality will be ready, although it will not be active until attached to the listener in the next step.