Configuring data synchronization with the Generic SCIM Connector
With the Generic SCIM Connector, you can configure inbound data synchronization connections for a set of SCIM 2.0-based One Identity Starling Connect connectors:
NOTE: Consider the following when planning to configure a SCIM-based data synchronization connector:
-
The Generic SCIM Connector was tested with the following Starling Connect connectors:
While the Generic SCIM Connector may work with other SCIM 2.0-based Starling Connect connectors, One Identity tested it to work only with those connectors and connector versions.
-
To configure a connection to the PingOne connector of Starling Connect, use the SCIM Connector of Active Roles . For more information, see Configuring data synchronization with the SCIM Connector.
For the list of Active Roles connector features that the Generic SCIM Connector supports or does not support, see the following table.
Table 105: Generic SCIM Connector – Supported features
|
Bidirectional synchronization
Specifies whether you can both read and write data in the connected data system. |
No |
|
Delta processing mode
Specifies whether the connection can process only the data that has changed in the connected data system since the last synchronization operation. This reduces the overall synchronization duration. |
No |
|
Password synchronization
Specifies whether you can synchronize user passwords from an Active Directory (AD) domain to the connected data system. |
No |
|
Secure Sockets Layer (SSL) data encryption
Specifies whether the connector can use SSL to encrypt data transmitted between Active Roles and the connected data system. |
Yes |
For more information on the SCIM protocol, see the official SCIM site, or the following IETF RFC documents:
-
IETF RFC-7642: System for Cross-domain Identity Management: Definitions, Overview, Concepts, and Requirements
-
IETF RFC-7643: System for Cross-domain Identity Management: Core Schema
-
IETF RFC-7644: System for Cross-domain Identity Management: Protocol
Configuring the Generic SCIM Connector for Starling Connect connections
You can configure an Active Roles connection to the following Starling Connect connectors with the Generic SCIM Connector:
Prerequisites
Before configuring the connection, make sure that the following conditions are met:
-
Your organization must have an active Starling Connect account.
-
The Starling connector to which you want to connect must be already configured in Starling Connect.
-
If your organization is using a proxy server for outbound connections, make sure that the system level proxy settings are properly configured.
To configure system-level proxy settings, navigate to one of the following Windows configuration pages:
-
You are aware of the specific implementation details (such as the supported objects and operations) of the Starling Connect connector you want to connect to. For more information, see the connector-specific sections of the Starling Connect Active Roles Administration Guide.
To configure a connection to a Starling Connect connector with the Generic SCIM Connector
-
In the Active Roles , navigate to Connections > Add Connection.
Figure 4: Active Roles – Adding a new connection via Connections > Add connection

-
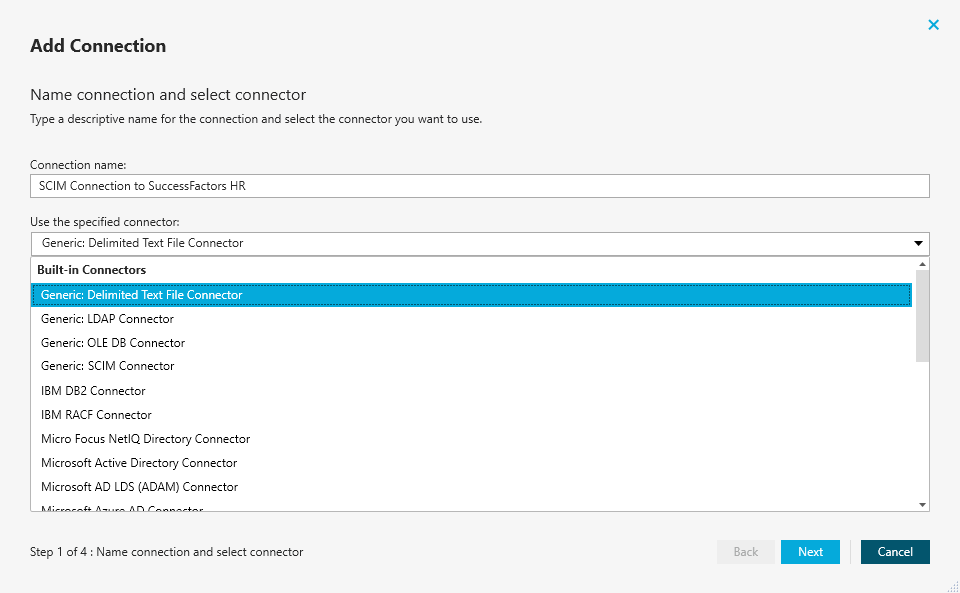
In the Name connection and select connector step, specify a custom Connection name. Then, to load the SCIM-specific connector settings, from the Use the specified connector drop-down list, select Generic: SCIM Connector.
Figure 5: Add Connection – Specifying the connection name and connector type
-
(Optional) If you want to use a remote connector for the configured connection, configure Remote connector access as described in Creating a connection using a remotely installed connector. To continue, click Next.
-
To continue, click Next.
The Connection settings step of the Generic SCIM Connector appears.
Figure 6: Generic SCIM Connector – General, authentication and implementation settings

-
Under General settings, specify the base SCIM URL of the Starling Connect connector to which you want to connect.
TIP: To check the base SCIM URL of the Starling Connect connector, in Starling Connect, navigate to Connectors > Active Connectors, select the SCIM-based connector to which you want to connect, then copy the value of the SCIM URL property.
-
Under Authentication settings, to enable the authentication scheme options required by the supported Starling Connect connectors, select the Starling authentication scheme, then configure the following settings:
-
Token endpoint URL: Specifies the full path of the Starling connector token endpoint.
TIP: To find the token endpoint URL of the Starling Connect connector, in Starling Connect, navigate to Connectors > Active Connectors, and copy the value of the SCIM Token Endpoint URL property.
-
Client ID: Specifies the SCIM client ID.
TIP: To find the SCIM client ID of the Starling Connect connector, in Starling Connect, navigate to Connectors > Active Connectors, and copy the value of the SCIM Client ID property.
-
Client secret: Specifies the SCIM client secret.
TIP: To find the SCIM client secret of the Starling Connect connector, in Starling Connect, navigate to Connectors > Active Connectors, and copy the value of the Show SCIM Client Secret text box.
-
Under Implementation plugin, to enable the pre-made connection implementation for the supported Starling Connect connectors, select Starling batch 1 - v2.0.
NOTE: The Starling batch 1 - v2.0 implementation plugin is backwards compatible with Starling batch 1 - v1.0, originally released in Active Roles 7.6.1.
The Generic SCIM Connector was tested with the following Starling Connect connectors:
While the Generic SCIM Connector may work with other SCIM 2.0-based Starling Connect connectors, One Identity tested it to work only with those connectors and connector versions.
For the list of SCIM attributes supported by Starling Connect for these connectors, see the Pipedrive, ServiceNow, SuccessFactorsHR and Zendesk chapters of the Starling Connect Active Roles Administration Guide.
-
Configure the following Starling Connect connection settings as required by the Starling Connect connector to which you want to connect.
-
Import uses direct query: When selected, Active Roles queries every synchronized object separately by their ID. Select this setting when configuring a connection to the Starling Connect ServiceNow 2.0, Zendesk 1.0, or similar connectors.
NOTE: Consider the following when using this setting:
-
Selecting this setting decreases synchronization speed considerably. However, you must select this setting to read all object attributes for Starling Connect ServiceNow 2.0, or to read certain resource types or attributes for Zendesk 1.0.
-
Do not enable this setting when configuring the Generic SCIM Connector for other supported Starling Connect connectors, as it has no effect on the results of import data synchronization.
-
Query only synced attributes: To improve performance, certain Starling Connect connectors allow to query only parameters that are specifically defined for synchronization. If you enable this setting, sets the ?attributes=attrName query parameter according to IETF RFC-7644, so that Starling Connect will retrieve the attributes specified in the sync workflow.
NOTE: Select this setting if you configure a connection for the Starling Connect Pipedrive 1.0 or Zendesk 1.0 connectors.
-
Starling cursor-based pagination: Certain Starling Connect connectors use a cursor-based pagination method (as defined by Cursor-based Pagination of SCIM Resources) instead of the protocol-defined index-based pagination. When configuring a connection to such a Starling Connector, select this setting to override the standard pagination method.
NOTE: Select this setting if you configure a connection to the Starling Connect Pipedrive 1.0, WorkdayHR 3.0 or Zendesk 1.0 connectors.
-
Max degree of parallelism: If Import uses direct query is enabled, this setting specifies the maximum number of threads that can run in parallel for the direct query of each object in the response list (that is, how many entries can query simultaneously).
TIP: One Identity recommends testing the value optimal for your environment, and setting it as low as possible. Specifying a value of 1 means no parallelism is configured.
NOTE: Consider the following when using this setting:
-
This setting works only if Import uses direct query is enabled. Active Roles will ignore any value specified for Max degree of parallelism if Import uses direct query is not selected.
-
Setting the value of Max degree of parallelism too high may result in connector service instability.
-
Check the implementation plugin information indicated on-screen. Make sure that the Supported Features, the Target Service Providers and the supported Starling Connect connector versions will meet the requirements of your planned mapping rule and/or synchronization workflow.
-
To verify that the specified authentication settings are correct, click Test Connection.
NOTE: Clicking Test Connection verifies only if the authentication settings for the SCIM metadata endpoint connection are correct, and if Active Roles can fetch the SCIM schemas and query the resourceTypes metadata from the configured SCIM service.
When testing the connection, Active Roles does not query any actual resource objects. Because of this, testing may finish successfully even if the connection is down between Starling Connect and the third-party service provider (for example, SuccessFactors HR), preventing the import of actual data during synchronization later.
TIP: If testing fails, Active Roles will highlight the settings that it detects as incorrect. Check and fix those settings, then try again. If testing fails again, then:
-
Check your network connectivity.
-
Check if the Starling Connect service is available.
-
Make sure that the Starling Connect connector you specified during configuration is still active and working.
-
If you use a proxy server, make sure that the system-level proxy settings are properly configured.
-
If testing completed successfully, create the new SCIM connection to the Starling Connect connector by clicking Finish.
After Active Roles created the connection, you can use it to configure SCIM-based data synchronization by setting up one or more mapping rules and synchronization workflows.
Viewing or modifying the settings of a Generic SCIM Connector connection
You can view or modify an existing connection based on the Generic SCIM Connector with the . Modifying a Generic SCIM Connector connection is typically required if any change occurs in the SCIM-based Starling Connect connectors to which the Active Roles connection was originally configured.
To view or modify an existing Generic SCIM Connector connection
-
In the , click Connections.
-
In Connections, search for the connection you want to modify, then click Connection settings.

-
(Optional) In General, modify the custom Connection name.
-
(Optional) In Connection Settings, modify the following settings as you need:
-
Token endpoint URL: Specifies the full path of the Starling connector token endpoint.
TIP: To find the token endpoint URL of the Starling Connect connector, in Starling Connect, navigate to Connectors > Active Connectors, and copy the value of the SCIM Token Endpoint URL property.
-
Client ID: Specifies the SCIM client ID.
TIP: To find the SCIM client ID of the Starling Connect connector, in Starling Connect, navigate to Connectors > Active Connectors, and copy the value of the SCIM Client ID property.
-
Client secret: Specifies the SCIM client secret.
TIP: To find the SCIM client secret of the Starling Connect connector, in Starling Connect, navigate to Connectors > Active Connectors, and copy the value of the Show SCIM Client Secret text box.
-
Import uses direct query: When selected, Active Roles queries every synchronized object separately by their ID. Select this setting when configuring a connection to the Starling Connect ServiceNow 2.0, Zendesk 1.0, or similar connectors.
NOTE: Consider the following when using this setting:
-
Selecting this setting decreases synchronization speed considerably. However, you must select this setting to read all object attributes for Starling Connect ServiceNow 2.0, or to read certain resource types or attributes for Zendesk 1.0.
-
Do not enable this setting when configuring the Generic SCIM Connector for other supported Starling Connect connectors, as it has no effect on the results of import data synchronization.
-
Query only synced attributes: To improve performance, certain Starling Connect connectors allow to query only parameters that are specifically defined for synchronization. If you enable this setting, sets the ?attributes=attrName query parameter according to IETF RFC-7644, so that Starling Connect will retrieve the attributes specified in the sync workflow.
NOTE: Select this setting if you configure a connection for the Starling Connect Pipedrive 1.0 or Zendesk 1.0 connectors.
-
Starling cursor-based pagination: Certain Starling Connect connectors use a cursor-based pagination method (as defined by Cursor-based Pagination of SCIM Resources) instead of the protocol-defined index-based pagination. When configuring a connection to such a Starling Connector, select this setting to override the standard pagination method.
NOTE: Select this setting if you configure a connection to the Starling Connect Pipedrive 1.0, WorkdayHR 3.0 or Zendesk 1.0 connectors.
-
Max degree of parallelism: If Import uses direct query is enabled, this setting specifies the maximum number of threads that can run in parallel for the direct query of each object in the response list (that is, how many entries can query simultaneously).
TIP: One Identity recommends testing the value optimal for your environment, and setting it as low as possible. Specifying a value of 1 means no parallelism is configured.
NOTE: Consider the following when using this setting:
-
This setting works only if Import uses direct query is enabled. Active Roles will ignore any value specified for Max degree of parallelism if Import uses direct query is not selected.
-
Setting the value of Max degree of parallelism too high may result in connector service instability.
-
(Optional) In Scope, modify the scope of objects included in the data synchronization process of the connection. For more information on the Scope settings, see Modifying synchronization scope for a connection.
-
(Optional) In Connection Handlers, create, update or remove any automated data synchronization operations for the connection. For more information on the Connection Handlers settings, see Using connection handlers.
-
To apply your changes, click Save and Continue.
Using connectors installed remotely
In some cases, you need to configure a connection to an external data system which is separated by a firewall from the computer running . To implement this scenario, you can install an instance of and built-in connectors on a remote computer and switch this instance to remote mode. This will allow the instance running in the local mode to communicate with the remotely installed instance and connectors via a single port.
Consider a scenario where you want to synchronize data between two Active Directory domains that are separated by a firewall. In this case, you can install one instance in the local mode in the first domain, then deploy another instance in the remote mode in the other domain. Then, ensure the firewall allows traffic on the port used for communications between the instances.
