Chat now with support
Chat mit Support

Active Roles 8.1.2 - Synchronization Service Administration Guide

Synchronization Service overview Deploying Synchronization Service Getting started Connections to external data systems
External data systems supported with built-in connectors
Working with Active Directory Working with an AD LDS (ADAM) instance Working with Skype for Business Server Working with Oracle Database Working with Oracle Database user accounts Working with Exchange Server Working with Active Roles Working with One Identity Manager Working with a delimited text file Working with Microsoft SQL Server Working with Micro Focus NetIQ Directory Working with Salesforce Working with ServiceNow Working with Oracle Unified Directory Working with an LDAP directory service Working with an OpenLDAP directory service Working with IBM DB2 Working with IBM AS/400 Working with IBM RACF Working with MySQL database Working with an OLE DB-compliant relational database Working with SharePoint Working with Microsoft 365 Working with Microsoft Azure Active Directory Configuring data synchronization with the SCIM Connector Configuring data synchronization with the Generic SCIM Connector
Using connectors installed remotely Creating a connection Renaming a connection Deleting a connection Modifying synchronization scope for a connection Using connection handlers Specifying password synchronization settings for a connection
Synchronizing identity data Mapping objects Automated password synchronization Synchronization history Scenarios of use Developing PowerShell scripts for attribute synchronization rules Using PowerShell script to transform passwords

Viewing or modifying the settings of a Generic SCIM Connector connection

You can view or modify an existing connection based on the Generic SCIM Connector with the Synchronization Service Console. Modifying a Generic SCIM Connector connection is typically required if any change occurs in the SCIM-based Starling Connect connectors to which the Active Roles Synchronization Service connection was originally configured.

To view or modify an existing Generic SCIM Connector connection

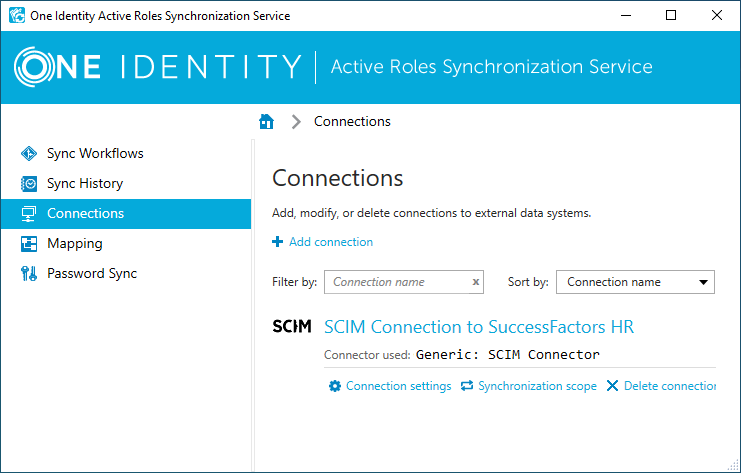
  1. In the Synchronization Service Console, click Connections.

  2. In Connections, search for the connection you want to modify, then click Connection settings.

  3. (Optional) In General, modify the custom Connection name.

  4. (Optional) In Connection Settings, modify the following settings as you need:

    • Token endpoint URL: Specifies the full path of the Starling connector token endpoint.

      TIP: To find the token endpoint URL of the Starling Connect connector, in Starling Connect, navigate to Connectors > Active Connectors, and copy the value of the SCIM Token Endpoint URL property.

    • Client ID: Specifies the SCIM client ID.

      TIP: To find the SCIM client ID of the Starling Connect connector, in Starling Connect, navigate to Connectors > Active Connectors, and copy the value of the SCIM Client ID property.

    • Client secret: Specifies the SCIM client secret.

      TIP: To find the SCIM client secret of the Starling Connect connector, in Starling Connect, navigate to Connectors > Active Connectors, and copy the value of the Show SCIM Client Secret text box.

    • Import uses direct query: When selected, Active Roles Synchronization Service queries every synchronized object separately by their ID. Select this setting when configuring a connection to the Starling Connect ServiceNow 2.0, Zendesk 1.0, or similar connectors.

      NOTE: Consider the following when using this setting:

      • Selecting this setting decreases synchronization speed considerably. However, you must select this setting to read all object attributes for Starling Connect ServiceNow 2.0, or to read certain resource types or attributes for Zendesk 1.0.

      • Do not enable this setting when configuring the Generic SCIM Connector for other supported Starling Connect connectors, as it has no effect on the results of import data synchronization.

    • Query only synced attributes: To improve performance, certain Starling Connect connectors allow to query only parameters that are specifically defined for synchronization. If you enable this setting, Synchronization Service sets the ?attributes=attrName query parameter according to IETF RFC-7644, so that Starling Connect will retrieve the attributes specified in the sync workflow.

      NOTE: Select this setting if you configure a connection for the Starling Connect Pipedrive 1.0 or Zendesk 1.0 connectors.

    • Starling cursor-based pagination: Certain Starling Connect connectors use a cursor-based pagination method (as defined by Cursor-based Pagination of SCIM Resources) instead of the protocol-defined index-based pagination. When configuring a connection to such a Starling Connector, select this setting to override the standard pagination method.

      NOTE: Select this setting if you configure a connection to the Starling Connect Pipedrive 1.0, WorkdayHR 3.0 or Zendesk 1.0 connectors.

    • Max degree of parallelism: If Import uses direct query is enabled, this setting specifies the maximum number of threads that Synchronization Service Console can run in parallel for the direct query of each object in the response list (that is, how many entries can Synchronization Service Console query simultaneously).

      TIP: One Identity recommends testing the value optimal for your environment, and setting it as low as possible. Specifying a value of 1 means no parallelism is configured.

      NOTE: Consider the following when using this setting:

      • This setting works only if Import uses direct query is enabled. Active Roles Synchronization Service will ignore any value specified for Max degree of parallelism if Import uses direct query is not selected.

      • Setting the value of Max degree of parallelism too high may result in connector service instability.

  5. (Optional) In Scope, modify the scope of objects included in the data synchronization process of the connection. For more information on the Scope settings, see Modifying synchronization scope for a connection.

  6. (Optional) In Connection Handlers, create, update or remove any automated data synchronization operations for the connection. For more information on the Connection Handlers settings, see Using connection handlers.

  7. To apply your changes, click Save and Continue.

Using connectors installed remotely

In some cases, you need to configure a connection to an external data system which is separated by a firewall from the computer running Synchronization Service. To implement this scenario, you can install an instance of Synchronization Service and built-in connectors on a remote computer and switch this Synchronization Service instance to remote mode. This will allow the Synchronization Service instance running in the local mode to communicate with the remotely installed instance and connectors via a single port.

Consider a scenario where you want to synchronize data between two Active Directory domains that are separated by a firewall. In this case, you can install one Synchronization Service instance in the local mode in the first domain, then deploy another Synchronization Service instance in the remote mode in the other domain. Then, ensure the firewall allows traffic on the port used for communications between the Synchronization Service instances.

Installing Synchronization Service and built-in connectors remotely

To use connectors remotely, you need to install Synchronization Service and built-in connectors on a required remote computer and switch the installed instance of Synchronization Service to remote mode. For more information on installing Synchronization Service, see Installing Synchronization Service.

To set Synchronization Service in remote mode

  1. Start the Synchronization Service Console.

  2. Follow the steps in the wizard that starts automatically to configure Synchronization Service.

  3. On the Service Account and Mode page, do the following and click Finish:

    • Enter the account under which you want Synchronization Service to run.

    • Select the remote mode for this instance of Synchronization Service.

Creating a connection using a remotely installed connector

To create a connection using a remotely installed connector

  1. Start the Synchronization Service Console.

  2. On the Connections tab, click Add connection.

  3. In the Connection name text box, type a descriptive name for the connection.

  4. From the Use the specified connector list, select the connector you want to use.

  5. Click to expand the Remote connector access element, and then use the following options:

    • Use remote connector: Select this check box to use the connector installed on a remote computer.

    • Connector host: Type the Fully Qualified Domain Name (FQDN) of the computer on which the Synchronization Service in the remote mode and the corresponding connector are installed.

    • Port: Type the port number on which you want the Synchronization Service to access the remote connector. By default, this is port 8080.

    • Connect using: Specify an account under which to access the remote connector. The account must be a local administrator on the computer where the remote connector is installed. Select one of the following:

      • Synchronization Service account: Allows you to access the remote connector using the account under which Synchronization Service is running locally.

      • Windows account: Allows you to type the user name and password of the account with which you want to access the remote connector.

    • Verify Settings: Click this button to verify that Synchronization Service can access the remote connector using the settings you have specified.

  6. Follow the instructions of the wizard to complete the connection creation.

Verwandte Dokumente

The document was helpful.

Bewertung auswählen

I easily found the information I needed.

Bewertung auswählen