On the Defender Management Portal, you can generate and view a number of reports providing information about the security tokens, authentication requests from users, configuration of Defender Security Servers, installed Defender licenses, RADIUS payloads assigned to users, and more. After generating a report, you can print it out or save it in HTML or XML format.
To use Defender reports, the user account with which you sign in to the Defender Management Portal must have an appropriate portal role assigned. For more information, see Portal roles.
You can start using reports by clicking the Defender reports option on the home page of the portal:
The page that opens provides the following tabs you can use to configure, schedule, generate, and view Defender reports:
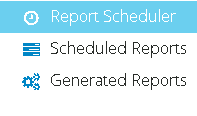
Report Scheduler Allows you to select a report, configure its settings, and schedule the report for generation.
Scheduled Reports Provides a list of all reports you have scheduled so far. The items in the list are also called scheduled report definitions. You can use this node to view the details of scheduled reports, immediately generate scheduled reports without waiting for next generation time, or selectively delete the scheduled report definitions you no longer need. Deleting a scheduled report definition stops the generation of the corresponding report but does not delete already generated reports located on the Generated Reports tab.
Generated Reports Provides a list of reports generated from the corresponding report definitions on the Scheduled Reports tab. You can use this node to view the generated reports and selectively delete the generated reports you no longer need. Deleting a generated report does not affect the underlying scheduled report definition located on the Scheduled Reports tab.
See also:
To generate a Defender report, you need to configure its settings and schedule its generation. You can schedule a report to generate on a recurring basis or only once.
To use Defender reports, the user account with which you sign in to the Defender Management Portal must have an appropriate portal role assigned. For more information, see Portal roles.
To generate a report
- Sign in to the Defender Management Portal.
For more information, see Opening the portal.
- Click the Defender reports option.
- In the left pane, click the Report Scheduler tab.
- In the right pane, from the Select a report list, select the report you want to schedule and generate.
- In the Report settings area, configure settings for your report.
For more information about available settings, click the report name below.
- After configuring the report settings, click the Schedule button, and then type the report description and configure the generation schedule. For more information, see Report scheduling settings.
- When you are finished with Report scheduling settings, click Save.
After scheduling your report, you can click the Preview button to display the report you have just created.
The Audit trail report provides information about all user authentication requests processed by a specific Defender Security Server over a specified period of time.
Table 19:
Audit trail report settings
|
Select a report type |
Select the type of report you want to generate. Basically, this option allows you to specify the type of the Defender Security Server log files from which you want to collect data for your report.
You can select one of the following:
- Audit report This report is generated using the log files whose names have the DSSAudit prefix.
- Accounting Report This report is generated using the log files whose names have the DSSAcct prefix.
|
|
Defender Security Server |
Select the Defender Security Server whose data you want to use for generating the report. |
|
Reporting period |
Specify the time period for which you want to generate the report. |
|
Select date and time formats |
Select this check box to choose the format for displaying times and dates in the report. After selecting this check box, use the following options:
- Time format Select the format for displaying times in the report.
- Date format Select the format for displaying dates in the report.
- Time zone Select the time zone for which you want to generate the report.
|
The Authentication requests report provides a summary of authentication requests processed by a specific Defender Security Server, for either a single user or all users, over a specified period of time.
Table 20:
Authentication requests report settings
|
Defender Security Server |
Select the Defender Security Server whose data you want to use for generating the report. |
|
Access Node |
Select the Access Node for which you want to generate the report. |
|
Include source address and
Access Node |
Select this check box to include the source address and Access Node details in the report. Otherwise, leave this check box cleared. |
|
Include users whose name
begins with |
Type the initial characters of the user names for which you want to generate the report. Leave this text box blank to generate the report for all users. |
|
Include users in Active Directory group |
Type the complete name of the Active Directory group for which members you want to generate the report. Alternatively, click the magnifying glass icon to search for and select the Active Directory group. Leave this text box blank to generate the report for users in all groups. |
|
Reporting period |
Specify the time period for which you want to generate the report. |
|
Select date and time formats |
Select this check box to choose the format for displaying times and dates in the report. After selecting this check box, use the following options:
- Time format Select the format for displaying times in the report.
- Date format Select the format for displaying dates in the report.
- Time zone Select the time zone for which you want to generate the report.
|
