You must make a copy of a default object if you want to add new functionality to it that cannot be added in the configurator. The Copy objects wizard helps you with this.
To add a copy of an object with the wizard
-
In the toolbar, select the Edit > Copy objects menu item.
Copy objects... opens after compiling. All existing database objects are ordered by different object types into a hierarchical structure.
-
Enable the option next to the database object you want to copy.
NOTE: The database objects cannot be multi-selected.
NOTE: The wizard automatically adds substitution rules for the objects used for copying if Add substitution rule for current object is set. The copies are automatically referenced instead of the default objects. The Web Designer does not generate substitution rules if custom database objects are used as copy templates. You can use the configurator to enter these substitution rules manually. For more information, see Project configuration - customization.
- Enter a name for the copy in the Copy name* column, if required.
A custom prefix stored in the database is automatically prefixed to the entered or suggested name.
- Click Next.
A copy of the selection is created and a conformation prompt is displayed. After you have closed the wizard, new tabs are created in the definition tree view displaying the copies.
- Save the copy manually from the toolbar.
In some cases, it is sufficient to add or delete a node to change single properties within an object. In such cases, extensions are best suited to configuring the web application. This method of configuration allow you to describe changes to an object.
You can add any number of extensions to the Web Designer's base object module, component, and web project. Some default extensions are already supplied when the database modules are installed. You can add custom extensions yourself.
Extensions are edited when you configure the base objects. That means you add an extension to the object and change the property value. You then compile the base object and the modification resulting from the extension is highlighted in the Web Designer.
You can identity base objects, which you want to extend, by their colored nodes in Objects definitions. You edit extensions in Configuration (custom).
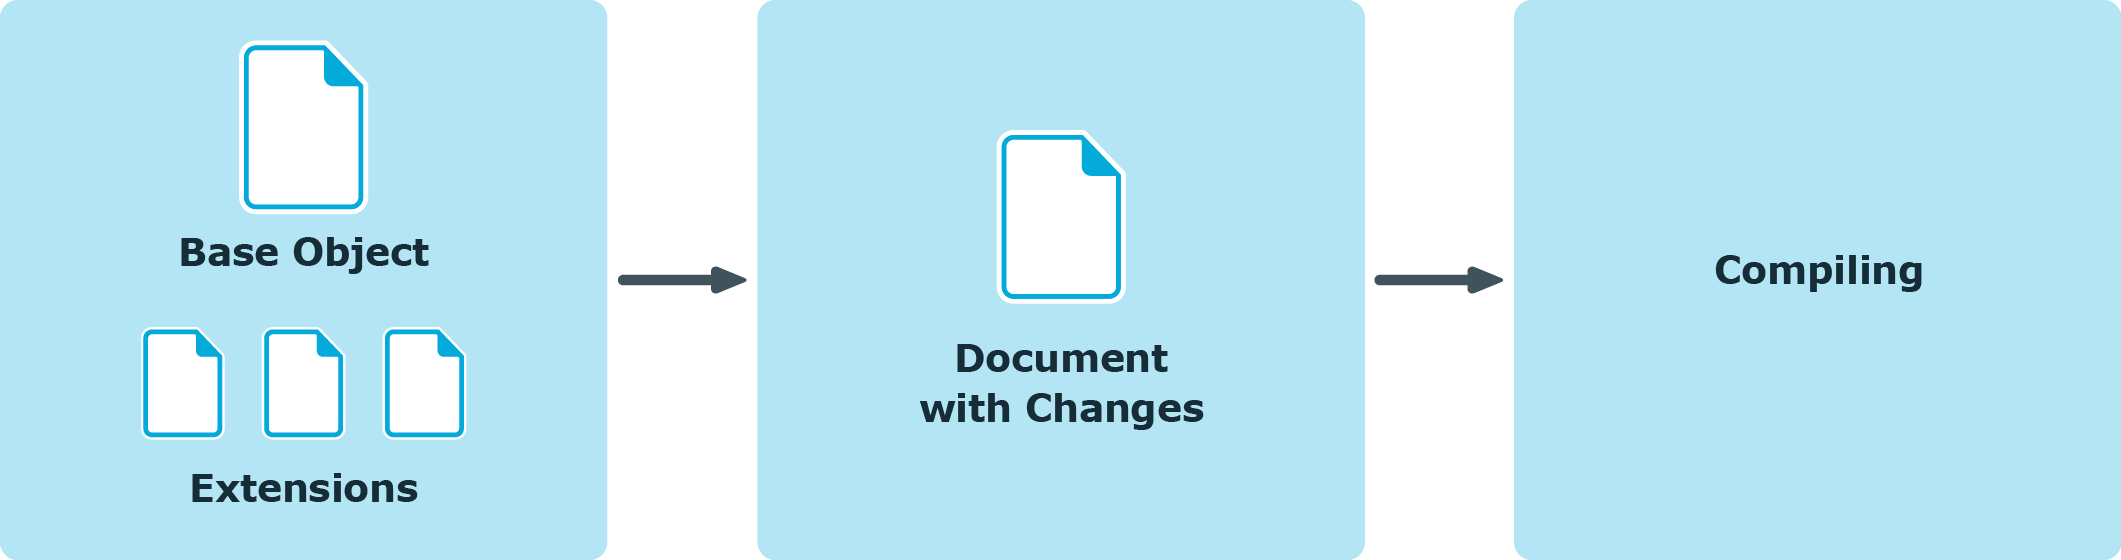
Figure 1: Workflow in the Web Designer
To overwrite a single property in an extension
NOTE: An edited extension node is labeled with  in the Object definition view in the definition tree view.
- In the Object definition view, mark an extension node.
- In the Node editor view's toolbar, click
 to mark the edited setting of the extension node in color.
- Click
 at the marked place.
This switches you into the Configuration (custom) view and marks the node with the modified property value.
- To return to the Object definitions view, click
 on the changed setting in the node editor window.
NOTE: You can switch between the Configuration (custom) and Object definition views with the button, if the extension is found under the Add node or Remove node node.
Each extension is its own object in the Web Designer. The advantage of extensions is that database objects that have been extended are updated by migration without the database objects being overwritten. This does not apply in the case of object copies. In that case, the copy is not updated on migration.
The following extension rules are listed in the table.
Table 50: Overview of extension rules
| Inserting a node |
Adds a new node to the read-only base object. |
| Moving a node |
Removes a node from the base document and places it in an extension. |
| Editing a property |
Modifies a node property in the read-only base object. |
| Deleting a node |
Deletes a node from the read-only base object.
A deletion is carried out, for example, when you want to delete a bookmark on the Web Portal start page. |
NOTE: You recognize an extension node by its colored bar.
You add a new node in the definition tree view using the context menu on your selected node. The entries in the context menu vary and depend on which type of node you are adding the extension node to. You can, for example, add new form or component nodes.
Because there are numerous types of nodes that can be added, the example is based on a node of type title.
To add a new node
- In the navigation view, double-click the required base object.
The selected base object is displayed in Object definition (read-only).
- Mark the node 'Title', for example, and select Object in extension > New node.
NOTE: You can also select another item as New node if you know the node type to base the extension on.
- In the New nodes dialog, select the button node type from the list and click OK.
The new node is added with a custom prefix and a bar under the selected node.  is displayed at the bottom of the definition tree view. Use to go to the definition object.
- Edit the new node in Node edit. You may configure the following settings.
NOTE: Fields marked with * are compulsory.
To modify the position of an extension node.
- Mark the nodes you added in the step-by-step "To add a new node" in Object definition.
- Switch to the definition object by click in the definition tree view.
The edited new node is displayed in Configuration (custom).
In the custom configuration view, you can, for example, edit the position of the button. This is how you do this.
- In the Configuration (custom) view, mark the Add node node above the node you added.
- Enter the value "0" in Sort order.
The value is displayed after the Add node node (sort order: 0). You will see the change after compiling the preview. When you swap back to the Object definition (read-only) view, you will see that your added node is placed above the extension you marked.
You can move nodes, which are on a parent node in an extension. This assumes that the node to move is on a custom object which is not write protected. An example of this would be objects found in a container node. Other examples of moveable extension nodes are columns in a collection or parameters of a configuration parameter section.
NOTE: The menu item Move to extension is only available to custom objects.
To move a node
- In the navigation view, double-click the required base object.
The selected base object is displayed in the Object definition view in the definition tree view.
- Enable the view in the definition tree view using
 .
.
- Mark a node and select Move to extension from the context menu.
The node is marked in color as in the extension mode.
A change can take the form of extending viewing conditions for a container, for example, as explained below. Other changes are not gone into here. For more information, see How extensions work.
To edit a property
- In the Node editor view, click
 next to the Viewing condition field.
The view switches to Configuration (custom) and the Modify property value extension is selected. You can edit the extension.
- Enter the value "1=1" in Condition in the Node editor view.
The edited extension is displayed with the modification in the definition tree view and in the preview. The edited node is marked with in the definition tree view.
Before you can delete the node, you must create a deletion rule for the mode in question. You can only add a deletion rule to a node that does not contain an extension.
A use case would be if you want to remove a container node from a write protected base object.
To create a deletion rule
To remove a deletion rule
- In the Configuration (custom) view, mark the Remove node node if you want to remove the extension again, and, in the context menu, select Delete.
NOTE: The menu item Delete is only available to custom objects.
- Delete the extension from the definition tree view by selecting Yes.
