You can delete a shared mailbox in the selected Azure tenant with the Delete option of the Active Roles Web Interface.
To delete a shared mailbox
-
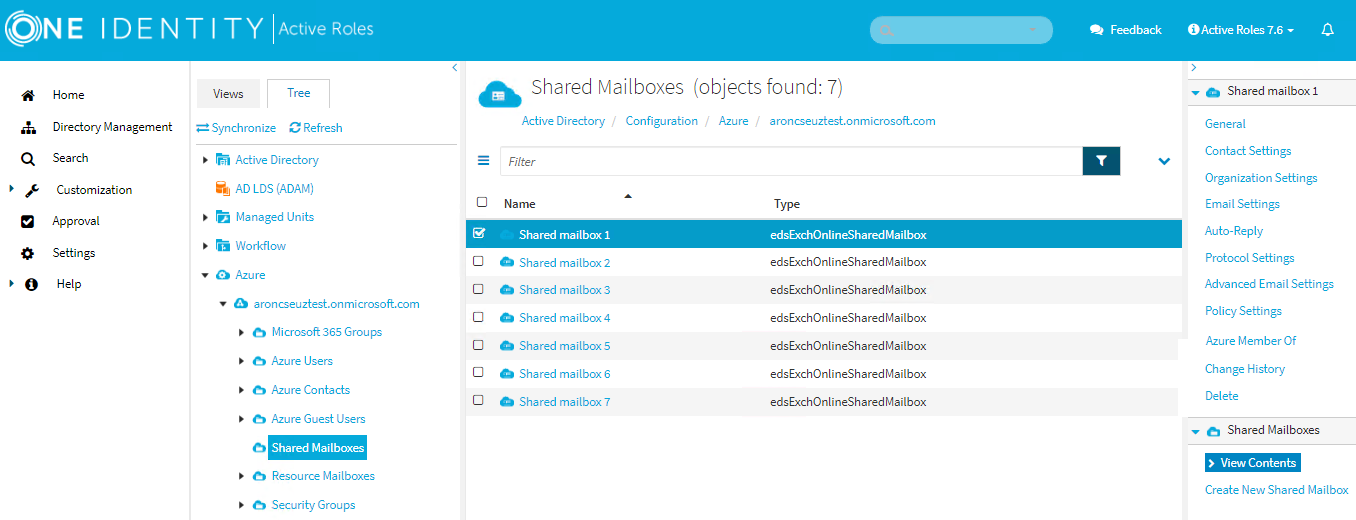
Navigate to Directory Management > Tree > Azure > <azure-tenant-name> > Shared Mailboxes.
Figure 69: Shared Mailboxes — Listing the shared mailboxes in the Azure tenant
-
Select the shared mailbox that you want to delete.
-
Click Delete.
-
To confirm, click Yes.
You can remove the remote mailbox (that is, the assigned Exchange Online mailbox) of an on-premises user with the Active Roles Web Interface and the Active Roles Console.
Deleting the remote mailbox of a user is typically required in case of an organizational or infrastructural change, but is also a mandatory prerequisite if you want to change the current remote mailbox of the user.
To delete the remote mailbox of an on-premises user
-
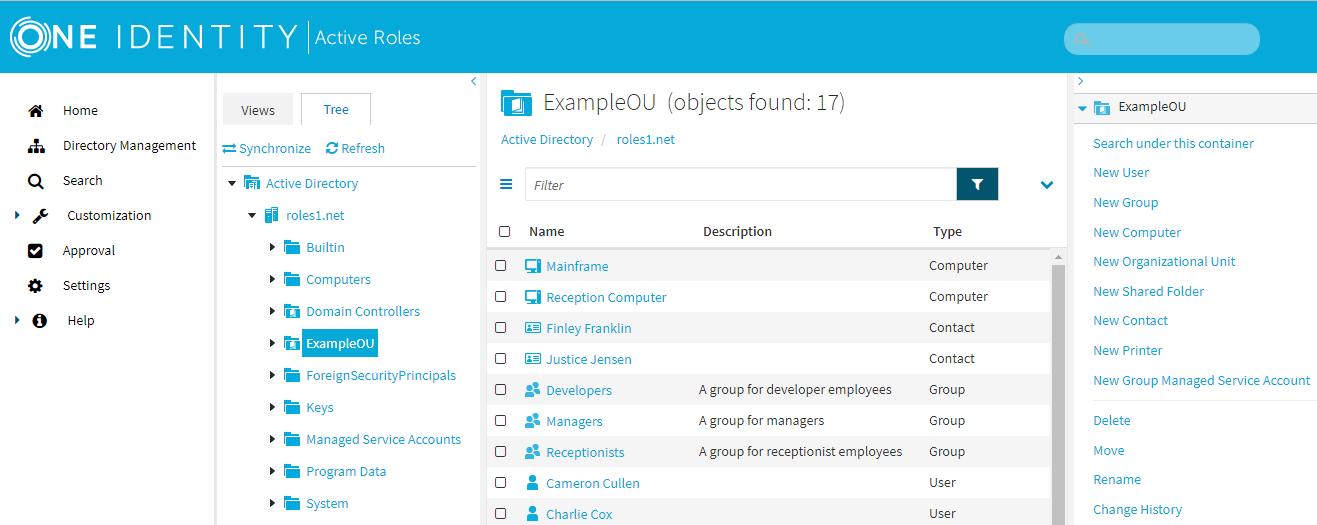
In the Active Roles Web Interface, under Directory Management > Tree > Active Directory, navigate to the OU of the on-premises user whose remote mailbox you want to delete.
Figure 70: Active Roles Web Interface – Navigating to the OU of the user
-
Select the user and click Delete E-mail Addresses.
-
To confirm the deletion of the email address, click OK.
After clicking OK, Active Roles deletes the remote mailbox of the on-premises user. However, this change does not reset the value of the edsvaMsExchEnableRemoteMailRoutingAddress property of the user. While this does not cause any operational issues, Active Roles recommends updating this value manually for consistency as described in the next step.
-
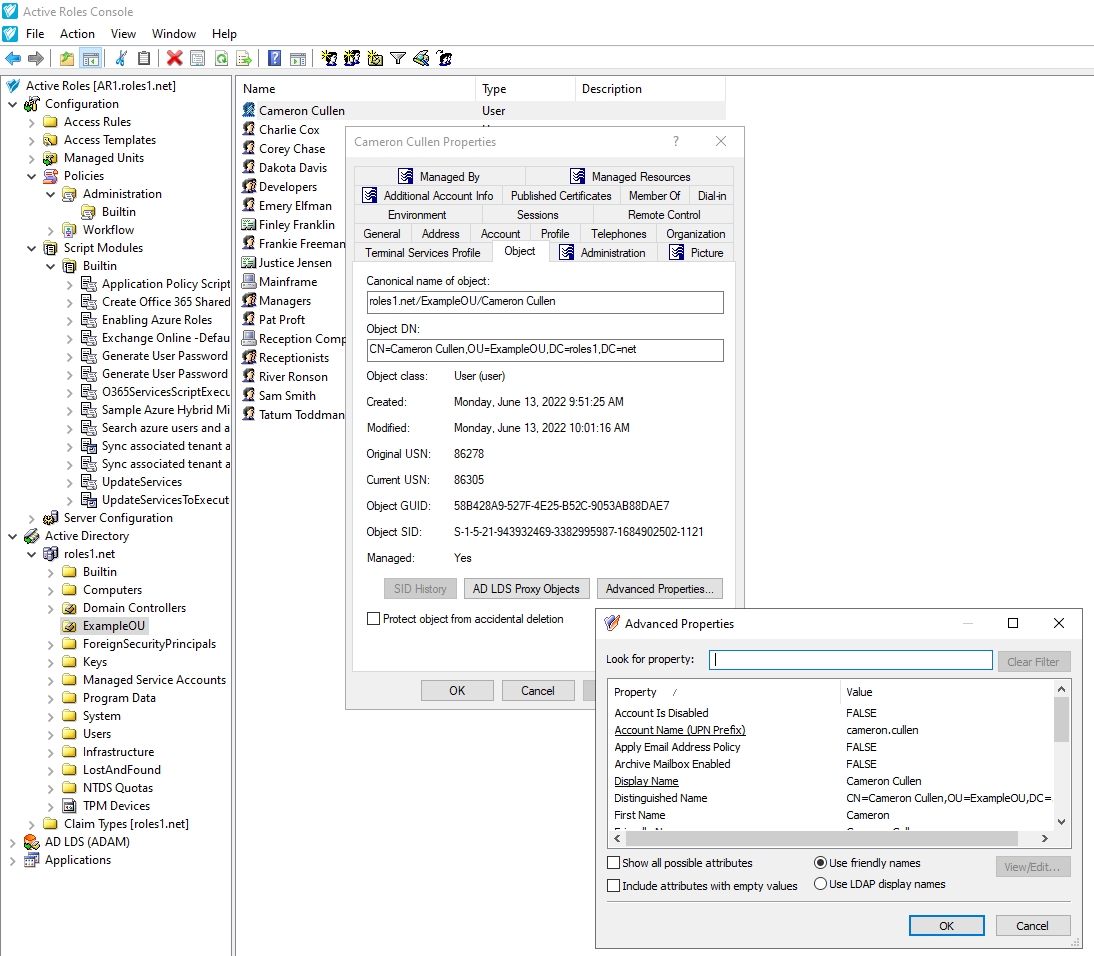
(Optional) Open the Advanced Properties of the on-premises user. In the Active Roles Console, in the Active Directory (AD) tree, navigate to the Organizational Unit (OU) where the user is located, double-click the user, then in the Properties window, click Object > Advanced Properties.
Figure 71: Active Roles Console– Opening the Advanced Properties of a user
-
Search for the edsvaMsExchEnableRemoteMailRoutingAddress property.
TIP: To find the property faster, enter its name (or part of its name) in the Look for property field. If you cannot find the property, select Show all possible attributes and Include attributes with empty values, too.
After you found the property, open its settings by double-clicking it.
-
In the Edit Attribute dialog, in Value, delete the configured remote mailbox.
-
To apply your changes, click OK in each open window.
To change the remote mailbox of an on-premises user
-
In the Active Roles Web Interface, delete the current remote mailbox of the on-premises user as described in the To delete the remote mailbox of an on-premises user procedure.
-
Open the Advanced Properties of the on-premises user. In the Active Roles Console, in the Active Directory (AD) tree, navigate to the Organizational Unit (OU) where the user is located, double-click the user, then in the Properties window, click Object > Advanced Properties.
-
Search for the edsvaMsExchEnableRemoteMailRoutingAddress property.
TIP: To find the property faster, enter its name (or part of its name) in the Look for property field. If you cannot find the property, select Show all possible attributes and Include attributes with empty values, too.
After you found the property, open its settings by double-clicking it.
-
In the Edit Attribute dialog, in Value, specify the new remote mailbox for the user.
-
To apply your changes, click OK in each open window.
You can use the Web Interface to manage directory data in Microsoft Active Directory Lightweight Directory Services (AD LDS). Similarly to Active Directory domains, directory data can be managed in only the AD LDS instances that are registered with Active Roles (that is, in managed AD LDS instances).
The application directory partitions found on the managed AD LDS instances are grouped together in the AD LDS (ADAM) container, thus making it easy to locate the AD LDS data. Each directory partition is represented by a separate container (node) so you can browse the partition tree the same way you do for an Active Directory domain.
The Web Interface supports a wide range of administration operations on AD LDS users, groups and other objects, so you can create, view, modify, and delete directory objects, such as users, groups, containers and Organizational Units in AD LDS the same way you do when managing data in Active Directory.
To browse the directory tree in AD LDS directory partitions
-
On the Navigation bar, click Directory Management.
-
In the Browse pane, click the Tree tab.
-
On the Tree tab, do the following:
-
Expand the AD LDS (ADAM) container.
-
Under AD LDS (ADAM), expand a directory partition object to view its top-level containers.
-
Expand a top-level container to view the next level of objects in that container.
-
Do one of the following:
-
To move down a directory tree branch, continue expanding the next lowest container level on the Tree tab.
-
To administer a directory object at the current directory level, click a container on the Tree tab and perform the following instructions.
To manage directory data in AD LDS
On the Tree tab in the Browse pane, under AD LDS (ADAM), click the container that holds the data you want to manage.
-
In the list of objects, select the object that represents the directory data you want to manage.
-
Use commands in the Command pane to perform management tasks.
NOTE: In the list of objects, clicking the name of a leaf object, such as a user or group will display the properties page of the object. Clicking a container object, such as a partition or an organizational unit, will display a list of objects held in that container.
You can use the Web Interface to manage the following computer resources:
-
Services: Start or stop a service, view or modify properties of a service.
-
Network file shares: Create a file share, view or modify properties of a file share, stop sharing a folder.
-
Logical printers: Pause, resume or cancel printing, list documents being printed, view or modify properties of a printer.
-
Documents being printed (print jobs): Pause, resume, cancel or restart printing of a document, view or modify properties of a document being printed.
-
Local groups: Create or delete a group, add or remove members from a group, rename a group, view or modify properties of a group.
NOTE: This task is not available on Domain Controllers (DCs).
-
Local users: Create or delete a local user account, set a password for a local user account, rename a local user account, view or modify properties of a local user account.
NOTE: This task is not available on DCs.
-
Devices: View or modify properties of a logical device, start or stop a logical device.
To manage computer resources
-
In the Web Interface, locate the computer that hosts resources you want to manage. For more information on how to locate objects in the Web Interface, see Locating directory objects.
-
Select the computer in the list of objects, then click Manage in the Command pane.
-
In the list of resource types, click the type of resource you want to manage.
-
In the list of objects that appears, select the resource you want to manage.
-
Use commands in the Command pane to perform management tasks on the selected resource.
To manage print jobs
-
To start managing computer resources, repeat Steps 1 and 2 of the previous procedure.
-
To view the list of printers found on the selected computer, in the list of resource types, click Printers.
-
In the list of printers, select a printer whose print jobs you want to manage.
-
To view the list of documents being printed, in the Command pane, click Print Jobs.
-
In the list of documents, select a document to pause, resume, restart, or cancel printing.
-
To perform management tasks on the selected document, use the available commands in the Command pane.
