Starling integration
One Identity Starling helps to combine products from the One Identity line to create a secure and customizable cloud service. For more information, see the Starling technical documentation.
If you are using a Starling 2FA plugin, (that is, you have uploaded it to Basic Settings > Plugins and then configured it at Policies > AA Plugin Configurations) and the SPS node is joined to One Identity Starling, you do not have to specify api_key and api_url in the Starling 2FA plugin configuration. This configuration method is more secure.
Topics:
Joining SPS to One Identity Starling
This section describes how to use SPS with One Identity Starling and how to take advantage of companion features from Starling products, such as Two-Factor Authentication (2FA) and Identity Analytics.
Prerequisites
To join SPS to One Identity Starling
-
Navigate to Basic Settings > Starling Integration.
|

|
CAUTION: If SPS nodes are joined to a cluster, ensure that you initiate your Starling integration from the Central Management node. |
-
To check the availability of SPS and Starling, that is, if SPS can connect directly to the web and SPS can access Starling, click Check availability.
-
If your SPS cannot connect directly to the web, check your Internet connection and ensure that SPS can connect to the web, then re-initiate the process of joining your SPS to Starling. Ensure that SPS can access the following websites:
-
account.cloud.oneidentity.com
-
sts.cloud.oneidentity.com
-
accountsupervisor.cloud.oneidentity.com
-
oneidentitycloud.statuspage.io
If your SPS is behind a web proxy, navigate to Basic Settings > Network > HTTPS Proxy and configure the proxy settings.
For more information, see Network settings.
NOTE: Currently, only built-in Certificate Authorities are supported. If the web proxy replaces the certificates of the Starling website on-the-fly, the join process might fail.
-
If SPS cannot access Starling, wait until Starling is available and re-initiate the process of joining your SPS to Starling.
Figure 78: Basic Settings > Starling Integration — SPS is ready to join Starling

-
When SPS is ready to join Starling, click Start join.
The One Identity Starling site will open on a new tab.
NOTE: Once you click Start join, you cannot stop the process and your SPS machine will be joined to Starling. Ensure that you continue with the join process, and once the join process is complete, if required, you can unjoin SPS from Starling.
For more information, see Unjoining SPS from One Identity Starling.
-
To allow SPS to access your Starling organization and the services that you have subscribed to, click Allow.
The Join to Starling screen is displayed.
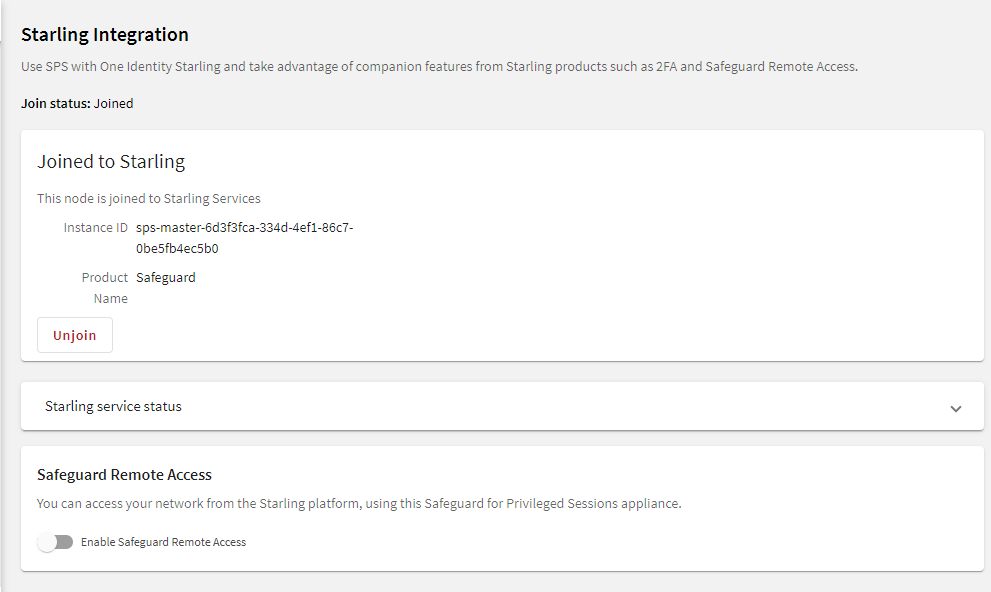
Figure 79: Basic Settings > Starling Integration — Example of SPS joined to Starling

Result
Your SPS instance is joined to Starling.
Unjoining SPS from One Identity Starling
This section describes how to unjoin SPS from One Identity Starling, which is required if you want to decommission an SPS, or to replace an SPS with another one.
Prerequisites
-
An existing Starling organization (tenant).
-
An SPS that is already joined to Starling.
-
To avoid errors, SPS prevents you from unjoining SPS from One Identity Starling if Safeguard Remote Access is enabled. To unjoin SPS from One Identity Starling, disable Safeguard Remote Access.
To unjoin SPS from One Identity Starling
- Navigate to Basic Settings > Starling Integration.
- Click Unjoin.
- (Optional) To join an SPS, see Joining SPS to One Identity Starling.
User management and access control
User management and access control
The Users & Access Control menu (previously named AAA menu) allows you to configure multiple login options and to control the authentication, authorization, and accounting settings of users accessing One Identity Safeguard for Privileged Sessions (SPS). The following topics are detailed in the next sections:


