Quick Connect Administration Console
The Quick Connect Administration Console is a graphical user interface that provides access to the One Identity Quick Connect Sync Engine functionality. You can use the Administration Console to connect One Identity Quick Connect Sync Engine to external data systems, manage existing connections, and perform data synchronization operations between the connected data systems. The Administration Console is installed as part of One Identity Quick Connect Sync Engine.
To start the Quick Connect Administration Console
To start the Quick Connect Administration Console, depending upon the version of your Windows operating system, click Quick Connect Administration Console on the Apps page or select All Programs | Quick Connect Administration Console from the Start menu.
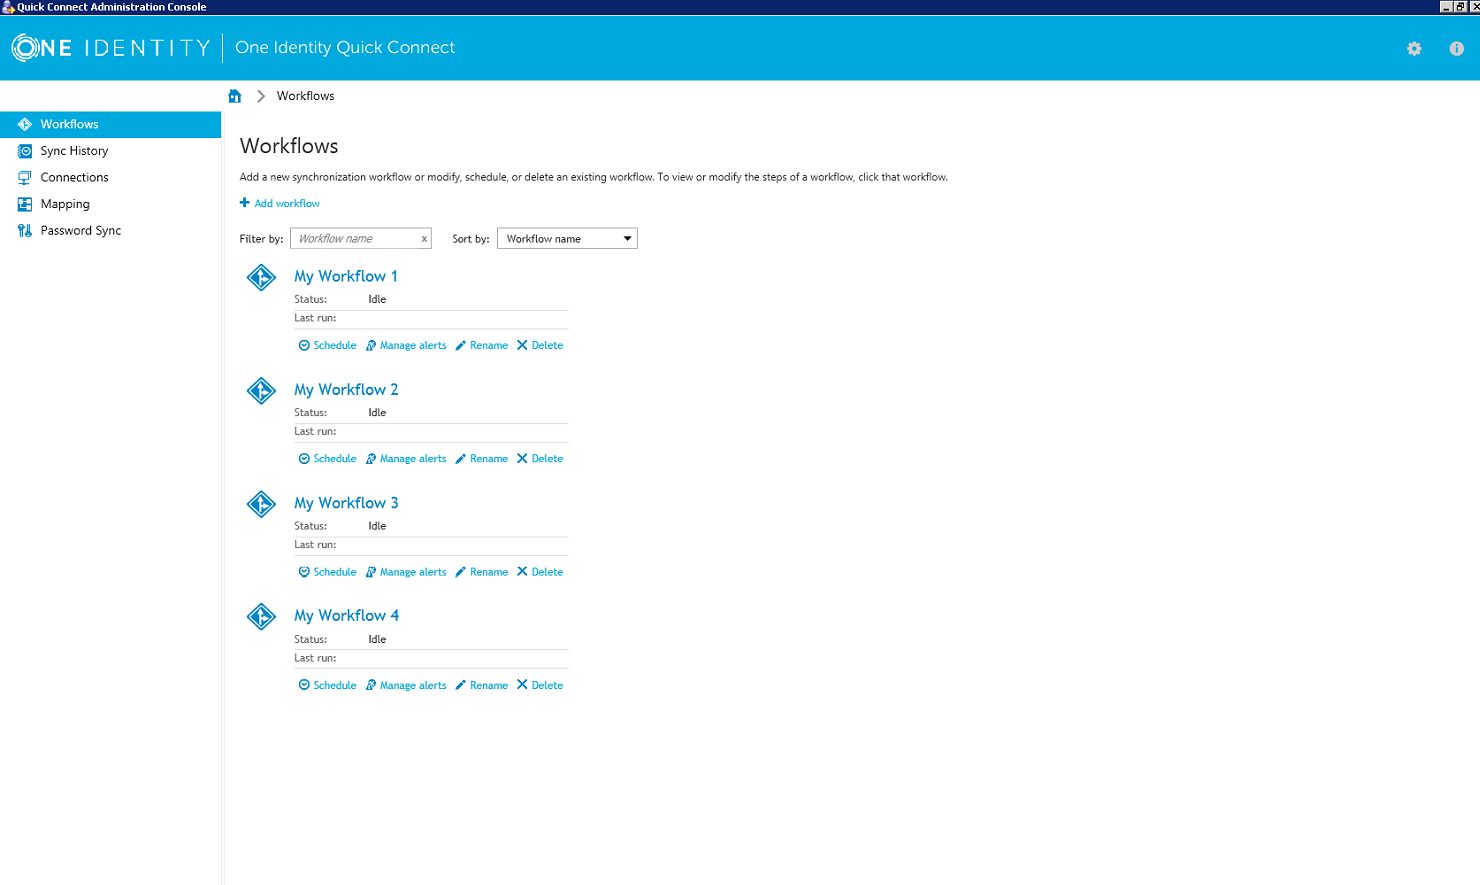
The Quick Connect Administration Console looks similar to the following:
Figure 1: Quick Connect Administration Console
In the upper right corner of the console, you can click the following items:
Table 4: Menu items
|
The Gear icon |
Provides the following commands:
Configure Sync Engine. Starts a wizard that helps you change the configuration settings of the current One Identity Quick Connect Sync Engine instance.
Import Configuration. Starts a wizard that helps you to import configuration settings from a configuration file created by another instance of One Identity Quick Connect Sync Engine.
Export Configuration. Starts a wizard that helps you to save the configuration profile of the current One Identity Quick Connect Sync Engine instance to a file. You can use this file to apply the saved configuration to other instances of One Identity Quick Connect Sync Engine 6.1.0 deployed in your environment.
Mail Profiles. Allows you to add, edit, or delete mail profiles for sending notification emails about workflow runs. For more information on how to use the email notification, see Using workflow alerts.
Diagnostic Logging. Allows you to specify settings for writing Quick Connect diagnostic data to the Quick Connect log file or Windows Event Log.
Communication Port. Allows you to change the communication port number used by the One Identity Quick Connect Sync Engine. |
|
The Information icon |
Displays a window where you can view a list of installed Quick Connect connectors and connector usage statistics (such as the average and maximum number of licensed objects in the connection scope for each installed connector). |
In this section:
For more information about the elements you can use on these tabs, see the next subsections.
Workflows tab
Allows you to manage data synchronization workflows for connected data systems. A workflow can include a number of synchronization steps, each performing a specific data synchronization operation (provision, deprovision, or update). For more information on synchronization workflows and their steps, see Synchronizing identity data.
You can also use this tab to manage email notification settings for each existing synchronization workflow. For more information, see Using workflow alerts.
On the Workflows tab, you can use the following elements (some of these elements become available only after you create at least one workflow with one or more synchronization steps):
- Add workflow. Creates a new synchronization workflow.
- Filter by. Allows you to filter existing workflows by the letters or text you type in the text box. The filter applies to the workflow names.
- Sort by. Allows you to sort existing workflows by workflow name, last run time, or the number of synchronization steps.
- <Workflow Name>. Represents a synchronization workflow. You can click the workflow name to view and add, delete, or modify synchronization steps in that workflow.
- Schedule. Allows you to create a schedule for running the synchronization workflow.
- Manage alerts. Allows you to add, delete, or edit alerts for the synchronization workflow. An alert allows you to automatically send notification emails about the completion of a workflow run to specified recipients.
- Rename. Allows you to rename the synchronization workflow.
- Delete. Deletes the workflow.
Sync History tab
Allows you to view and selectively clean up the synchronization history. This is the history of synchronization workflow runs and object mapping operations. For more information, see Synchronization history.
On the Sync History tab, you can use the following elements:
- Clean up now. Allows you to selectively clean up sync history entries by specifying the age of the entries that you want to clean up.
- Schedule cleanup. Allows you to schedule a recurring cleanup operation for the sync history.
- Workflow History. Allows you to view a list of completed workflow runs and the details of objects that participated in a particular workflow run.
- Mapping History. Allows you to view a list of completed map and unmap operations and the details of objects that participated in those operations.
- Search. Allows you to search the One Identity Quick Connect Sync Engine synchronization history for completed provision, deprovision, update, and sync passwords operations. You can search by a number of criteria, such as the target connected data system and object type on which the operation was performed and the time period during which the operation completed.
Connections tab
Allows you to manage connections between the One Identity Quick Connect Sync Engine and the external data systems you want to use for data synchronization operations.
For instructions on creating connections to external data systems supported out of the box, see External data systems supported out of the box. For instructions on creating connections to other types of external data systems, see the documentation supplied with the Quick Connect package that supports the data system.
On the Connections tab, you can use the following elements (some of these elements become available only after you create at least one connection):
- Add connection. Allows you to create a new connection to an external data system.
- Filter by. Allows you to filter existing connections by the letters or text you type in the text box. The filter applies to the connection names.
- Sort by. Allows you to sort existing connections by connection name, name of the connector used, or the frequency of usage in synchronization workflow steps.
- <Connection Name>. Represents a connection to external data system. You can click a connection name to view or modify the corresponding connection settings.
- Connection settings. Allows you to view or modify settings for the connection.
- Synchronization scope. Allows you to view or modify synchronization scope for the connection.
- Delete connection. Deletes the connection.
