
Show Server Schema
You can access the server Schema view by clicking on the Show Schema option in the Schema menu in the menu toolbar. You can also open the view by clicking on the Show Schema icon in the Control toolbar. Note that if no Schema is returned by the server that you have connected to, this option will be unavailable.
The Show Schema panel will open as a view accessible on the Search View button bar at the bottom of the screen and is represented by a button displaying the same Show Schema icon as is used in the Control toolbar.
Fig-30: Viewing the Server Schema
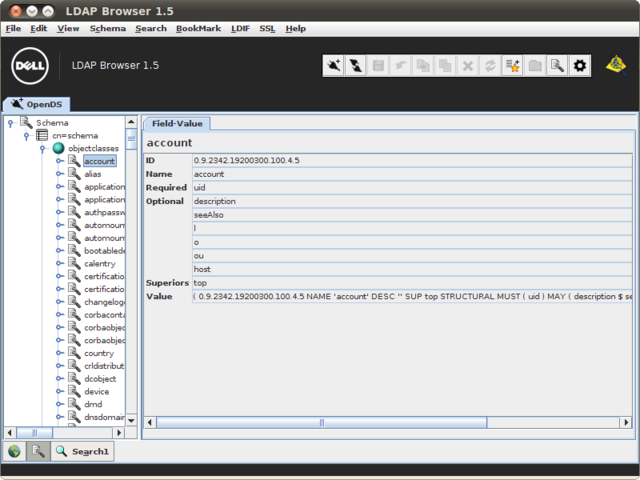
The schema is displayed as a tree in the navigation panel. The schema node in the tree can be expanded to view ObjectClasses, AttributeTypes, LDAPSyntaxes and MatchingRules. Expanding any of these options will allow you to view the individual entries for each schema component. Entries are displayed in a similar way to entries within the normal tree, with the exception that Schema entries cannot be edited. However, although the schema cannot be edited so that it affects the server, additional objectclasses and attributes can be added to the local representation of the schema. This is useful for when you are making use of a Virtual Directory or LDAP Proxy product that may provide virtualized schema extension options that will not be included in the schema reported by a backend directory.
Virtual schema entries added to the local schema representation are highlighted in red in the navigation panel of the browser, when viewing the schema tree.
Editing the Local Schema Representation
In some cases, you may be making use of some kind of Virtual Directory Server or LDAP Proxy software that will be situated between the browser and a backend server. In these situations, it is possible that the schema that is reported the backend LDAP directory, may not entirely match the capabilities of the solution that you have implemented. For instance, if you have made use of any form of attribute victimization or alternate method of extending the schema without actually performing a modification on the backend system, then the schema reported will not match the actual capabilities of your solution. In these cases, you may need to update the local schema representation that the browser is storing. It is absolutely important that you understand that changing the local schema representation will not change the schema on the server, it will merely facilitate the option of using additional objectclasses and attributes that your solution actually already supports.
Note that after any changes to the schema that you make, you should Save your configuration so that LB will remember the changes when it is restarted. This is particularly important if you are restoring schema entries, or they will simply not be visible when the browser is restarted. If, at any point, you make a change to the schema and it is not reflected in the browser, you may find that you need to save your changes and re-open the connection as the schema will need to be regenerated based on the new configuration.
Adding an ObjectClass
You can add an objectclass to the local schema representation by clicking on the Add ObjectClass button in the Manage ObjectClasses window. This will open a New ObjectClass dialog. This window offers a number of facilities to construct a new ObjectClass within the schema. As this is a fairly advanced topic and is rarely required unless you are using a Virtual Directory Server or LDAP Proxy product, you will need to have a clear understanding of the information that you will be providing within your ObjectClass definition. The following options are available:
-
Objectclass: The name of the ObjectClass as it will be used within the browser.
-
Description: A description of the ObjectClass for the purpose of identifying the class and what it is used for.
-
ID: The unique Object ID (OID) that should be used to identify the ObjectClass.
-
Type: There are three options in this drop down list:
-
+STRUCTURAL+: A structural object class is used to define the primary type for an entry. Each entry must have exactly one structural class, and it defines the core type of object that the entry represents.
-
+ABSTRACT+: An abstract object class is not intended to be used directly in entries but should be subclassed by a structural or auxiliary class.
-
+AUXILIARY+: An auxiliary object class is used to define a characteristic of an entry. An entry may have zero or more auxiliary classes.
-
-
Superior ObjectClasses: In the panel on the left, you can select superior ObjectClasses for this ObjectClass, and add them using the >> button. You will be likely to specify superior ObjectClasses if you have specified that this ObjectClass is of an Abstract or Auxiliary type.
-
Required Attributes: In the panel on the left, you can select Attributes that this ObjectClass requires, and add them using the >> button.
-
Optional Attributes: In the panel on the left, you can select optional attributes that belong to this ObjectClass, and add them using the >> button.
-
Aliases: In this section, you can add and remove aliases that can be used to reference this ObjectClass.
Fig-31: New ObjectClass

When you have finished entering the details for your virtual ObjectClass, you can click on the Create ObjectClass button. This will update the local schema representation, and automatically refresh the view if you have it open. It will also store this virtual ObjectClass in the local configuration file for future use. An entry for a virtual attribute within a configuration file will look something like this:
    objectclassbegin:
    objectclassname:OnecorpOC
    objectclassoid:1.23.44.7.89.03.49.5
    objectclasssuperior:top$
    objectclassdescription:This is a virtual objectclass
    objectclassrequired:NewName$
    objectclassoptional:NewAttr1$NewAttr2$
    objectclasstype:0
    objectclassalias:Newtest$
    objectclassend:
When you have added an ObjectClass to the local schema representation, the font color for the ObjectClass entry in the schema will be set to red, so that it is easy to identify that the ObjectClass is stored locally and not in the schema reported by the server.
Adding an Attribute
You can add an attribute to the local schema representation by clicking on the Add Attribute button in the Manage Attributes window. This will open the Add Attribute dialog, where you are able to specify the various parameters required to create a new attribute. As this is a fairly advanced topic and is rarely required unless you are using a Virtual Directory Server or LDAP Proxy product, you will need to have a clear understanding of the information that you will be providing within your Attribute definition. The following options are available:
-
Attribute: The name of the Attribute as it will be used within the browser.
-
Description: A description of the Attribute for the purpose of identifying the attribute and what it is used for.
-
ID: The unique Object ID (OID) that should be used to identify the Attribute.
-
Syntax String: The syntax string that should be used to describe the attribute type and how it should be used. For example, this should describe whether the attribute is a string or integer, and whether comparison operations are case-sensitive or case-insensitive.
-
Single: Whether or not the attribute should be treated as SINGLE-valued, or MULTI-valued.
-
Superior: Used to specify superior attributes, for which this attribute inherits properties.
-
Aliases: In this section, you can add and remove aliases that can be used to reference this attribute.
Fig-32: New Attribute

When you have finished entering the details for your virtual Attribute, you can click on the Create Attribute button. This will update the local schema representation, and automatically refresh the view if you have it open. It will also store this virtual Attribute in the local configuration file for future use. An entry for a virtual attribute within a configuration file will look something like this:
    attributebegin:
    attributename:NewAttr1
    attributeoid:77.88.5.03.4.5.77
    attributedescription:A virtual attribute
    attributesyntaxstring:1.3.6.1.4.1.1466.115.121.1.15{1024}
    attributesingle:no
    attributesuperior:
    attributealias:
    attributeend:
When you have added an Attribute to the local schema representation, the font color for the Attribute entry in the schema will be set to red, so that it is easy to identify that the Attribute is stored locally and not in the schema reported by the server.
Editing an ObjectClass
You can edit an objectclass within the local schema representation by clicking on the Manage ObjectClass option in the Schema menu in the menu toolbar. In the dialog that pops up, you can choose to Add a new ObjectClass, Remove and existing ObjectClass, or Restore an ObjectClass that you have previously removed. There is also an option to Modify an ObjectClass. If you click on this button, the Add ObjectClass window will appear, with all of the fields completed with the data relevant to the ObjectClass as it already exists within the schema. This gives you the opportunity to modify the definition for any ObjectClass within the local schema representation.
Fig-33: Modify an ObjectClass

While editing a virtual ObjectClass will simply update the information stored for that ObjectClass within the configuration file, editing a genuine ObjectClass will effectively add a new virtual ObjectClass with the values specified. This means that in order to undo these changes, you will need to remove the ObjectClass from the schema, and then save your configuration. This will remove the virtual ObjectClass from the configuration file and will revert the browser back to using the original ObjectClass defined in the Schema.
Editing an Attribute
You can edit an attribute within the local schema representation by clicking on the Manage Attribute option in the Schema menu in the menu toolbar. In the dialog that pops up, you can choose to Add a new Attribute, Remove and existing Attribute, or Restore an Attribute that you have previously removed. There is also an option to Modify an Attribute. If you click on this button, the Add Attribute window will appear, with all of the fields completed with the data relevant to the Attribute as it already exists within the schema. This gives you the opportunity to modify the definition for any Attribute within the local schema representation.
Fig-34: Modify an Attribute

While editing a virtual Attribute will simply update the information stored for that Attribute within the configuration file, editing a genuine Attribute will effectively add a new virtual Attribute with the values specified. This means that in order to undo these changes, you will need to remove the Attribute from the schema, and then save your configuration. This will remove the virtual Attribute from the configuration file and will revert the browser back to using the original attribute defined in the Schema.
Removing an ObjectClass
You can remove an objectclass from the local schema representation by clicking on the Remove button in the Manage Objectclass window.
This function provides two alternate behaviors. If you are removing a 'virtual objectclass' that you have created within the local schema representation using the Add ObjectClass option, the Remove ObjectClass option will remove the configuration entry stored within the configuration file, so that the 'virtual objectclass' is permanently removed.
On the other hand, removing a 'real objectclass' from the reported schema will create a new configuration entry in the configuration file, to store a list of 'removed' objectclasses. The configuration entry will look similar to the following:
    objectclassremovedbegin:
    objectclassremovedname: onecorpObjectClass
    objectclassremovedname: ipHost
    objectclassremovedend:
This second behavior may be useful where you have a particular objectclass definition in the schema reported by a backend, that causes a conflict with a similarly named objectclass in your Virtual Directory Solution.
Removing an Attribute
You can remove an attribute from the local schema representation by clicking on the Remove button in the Manage Attribute window.
This function provides two alternate behaviors. If you are removing a 'virtual attribute' that you have created within the local schema representation using the Add Attribute option, the Remove Attribute option will remove the configuration entry stored within the configuration file, so that the 'virtual attribute' is permanently removed.
On the other hand, removing a 'real attribute' from the reported schema will create a new configuration entry in the configuration file, to store a list of 'removed' attributes. The configuration entry will look similar to the following:
    attributeremovedbegin:
    attributeremovedname: onecorpAttribute1
    attributeremovedname: onecorpAttribute2
    attributeremovedend:
This second behavior may be useful where you have a particular attribute definition in the schema reported by a backend, that causes a conflict with a similarly named attribute in your Virtual Directory Solution.
Restoring an ObjectClass
If you select to remove an ObjectClass, it is automatically added to a list of 'removed ObjectClasses' that will be used to filter the ObjectClasses presented in the local schema representation. You may find that you wish to restore these ObjectClasses to their original state. If this is the case, you can use the Restore ObjectClass option in the Schema menu in the menu toolbar. This action will open a dialog listing the ObjectClasses that have been removed from the local schema representation. Simply selecting the ObjectClass that you wish to restore and clicking on the Restore button should ensure that the ObjectClass is added back into the schema.
Fig-35: Restore an ObjectClass

Restoring an Attribute
If you select to remove an Attribute, it is automatically added to a list of 'removed Attributes' that will be used to filter the Attributes presented in the local schema representation. You may find that you wish to restore these Attributes to their original state. If this is the case, you can use the Restore Attribute option in the Schema menu in the menu toolbar. This action will open a dialog listing the Attributes that have been removed from the local schema representation. Simply selecting the Attribute that you wish to restore and clicking on the Restore button should ensure that the Attribute is added back into the schema.
Fig-36: Restore an Attribute

SSL Truststores
In order to connect to an LDAPS server, you will need to enable SSL for your connection and you may need to specify a path to an SSL Truststore. SSL Truststores are binary files that are used to store collections of SSL certificates that can be used to encrypt communications between the LB client and the server that it is connecting to. A Truststore can contain as many certificates as you like, and you can set up as many different Truststore files as you require.
To create a new Truststore, or to add a certificate to an existing Truststore,you can click on the SSL Menu in the menu toolbar, and then click on the Store Certificate menu option. This will open the Truststore Dialog.
Fig-37: The SSL Truststore Dialog

The Truststore dialog expects the following parameters:
-
Truststore: You should enter the path to an existing Truststore file that you have created, or specify the path to a new Truststore file that you wish to create.
-
Password: This is the password used to encrypt the data stored within a Truststore. If you are adding a certificate to an existing truststore, this should match the password that the truststore was given when it was created. If you are creating a new Truststore, you can specify any new password here, but you should be sure to remember it in order to modify the Truststore in the future.
-
SSL Certificate: You should enter the path to an existing certificate currently available in PEM format on your filesystem. This certificate will be added to the Truststore and will be available for use when encrypting or validating SSL connections. You may continue to add certificates to the Truststore in the future, if more than one certificate is required (i.e. you need to create a chain, or you wish to use the same Truststore for alternate connections).
-
Alias: You can optionally specify an alias for each certificate that you add to the Truststore. This is useful if you want to look at certificate details for a specific certificate within the store.
Once the certificate that you wish to use for an SSL connection has been added to the TrustStore, you will be able to open an SSL connection to an LDAPS server in the Connection dialog by specifying the path to the TrustStore that you have added the certificate to.