This section describes how to configure connections.
NOTE:
When configuring HTTP or SSH connections, avoid using the IP address configured for administrator or user login on SPS.
To configure connections
-
Select the type of connection from the main menu.
-
To configure an HTTP connection, select HTTP Control > Connections.
-
To configure an ICA connection, select ICA Control > Connections.
-
To configure a Remote Desktop connection, select RDP Control > Connections.
-
To configure a Secure Shell connection, select SSH Control > Connections.
-
To configure a Telnet connection, select Telnet Control > Connections.
-
To configure a VNC connection, select VNC Control > Connections.
-
-
Click
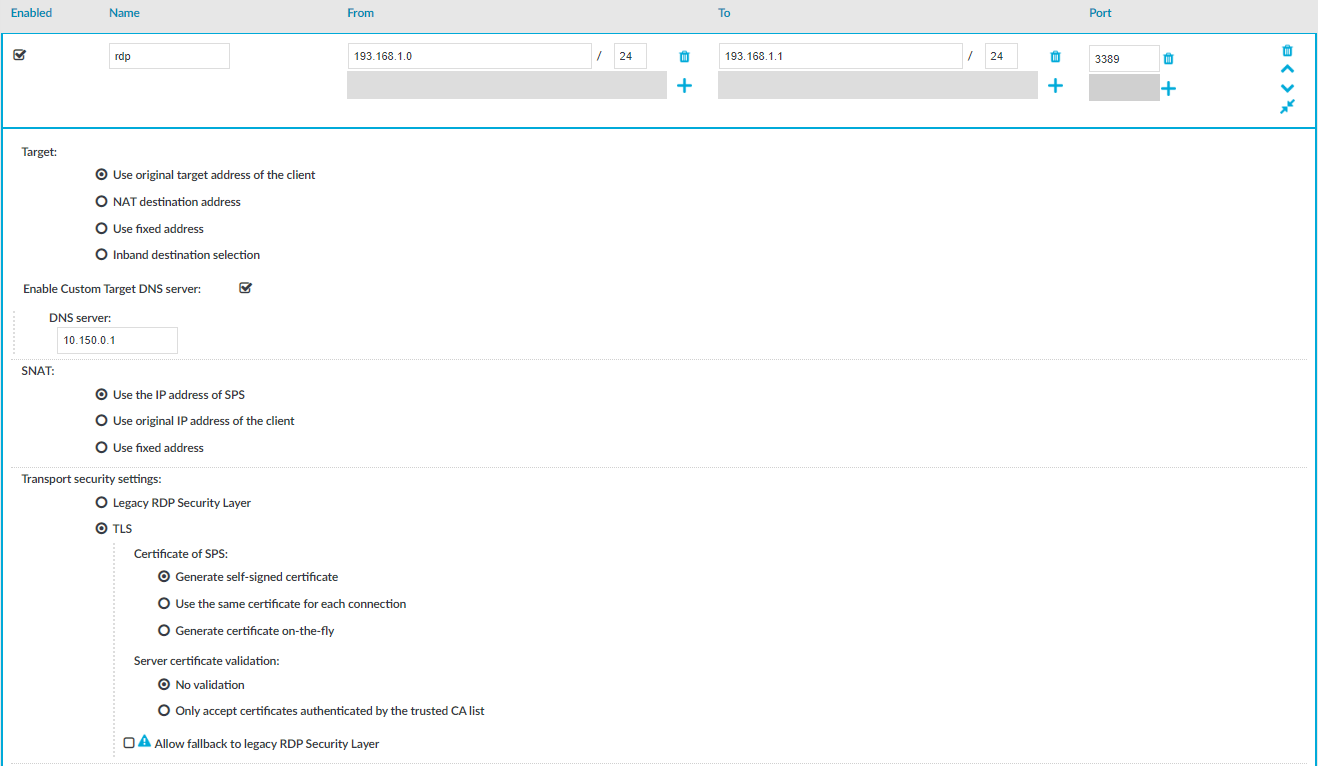
to define a new connection and enter a name that identifies the connection (for example, admin_mainserver).
TIP: Use descriptive names that give information about the connection, for example, refer to the name of the accessible server, the allowed clients, and so on.
Figure 40: <Protocol name> Control > Connections — Configuring connections
-
In the From field, enter the IP address of the client that is permitted to access the server. To list additional clients, click
You can use an IPv4 or an IPv6 address. To limit the IP range to the specified address, set the prefix to 32 (IPv4) or 128 (IPv6).
Alternatively, you can enter a hostname instead. SPS automatically resolves the hostname to an IP address.
NOTE: Note the following limitations:
-
To resolve the hostnames, SPS uses the Domain Name Servers set in the Basic Settings > Network > Naming > Primary DNS server and Secondary DNS server fields.
-
If the Domain Name Server returns multiple IP addresses, SPS randomly selects from the list.
-
-
In the To field, enter the IP address that the clients request.
You can use an IPv4 or an IPv6 address. To limit the IP range to the specified address, set the prefix to 32 (IPv4) or 128 (IPv6).
Alternatively, you can enter a hostname instead. SPS automatically resolves the hostname to an IP address.
NOTE: Note the following limitations:
-
To resolve the hostnames, SPS uses the Domain Name Servers set in the Basic Settings > Network > Naming > Primary DNS server and Secondary DNS server fields.
-
If the Domain Name Server returns multiple IP addresses, SPS randomly selects from the list.
-
In non-transparent mode, enter the IP address of an SPS logical interface.
-
In transparent mode, enter the IP address of the protected server.
To add additional IP addresses, click
-
-
If the clients use a custom port to address the server instead of the default port of the protocol, in the Port field, enter the port number that the clients request. To list additional port numbers, click
NOTE: SPS can handle a maximum of 15 unique ports per connection policy. If you want to add more than 15 custom ports, create additional connection policies.
-
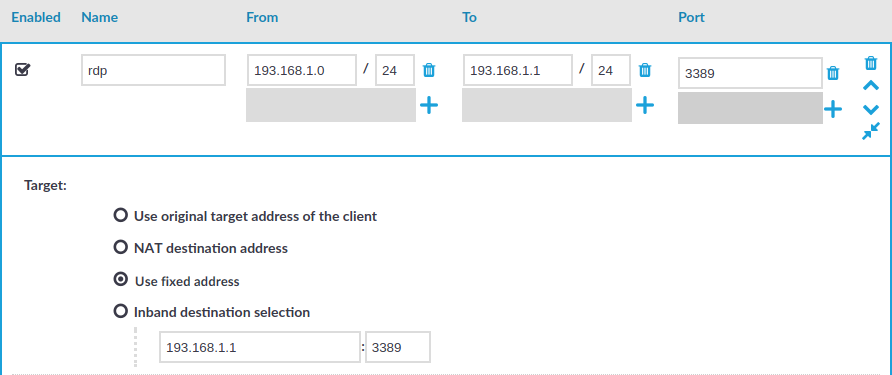
Non-transparent mode: In the Target field, enter the IP address and port number of the target server. SPS connects all incoming client-side connections to this server.
Figure 41: <Protocol name> Control > Connections — Configuring non-transparent connections
-
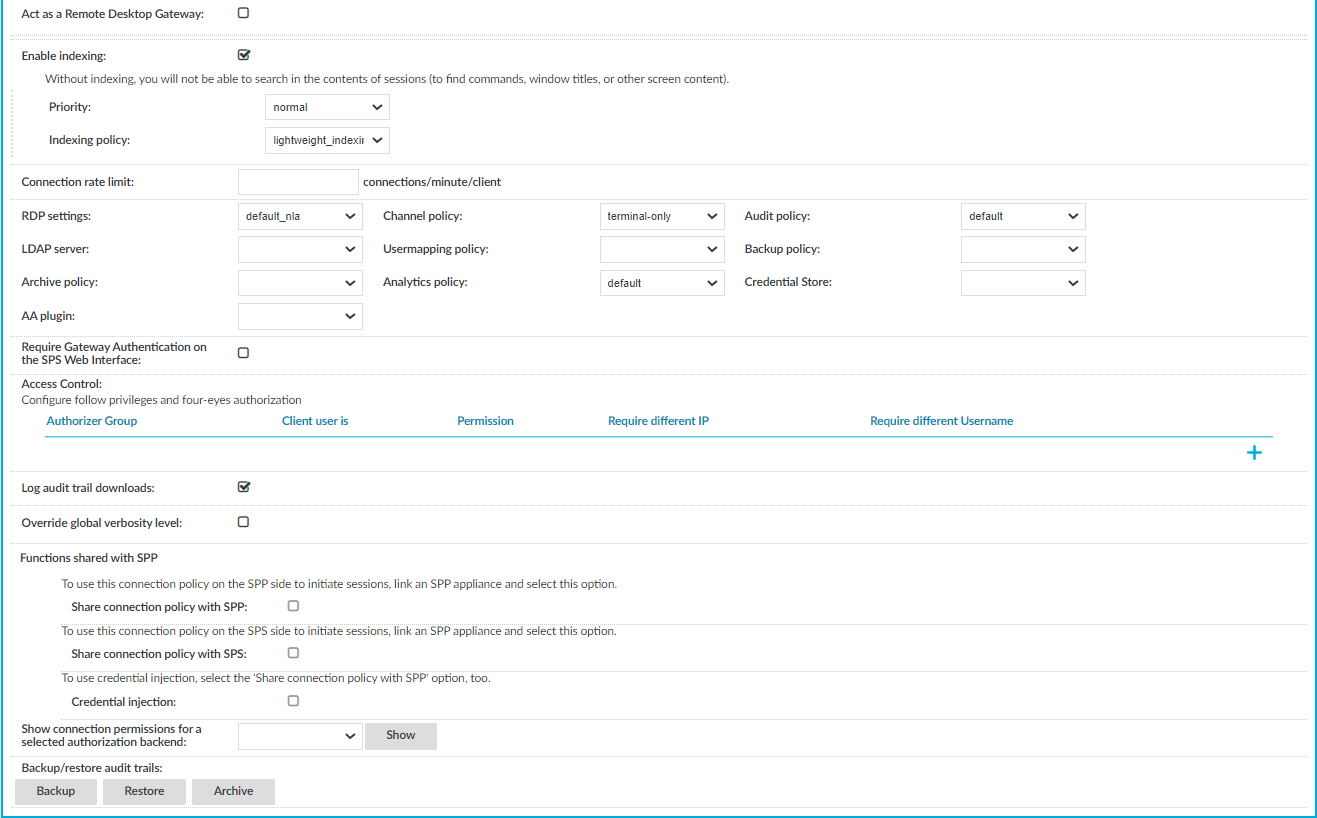
If needed, configure advanced settings (for example, network address translation, channel policy, gateway authentication, various policies, or other settings).
-
To save the connection, click Commit.
TIP: To temporarily disable a connection, deselect the checkbox of the connection.
-
If needed, reorder the list of the connection policies. You can move connection policies by clicking the
and
buttons.
SPS compares the connection policies to the parameters of the connection request one-by-one, starting with the first policy in the policy list. SPS applies to the connection the first connection policy that completely matches the connection request.
-
Depending on your needs and on your environment, you can configure the following settings for your connections:
-
Modify the destination or source addresses of the connections.
-
Select a Backup Policy and an Archiving Policy for the audit trails and indexes of the connection.
If you have indexed trails, the index is archived every 30 days.
Caution: Hazard of data loss! Make sure you also back up your data besides archiving it.
If a system crash occurs, you can lose up to 30 days of index, since the index is only archived every 30 days.
NOTE: The backup and archive policies set for the connection apply only to the audit trails and indexes of the connection. General data about the connections that is displayed on the Search page is archived and backed up as part of the system-backup process of SPS.
-
To timestamp, encrypt, or sign the audit trails, configure an Audit Policy to suit your needs.
Caution: In RDP connections, if the client uses the Windows login screen to authenticate on the server, the password of the client is visible in the audit trail. To avoid displaying the password when replaying the audit trail, encrypt the upstream traffic in the audit trail using a separate certificate from the downstream traffic.
-
Require the users to authenticate themselves not only on the target server, but on SPS as well.
-
Require four-eyes authorization on the connections, with the possibility of an auditor monitoring the connection in real-time.
-
In the case of certain connections and scenarios (for example SSH authentication, gateway authentication, Network Level Authentication (NLA) connections), SPS can authenticate you to an LDAP database, or retrieve your group memberships. To use these features, select an LDAP Server.
NOTE: To display the usergroups that can access a specific Connection Policy, open the Connection Policy, then on the Connections page, select Show connection permissions > Show.
-
To limit the number of new connection requests accepted from a single client IP address per minute, in the Connection rate limit field, enter the maximum number of accepted connections.
-
If you have joined an SPP appliance to SPS and want to share specific SPS functions with SPP, use the Functions shared with SPP option.
To share an RDP or an SSH connection policy with SPP to initiate sessions, select Share connection policy with SPP.
-
-
If your clients and servers support it, configure the connection to use strong encryption.
-
For graphical connections, adjust the settings of your servers for optimal performance:
-
Caution: For optimal performance and text recognition in graphical protocols, disable antialiasing on your servers. Antialiased text in the audit trails of RDP, VNC, and X11 connections is not recognized by the OCR engine of the Audit Player. The indexer service recognizes antialiased text, but its accuracy depends on the exact antialiasing settings. To properly index the trails of these connections, disable antialiasing.
Note that by default, antialiasing is enabled on Windows Vista and later versions. Antialiasing is also called font smoothing. To optimize performance, disable ClearType, which is an antialiasing technology used on Microsoft Windows.
-
When processing RDP connections, SPS attempts to extract the username from the connection.
-