戻る
-
タイトル
How to: Import a previously customized Active Roles Web Interface after an upgrade -
説明
When upgrading Active Roles, the default web interface sites are created and any previously customized web interface is no longer applied. -
対策
If customizations had been made to the Active Roles Web Interface in a previous version, it will be necessary to upgrade these configurations before applying them again.In the Active Roles Configuration Center:- Click the Web Interface tab on the left.
- Select the Create option on the right window pane.
- Select the appropriate IIS Website to configure and give the web interface a name in the Alias field. This will be the end part of the URL that you use for the site, for example, http://servername/siteName where siteName is the alias.
- Click Next
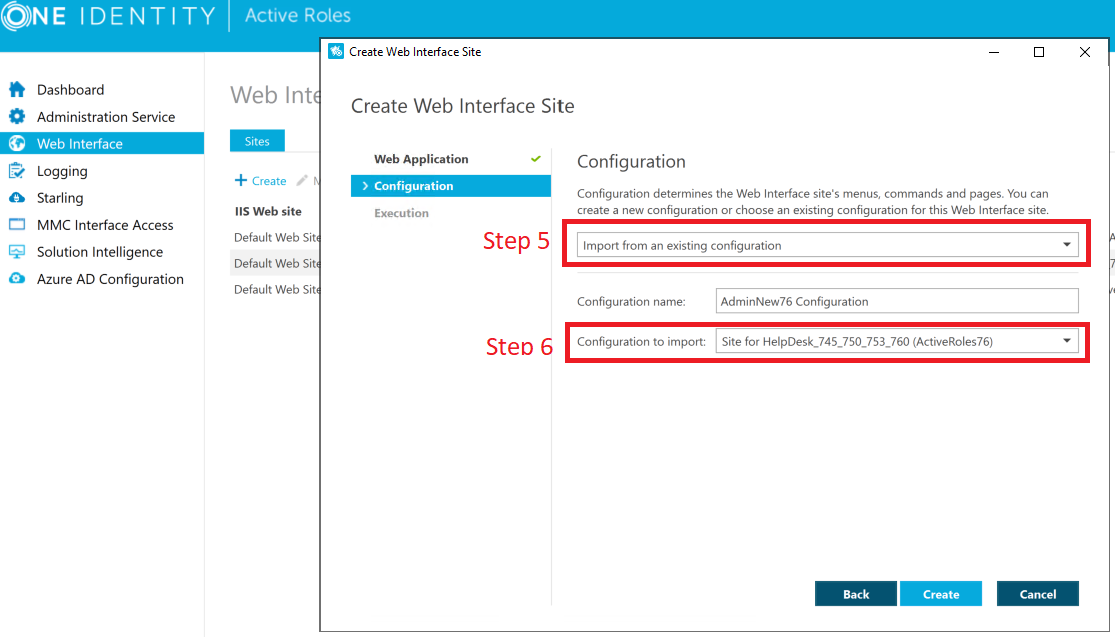
- (screenshot below) In the first drop-down, choose Import from an existing configuration.
- (screenshot below) In the Configuration to import drop-down, select the old configuration that was in use; it should have the old version labeled at the end to make it easier to pick out.
- For the Configuration Name, this will be the name of the new version configuration.
- Click Create
- Click Finish