To rename a group, right-click the group, and then click Rename. Type a new name and press ENTER. This displays the Rename Group dialog box, shown in the following figure. In the Rename Group dialog box, you can change the group name and group name (pre-Windows 2000).
Figure 14: Rename Group

In the Rename Group dialog box, hyperlinks are used to indicate the properties controlled by Active Roles policies (see Getting policy-related information earlier in this document).
To assign a manager over a group, right-click the group, click Properties, and go to the Managed By tab in the Properties dialog box, shown in the following figure. On the Managed By tab, click Change and select the user or contact to designate as the manager.
Figure 15: Assigning a manager over a group
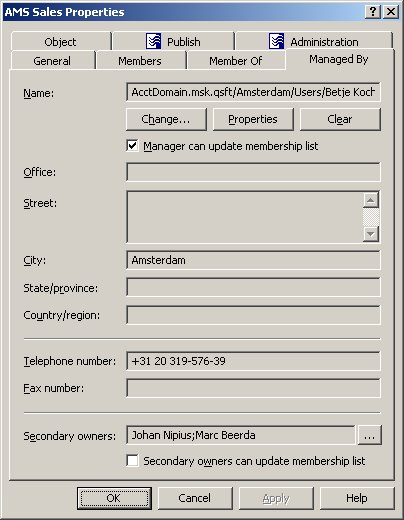
If you select Manager can update membership list, the manager can use Active Roles to add and remove members from the group.
It is possible to assign multiple group owners, to load balance the management of the group. To assign additional owners to the group, click the button next to the Secondary owners box. Group owners can be given the same rights over the group as the manager. For example, selecting the check box beneath the Secondary owners box gives the secondary owners the authority to add or remove members from the group.
It is possible to assign management of the group to another group: you can select a group in the Select Objects dialog box that you use to specify the manager or a secondary owner. This enables every member of the group to act as the manager or secondary owner.
To assign a manager over a group
- In the console tree, locate and select the folder that contains the group.
- In the details pane, right-click the group, and then click Properties.
- On the Managed By tab in the Properties dialog box, click Change under the Name box.
- Use the Select Objects dialog box to locate and select the user or contact you want to be responsible for the group - the manager of the group.
- Optionally, select the Manager can update membership list check box in order to authorize the manager to add or remove members from the group.
|

|
NOTE:
- To assign additional managers to the group, click the button next to the Secondary owners box. Secondary owners can be given the same rights over the group as the manager. For example, selecting the check box beneath the Secondary owners box gives the secondary owners the authority to add or remove members from the group.
- You can select a group for the role of the manager or secondary owner. This enables every member of the group to act as the manager or secondary owner.
- You can use the Find function of Active Roles in order to locate the group you want to modify. Once you have found the group, you can open the Properties dialog box for that group as follows: Right-click the group in the list of search results and click Properties.
|
