How to change group type
You can change the group type (security or distribution) of existing groups with the Active Roles Console.
To convert a group to another group type
-
In the Console tree, locate and select the folder that contains the group you want to modify.
-
In the details pane, right-click the group you want to modify, then click Properties.
-
On the General tab in the Properties dialog, under Group type, select the group type (Security or Distribution) you want to specify for the group.
How to change group scope
You can change the scope (domain local, global, universal) of a group with the Active Roles Console.
To change the group scope
-
In the Console tree, locate and select the folder that contains the group you want to modify.
-
In the details pane, right-click the group you want to modify, then click Properties.
-
On the General tab in the Properties dialog, under Group scope, click the group scope you want for this group.
For information about possible scope settings, see Group management.
NOTE: Active Roles supports the following group scope changes:
-
Global to universal: You can perform this scope change only if the modified group is not a member of another global group.
-
Domain local to universal: You can perform this scope change only if the modified group does not have another domain local group as a member.
-
Universal to global: You can perform this scope change only if the modified group does not have another universal group as a member.
-
Universal to domain local: You can perform this scope change without any restictions.
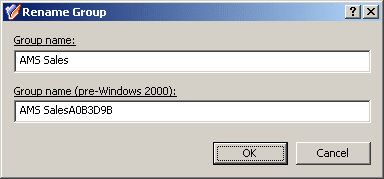
Renaming a group
To rename a group, right-click the group, then click Rename. Type a new name and press ENTER. This displays the Rename Group dialog, shown in the following figure. In the Rename Group dialog, you can change the group name and group name (pre-Windows 2000).
Figure 14: Rename Group
In the Rename Group dialog, hyperlinks are used to indicate the properties controlled by Active Roles policies. For more information, see Getting policy-related information.
How to rename a group
You can rename Active Directory groups with the Active Roles Console.
To rename a group
-
In the Console tree, locate and select the folder that contains the group you want to rename.
-
In the details pane, right-click the group and click Rename.
-
Type a new name (or clear the existing name), then press ENTER to display the Rename Group dialog.
-
Use the Rename Group dialog to modify (if needed) the group name and the group name (pre-Windows 2000).
-
When finished, click OK.
NOTE: Consider the following when renaming a group:
-
The behavior of the Rename Group dialog may vary depending on the configuration of Active Roles policies. To determine whether a given item in the dialog is under the control of a certain policy, observe the text label next to the item: the underlined text label indicates that some policy restrictions are in effect. Click underlined text labels to examine the policies that govern the behavior of the dialog.
-
To locate the group you want to rename, use the Find function of Active Roles. Once you found the group, rename it by selecting it in the list of search results, right-clicking it, clicking Rename, then specifying the new name. To apply the new name, press Enter.
