The provisioning sequence
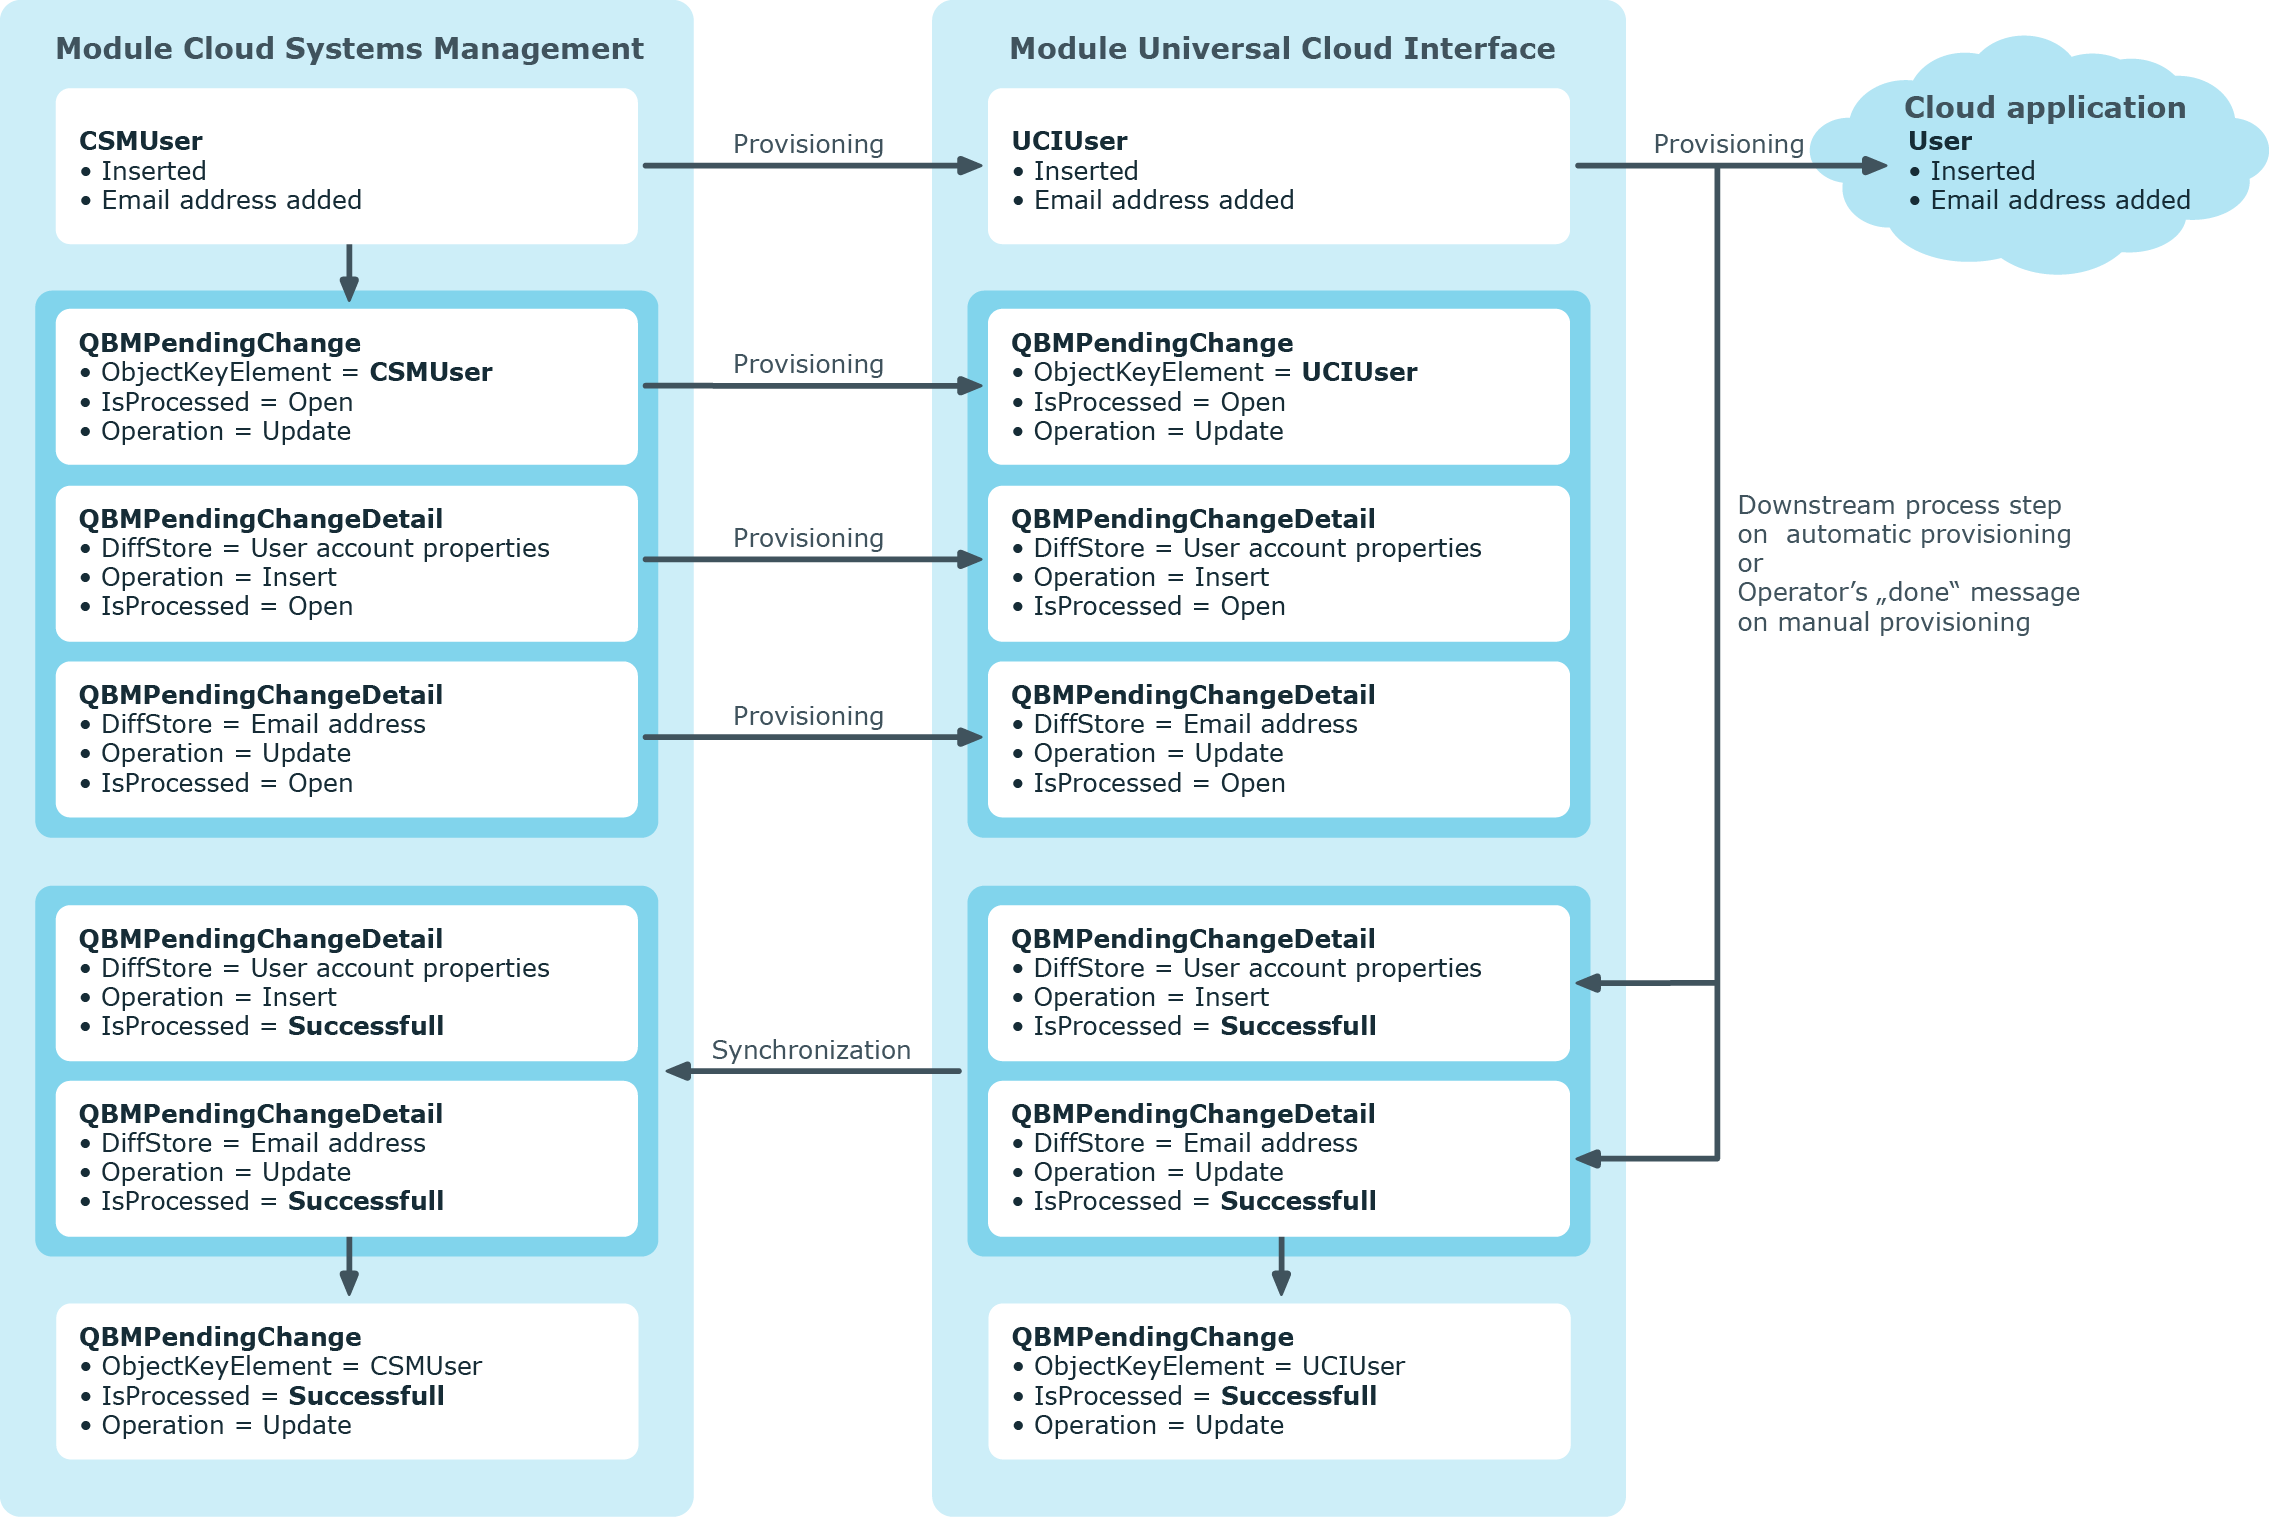
The following visual shows how object changes are provisioned and how the pending changes associated with it are processed. The sequence is identical for automatic and manual provisioning processes and does not depend on whether the Cloud System Management and the Universal Cloud Interface modules are installed in the same or in separate databases.
Figure 3: Provisioning sequence for pending changes
By default, the Cloud Systems Management module is synchronized hourly with the Universal Cloud Interface. This ensures that the processing state for pending changes is declared promptly in the Cloud Systems Management Module.
Related topics
Displaying pending changes
You can view pending changes in the Manager. Here, manual, and automatic provisioning processes are shown.
To display pending changes
Table 13: Meaning of the icons in the toolbar
|

|
Show selected object. |
|

|
Reload the data. |
Related topics
Retention time for pending changes
Pending changes are saved for a fixed period. After this period has expired, the entries are deleted by the DBQueue Processor from the QBMPendingChange and QBMPendingChangeDetail tables. The retention period depends on the status of provisioning processes and can be configured in the configuration parameter. The specified periods apply to both automatic and manual provisioning processes.
To configure the retention period for pending changes
-
To change the retention period for successful provisioning processes, in the Designer, edit the value of the QBM | PendingChange | LifeTimeSuccess configuration parameter. Enter a retention period in days. The default is 2 days.
-
To change the retention period for failed provisioning processes, in the Designer, edit the value of the QBM | PendingChange | LifeTimeError configuration parameter and enter the retention period in days. The default is 30 days.
-
To change the retention period for pending provisioning processes, in the Designer, edit the value of the QBM | PendingChange | LifeTimeRunning configuration parameter and enter the retention period in days. The default is 60 days.
Related topics
Configuring manual provisioning
|

|
WARNING: Data may be lost through inconsistencies.
If you select manual provisioning, you must ensure that changes from the One Identity Manager database are transferred quickly to the cloud application using suitable manual processes.
Ensure that data between the cloud application and the One Identity Manager database is synchronized regularly and quickly. To do this, set up synchronization through the SCIM connector. If this is not possible, you can synchronize using the CSV connector. |
Manual provisioning permissions are configured in the cloud application. Pending manual provisioning processes for this cloud application are displayed in the Web Portal. Operators can transfer pending changes to cloud application using this overview and then mark them as done. Auditors can check pending and completed provisioning processes in the Web Portal.
To configure manual provisioning
-
Edit the cloud application's main data.
-
Set the Manual provisioning option.
-
In the Web Portal, assign the operators who are permitted to edit pending provisioning processes.
-
In the Web Portal, specify the auditors who are authorized to check manual provisioning processes.
For more detailed information about synchronizing using the CSV connector, see the One Identity Manager CSV Connector User Guide.
Detailed information about this topic
