The One Identity Manager Service log file can be displayed in a browser.
You call up the log file with the appropriate URL:
http://<server name>:<port number>
The default value is port 1880.
Different credentials are expected depending on how the authentication method is configured for displaying the log file.
To open the One Identity Manager Service log file in the Job Queue Info
-
Start the Job Queue Info program.
-
In the Server state view, select the Job server and select the Open in browser context menu item.
The One Identity Manager Service HTTP server for the Job server is queried and the various One Identity Manager Service services are displayed.
-
To display the contents of the log file, select Log File in the navigation view.
Figure 3: The One Identity Manager Service log file
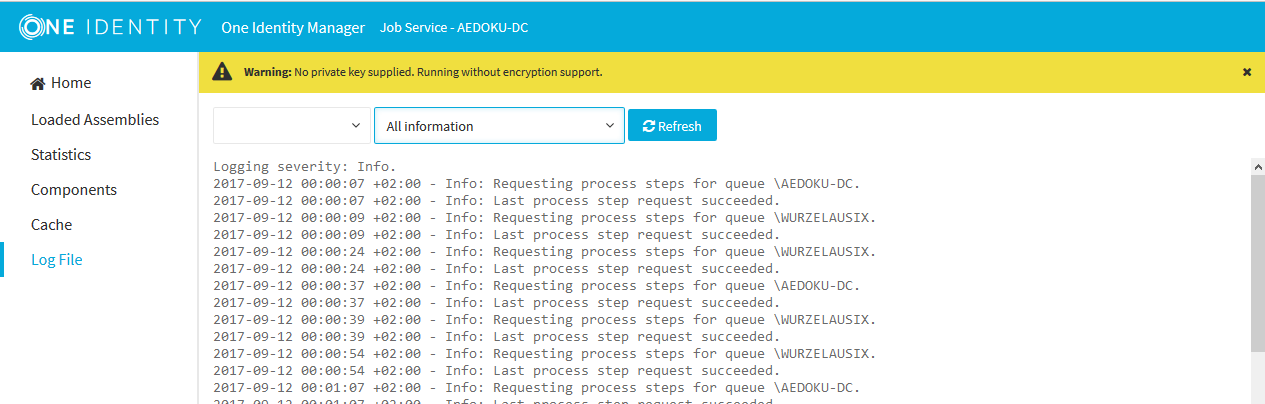
The messages to be displayed on the web page can be filtered interactively. There is a menu on the website for this. Only text contained in the log file can be displayed in this case. For example, if the message type is Warning, messages with the Info message type cannot also be displayed if the relevant filter is selected.
The log output is color-coded to make it easier to identify.
Table 19: Log file color code
|
Green |
Processing successful |
|
Yellow |
Warnings occurred during processing |
|
Red |
Fatal errors occurred during processing |
NOTE: If you want to retain the color information to send by email, you need to save the complete web page.
For more information about configuring how the One Identity Manager Service log file is displayed, see the One Identity Manager User Guide for One Identity Manager Tools User Interface.
NOTE:
-
In a default installation, the service is entered in the server’s service management with the name One Identity Manager Service.
-
If you change the One Identity Manager Service's user account, you must save the service's configuration file in the service’s install directory again.
-
If you are working with an encrypted One Identity Manager database, see Tips for working with an encrypted One Identity Manager database.
To customize login data and the way the service is started
-
Open the service management of the server and select the One Identity Manager Service in the list of services.
-
Open service properties with the Properties context menu item.
-
On the General tab, change the start type if necessary.
The Automatic start type is recommended.
-
Change the user account under which the service runs on the Login tab.
-
Click Apply.
-
Close the service's properties with OK.
-
Start the service from the context menu item Start.
If the One Identity Manager Service cannot be started, a corresponding message is written to the server event log.
Related topics
The idea of a cluster solution is to make the system highly available. The goal is to limit system failure to only a few seconds if a hardware or software component fails. This can be achieved with the installation of a Windows cluster solution (only possible with Enterprise servers). The following diagram shows such a solution.
Figure 4: Example of a cluster solution
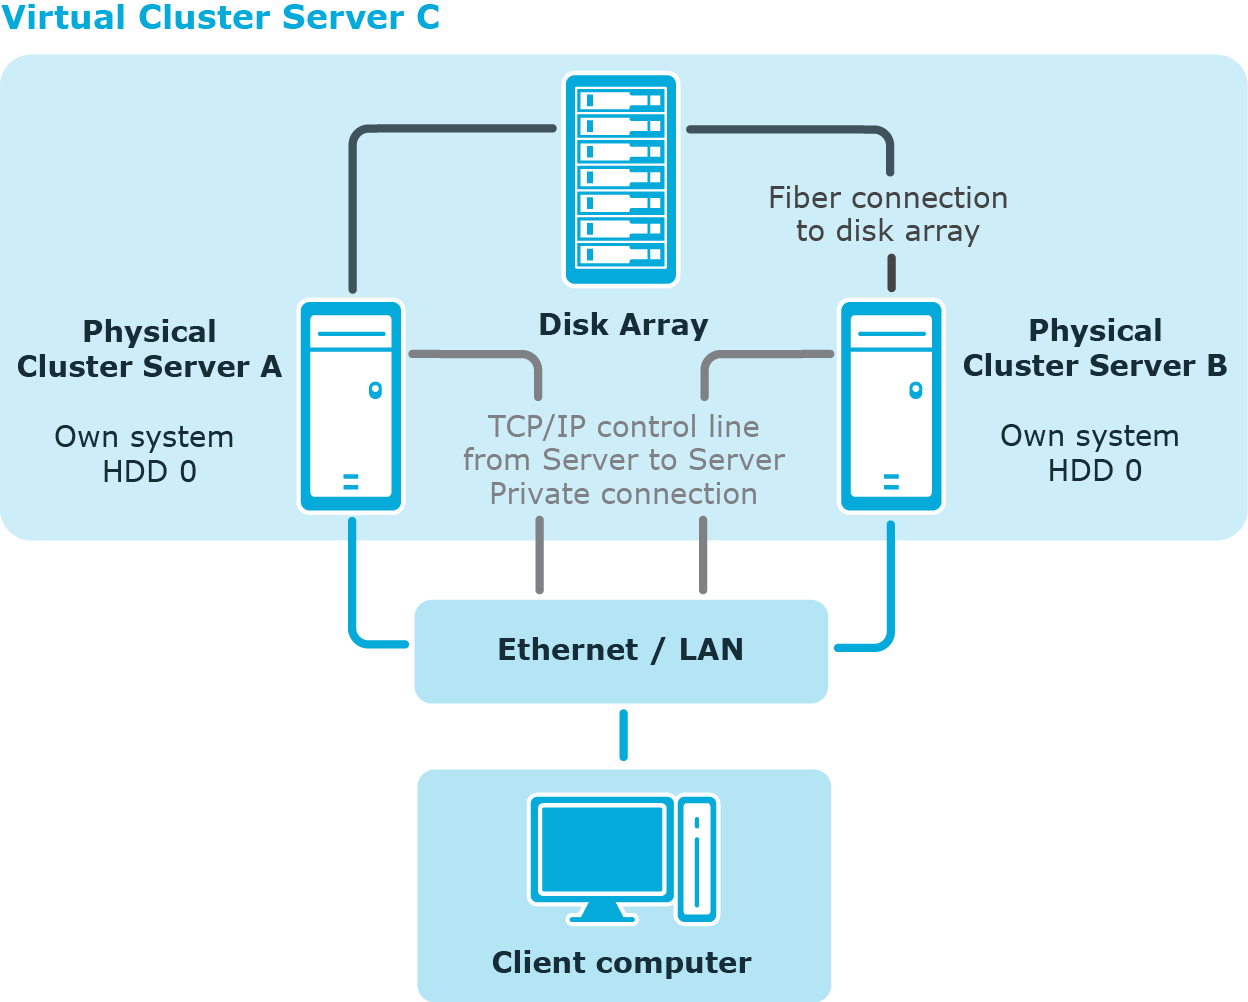
This cluster is made up of two physical computers Server A and Server B that use the same disk array and have their own individual system hard drive. Every server has a Windows operating system. Both servers are installed identically so that in the case of failure one server can take over from the other.
All redundant system components are managed by the cluster manager. From an external point of view, the cluster is addressed as a single, virtual server Server C. The service or user that is accessing the service is automatically connected to the physical server that is currently carrying out the work in the cluster.
If one of the servers fails, then the redundant server in the cluster automatically takes over. The virtual server remains the contact partner; only the physical server that is running, changes.
Detailed information about this topic
Once registered, the One Identity Manager Service is governed by cluster handling for site resilience and load balancing. The service is installed on a virtual server that simulates the cluster. All computer-related operations and service data operate, transparently, with the virtual server and not the real computer (cluster nodes). This also applies to clients that contact the service through the server name, for example RPC (ORPC, DCOM), TCP/IP (Winsock, Named Pipes), or HTTP.
Because the service is in the context of the virtual server, note the following facts:
-
The service-specific settings for the node on which the virtual server is located are replicated to all other nodes. Therefore, the service always has the same configuration irrelevant of the node on which it is actually started.
-
The service is always started only on the current node of the virtual server (the virtual server's current node). The service is stopped on all other nodes.
-
The service is booted and shutdown with the virtual server. If the cluster is not enabled, the service is stopped on all nodes.
-
Services on nodes are brought automatically into the required state (Manual or Stopped) before they are registered by the program.
Related topics
