After you created the RDS instance, you can test in the EC2 instance with the telnet client or Microsoft SQL Server Management Studio (SSMS) if the RDS connectivity was successfully configured.
To verify RDS connectivity in the EC2 instance
-
Log in to the EC2 instance created for Active Roles.
-
To test connectivity to RDS, install the telnet client. To do so:
-
Open Windows Server Manager.
-
On the Dashboard, click Add roles and features.
-
In Installation Type, select Role-based or feature-based installation, then click Next.
-
In Server Selection, choose Select a server from the server pool, and make sure that the local server (the EC2 instance) is selected.
-
In Server Roles, just click Next.
-
In Features, select Telnet Client.
-
In Confirmation, click Install, then Close the application.
-
To verify connectivity to the RDS instance, open the Windows Command Prompt, and run the following command:
telnet <rds-server-endpoint> <port-number>
To find the RDS server endpoint and port to specify, open the entry of the RDS instance in the AWS console, and check the values under Connectivity & Security > Endpoint & port.
NOTE: If the command returns an empty prompt, that indicates connectivity between the EC2 instance and the RDS instance.
-
Download and install Microsoft SQL Server Management Studio (SSMS) on the EC2 instance.
-
To test the connection with SSMS, start the application, then in the Connect to Server dialog, specify the following attributes:
-
Server type: Select Database Engine.
-
Server name: The same RDS instance endpoint used in the telnet command.
-
Authentication: Select SQL Server Authentication, then specify the admin user name and password created when configuring the RDS instance.
-
After you specified all connection properties, click Connect.
When used to synchronize AWS Managed Microsoft AD resources and passwords from an on-premises AD environment to AWS Managed Microsoft AD, you must install and configure on an Amazon Elastic Compute Cloud (EC2) instance.
To install and configure for use with AWS Managed Microsoft AD
-
Download the Active Roles installation media to the EC2 instance.
-
Run the setup and install Active Roles with all required prerequisites as described in Installing Synchronization Service.
-
After installation is finished, start Active Roles . The Configuration Wizard appears.
-
In Service Account and Mode, configure the following settings:
When you are ready, click Next.
-
In Instance Configuration, select Create a new configuration, then click Next.
-
In Database Connection, configure the following settings:
-
SQL Server: Specify the endpoint URL of the RDS instance connected to your EC2 instance. You can check the endpoint of the RDS instance in the AWS console by selecting the RDS instance, then navigating to Connectivity & Security > Endpoint & port.
-
Database: Specify the name of the database that will be used by (for example, syncservice).
-
For authentication, select Use SQL Server authentication, then enter the user name and password of the primary user in your RDS instance (configured in Creating the RDS instance for the Active Roles SQL Server).
-
In Configuration File, specify the name and save location of the configuration file.
-
(Optional) For added security, still in Configuration File, specify a password for the configuration.
-
To apply your changes and start creating the configuration, click Finish.
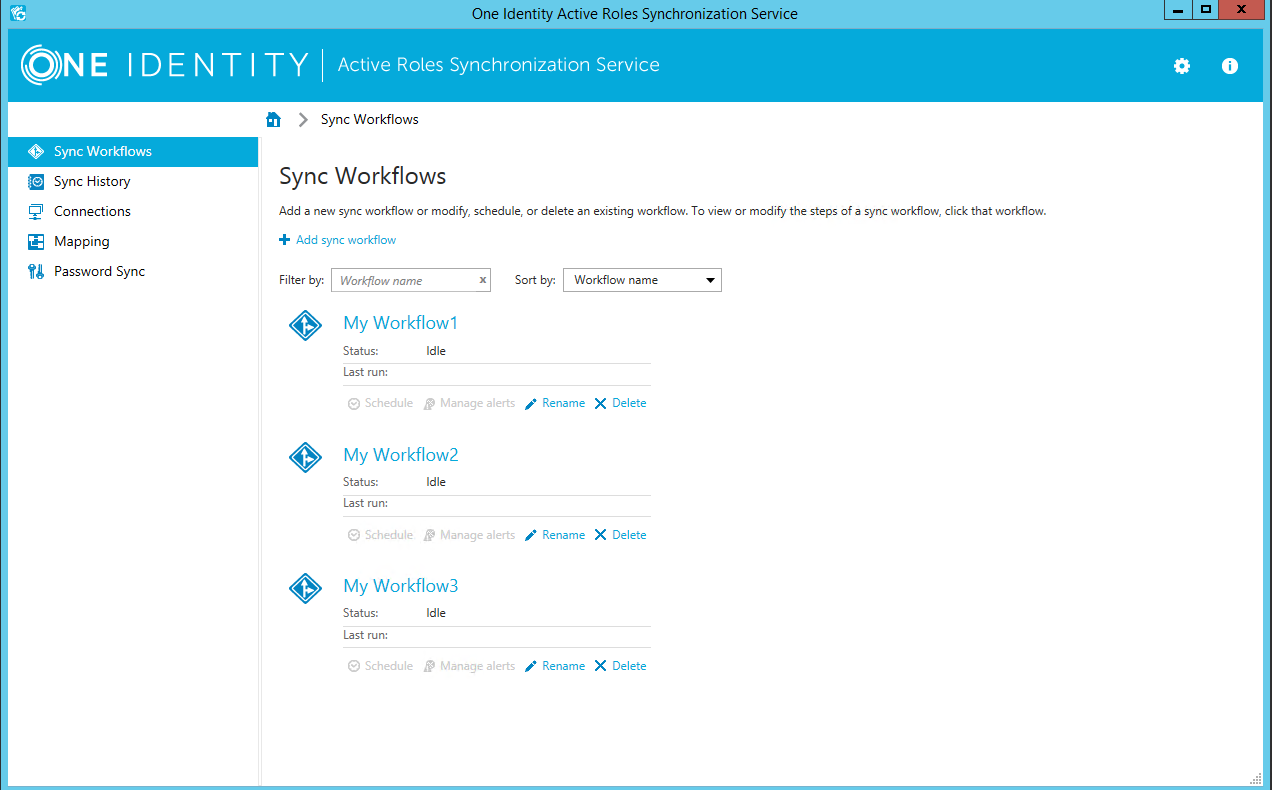
The is a graphical user interface that provides access to the functionality. You can use the to connect to external data systems, manage existing connections, and perform data synchronization operations between the connected data systems. The is installed as part of .
To start the , depending on the version of your Windows operating system, click Active Roles 8.1.4 on the Apps page or select All Programs > One Identity Active Roles 8.1.4 > Active Roles 8.1.4 from the Start menu.
The looks similar to the following:
Figure 3: