In One Identity Safeguard Remote Access (SRA), the next generation SSH client configuration was developed with a set of functionalities in mind to improve user experience:
-
Adaptive applications providing a seamless visual experience between applications (for example, Midnight Commander, a visual file manager that adapts the font size, theme, and resolution of the SSH client automatically).
-
Native clipboard support for copy-paste operations.
-
Adaptive resolution (that is, when you are resizing the terminal window, the displayed event information adapts to the changed size).
-
Screen-reader support for people with visual impairment to help access information on computer screens.
-
Web links highlighting.
SSH client functionalities
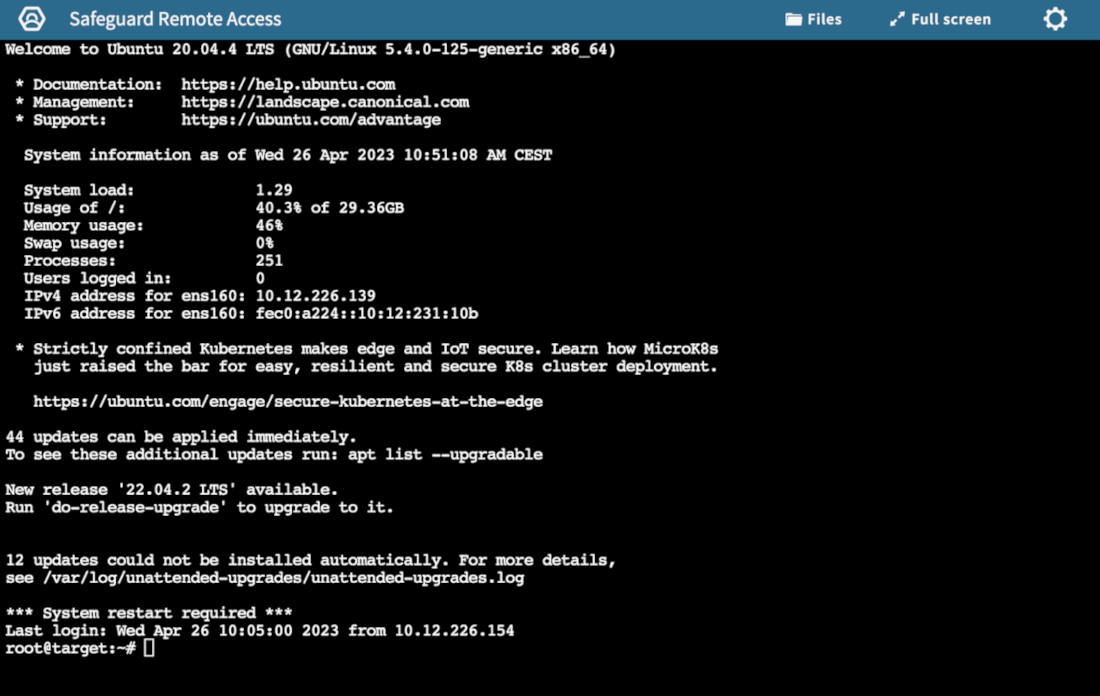
Once the connection to the target server has been established, your session window opens. A popup window may prompt you to provide your server-side credentials.
In the header of the session window, you will see a control panel with the  (Enter fullscreen mode) icon.
TIP: To exit fullscreen mode, press Esc.
To end a session, you can:
NOTE: Disconnecting from the session does not automatically take you back to the Connections page.
Figure 32: Session view with the next generation SSH client
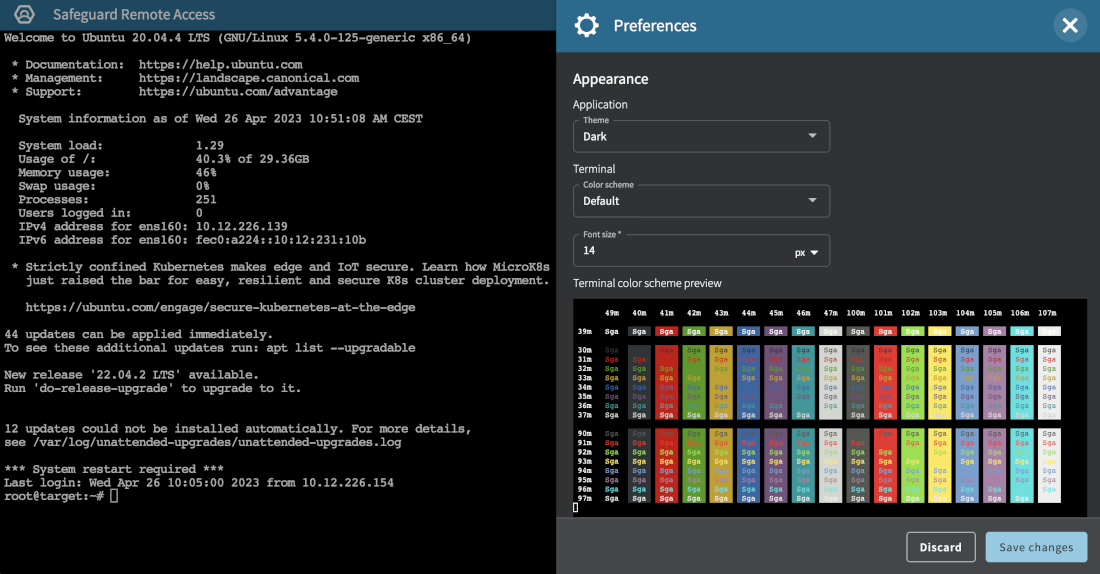
TIP: You can customize the appearance of your session window by clicking  , setting your Preferences, then clicking Save changes to save and apply your changes. While you change your settings, the end result is visible in the preview window dynamically.
Under Preferences, you can:
-
Choose from various pre-set themes for your application.
-
Set the color scheme for your terminal.
-
Change the font to a size that is more preferable to you.
Figure 33: Configuring your display preferences
This section describes how to download and upload files in active remote sessions.
To download files in an active remote session,
-
Navigate to the SRA Connections panel and find the connection tile you want to work with.
-
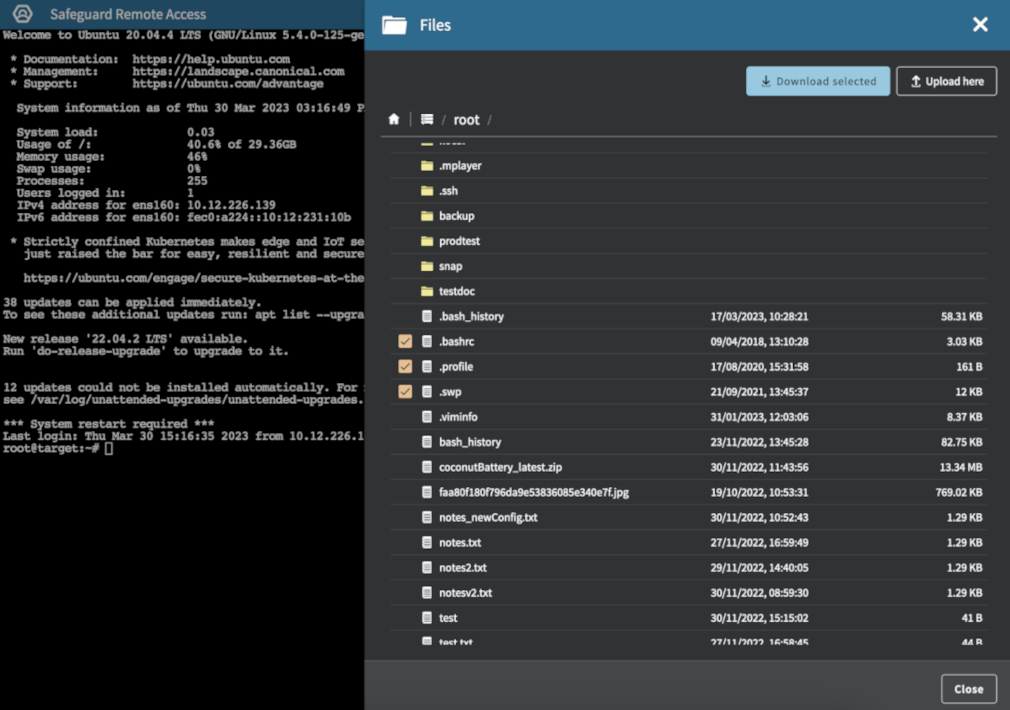
In the top-right corner of the session window, select Files from the menu bar.
Above the file tree, there is a folder path to facilitate navigation. By default, you are directed to your Home folder.
-
In the file tree, navigate to the file(s) you want to download. You can select the file(s) you want to download by clicking on the filename(s) or the checkbox(es) next to the filename(s).
When you have selected the file(s) you want to download, click Download selected.
NOTE: If you want to download multiple files located in different folders, select and add the files to the download queue before moving to a different folder. Otherwise, the files that you have previously selected will not be downloaded.
If you do not have permission to view a folder, a Permission denied for selected folder message will notify you.
Figure 34: SSH session > Files — Downloading files from a remote client
-
(Optional) If you want your files to download in the background while you keep working, check Start file transfers in the background above the file tree.
-
Check the downloaded files in your target folder.
NOTE: To stop a file from being downloaded, select one of the following two ways:
-
Open the Downloads queue to select the file you do not want to download, and click X.
-
If you are using Google Chrome as a browser (recommended), navigate to the downloaded files lane at the bottom of the page to select the file you do not want to download, and click Cancel. You can also Pause and Resume downloads. This feature is applicable only to Google Chrome.
To upload files in an active remote session,
-
Navigate to the SRA Connections panel and find the connection tile you want to work with.
-
In the top-right corner of the session window, select Files from the menu bar.
Above the file tree, there is a folder path for easy navigation. By default, you are directed to your Home folder.
-
Upload your file(s) by either of these methods:
TIP: The number of files being uploaded is visible in the Uploads(<number-of-downloads>) counter. If a version of the file already exists on the remote client, you can decide whether you want to override the file or change the file name to keep the previous file version as well. The folder you have uploaded your file into is refreshed automatically.
-
(Optional) To have file upload run in the background, check Start file transfers in the background.
-
(Optional) To check the progress of the upload, click Uploads.
-
Check the uploaded files in your target folder.
You can upload and download files in an active remote session simultaneously. All downloads and uploads can be managed individually within the queue. The Downloads | Uploads buttons disappear if all files have been processed.
NOTE: During file transfer, the All files are processed status can refer to the following scenarios:
-
The file is uploaded | downloaded.
-
The user started the file transfer, but the server declined the request and the file was deleted from the file transfer queue.
-
The user started the file transfer, but decided to cancel it before the upload | download is completed.
NOTE: SRA uses the JEDEC standard for file size calculation, where a kilobyte is considered as 1,024 bytes instead of 1,000 bytes. This could lead to scenarios where you can observe differences between the file sizes of the transferred files (for example, the file size might be 13.34 MB during download and 14 MB after download).
You can use the User Settings side sheet to set the theme and default image resolution of One Identity Safeguard Remote Access.
Setting the theme
Setting the theme might result in a more comfortable user experience.
To set the theme:
-
Navigate to the Settings side sheet by clicking the  (Settings) icon in the top right corner.
-
Select the preferred theme under User Preferences > Select theme.
NOTE: The default value is Light. You can select Auto to match the theme of the operating system.
Setting the default image resolution
Setting the image resolution according to your system results in better streaming quality.
NOTE: The available choices might be limited by the SRA Administrator.
To set the default image resolution:
-
Navigate to the Settings side sheet by clicking the (Settings) icon in the top right corner.
-
Select the preferred image resolution under Default Image Resolution.
NOTE: The default value is 1024x768. The configured setting will only apply to the current browser.
This section covers One Identity Safeguard for Privileged Sessions (SPS) related topics that are necessary for the One Identity Safeguard Remote Access (SRA) configuration to work properly.
