Cloning a connection means that you can connect to a different account with the same permissions.
To clone a connection
-
Go to the Connections panel and select the connection you would like to clone.
-
Click  (Options) on the connection card.
-
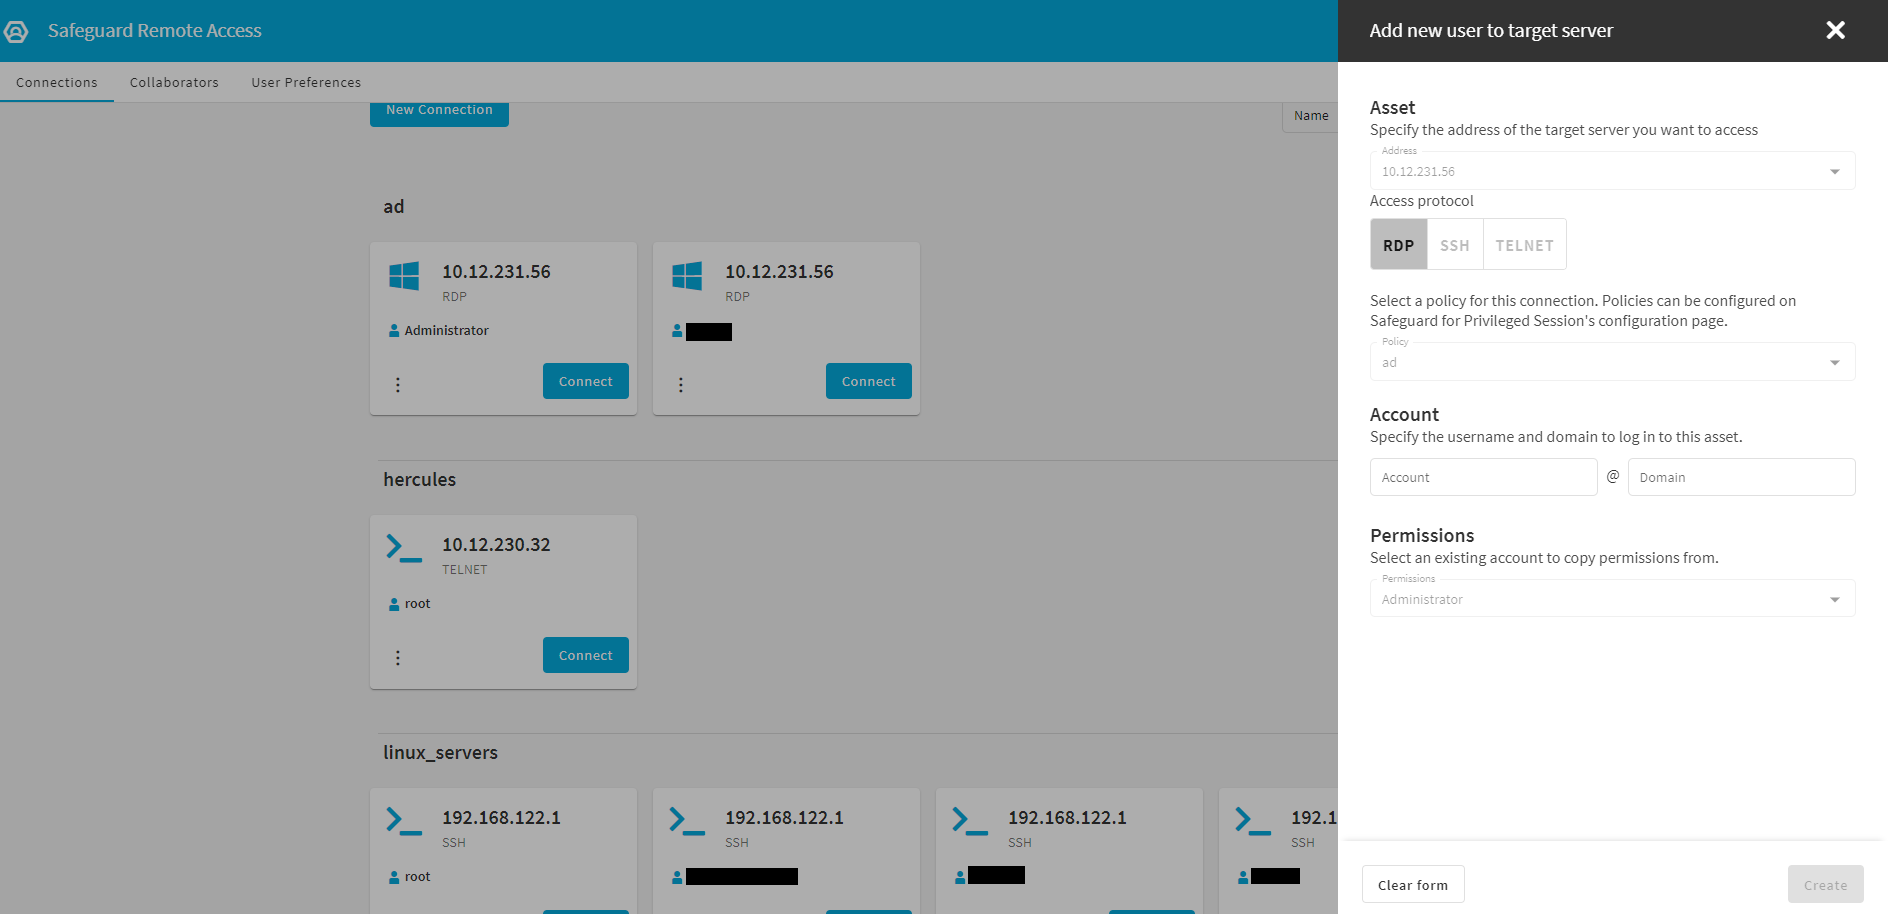
Select Clone & Customize. The Clone and Customize side sheet will open.
The asset, access protocol and policy information will be prefilled, as this is an existing connection.
-
Specify the Account and Domain names for the new connection.
-
In the Permissions field, select an existing account to copy permissions from (for example, root or Administrator).
-
Click Create.
Figure 25: Connections > Connection card > > Clone & Customize > Permissions — Cloning a connection
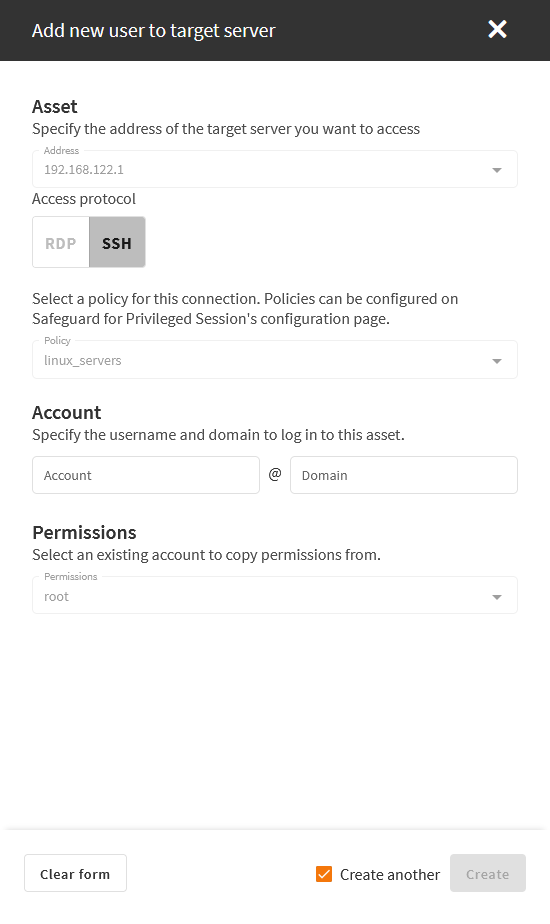
To clone a connection multiple times, use the Create another option.
To clone a connection multiple times
-
Follow steps 1-4 of the To clone a connection procedure.
Permissions are cloned from the connection that was last created.
-
Select Create another.
Figure 26: Connections > Connection card > > Clone & Customize > Add new user to target server > Create another — Cloning a connection multiple times
-
Click Create.
Expected result: The connections that you have created are listed on the Connections panel.
As long as Create another is selected, the side sheet will remain visible and you can create as many clones of the connection as you require, by clicking Create repeatedly.
When you no longer want to access a connection, delete it from One Identity Safeguard Remote Access (SRA).
To delete a connection
-
Navigate to the Connections panel and select the connection you want to delete.
-
Click (Options) on the connection card.
-
Select Delete.
-
Click Delete.
Inviting a collaborator makes it possible for multiple contributors to have access to One Identity Safeguard Remote Access (SRA).
NOTE: There are three ways of inviting a collaborator:
When you invite One Identity Starling collaborators, you cannot limit the accessibility to connections in SRA. The role-based access control functionality of SRA is available when Azure AD groups are added directly to connections.
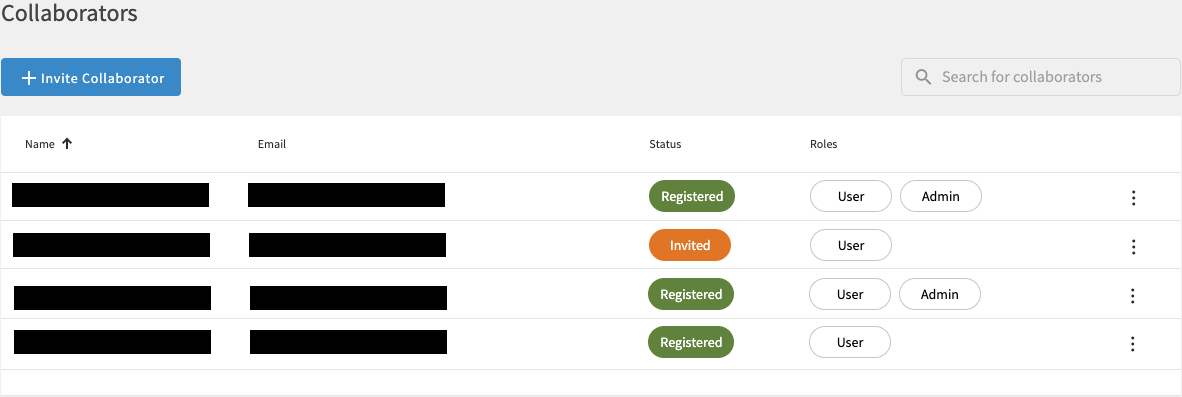
On the Collaborators panel, you can view the list of all collaborators invited or registered to the project, along with their Name, Email, Status, and Roles.
Figure 27: Collaborators - Collaborators list
Collaborator statuses and roles
Once invited, collaborators can have two statuses on the Collaborators panel:
-
Invited: The collaborator has been invited to your organization, but has not yet confirmed on their side.
NOTE: One Identity Starling automatically detects if the invited collaborator does not have an account yet. In this case, the collaborator receives an email with a link to complete the registration process.
NOTE: You can cancel and resend invitations in this status, but not in Registered status.
-
Registered: The collaborator has confirmed your invitation on their side.
Collaborators with One Identity Starling accounts can have two distinct roles:
-
Admin: Collaborators with this role have access to the Options side sheet and can configure role-based access control (RBAC). Collaborators with Admin role can invite other collaborators and assign roles to other users, set feature flags, and select maximum client resolution under Safeguard Remote Access Settings.
-
User: Collaborators with this role have read-only access to all connections on the Connections panel, but no configuration rights.
Searching for collaborators in your organization
If you have a large number of collaborators, you can use the Search for collaborators option to narrow down your collaborators list.
If there are no collaborators that match your search (that is, the collaborator is not a member of your SRA service yet), click the Invite a collaborator navigation link.
NOTE: Clicking the Invite a collaborator navigation link has the same effect as clicking the Invite Collaborator button on the Collaborators panel.
Inviting an SRA Collaborator to your organization
There are two ways you can invite an SRA collaborator to your organization:
To invite an SRA collaborator from the Collaborators panel
-
Navigate to the Collaborators panel.
NOTE: You can toggle the view mode between List view and Card view by clicking the icon in the top right corner. Both view modes provide the same set of features.
-
Click Invite Collaborator.
A pop-up window appears.
Figure 28: Collaborators - Inviting a collaborator
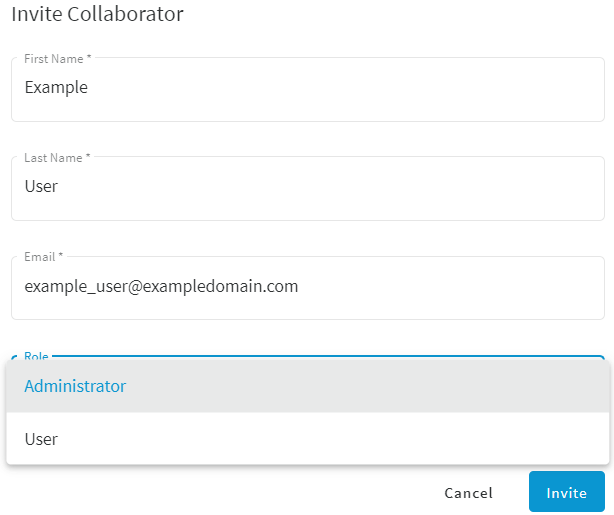
Enter the First Name, Last Name, and Email address of the collaborator you want to invite to your organization, then under Role, select Administrator or User.
-
Click Invite.
On the Collaborators panel, the collaborator you invited appears, with an Invited status.
TIP: To cancel or re-send your invitation, click (Options) next to the collaborator with an Invited status, then select Cancel Invitation or Re-send Invitation.
Once the collaborator accepts your invitation and confirms on their side, their status changes to Registered.
Promoting and demoting collaborators
If you want to change your collaborators' roles, you can promote or demote them.
To promote a collaborator from User to SRA Admin
-
From your collaborators list, select the collaborator you want to promote.
-
Click (Options) and select Remove Collaborator.
NOTE: This action will remove the collaborator only from SRA, but not from One Identity Starling.
-
Navigate to the SRA Collaborators page.
-
Re-invite the collaborator with Admin role.
To a collabdemoteorator from SRA Admin to User
-
From your collaborators list, select the collaborator you want to demote.
-
Click (Options) and select Remove Collaborator.
NOTE: This action will remove the collaborator only from SRA, but not from One Identity Starling.
-
Navigate to the SRA Collaborators page.
-
Re-invite the collaborator with User role.
NOTE: You can promote or demote a contributor in One Identity Starling Services > Organization > Manage Organization Admins > > Demote to Collaborator directly. However, this will not affect the contributor's role in SRA. The only way to switch roles for contributors in SRA is to delete, then re-invite them with a different role.
By default, when a connection policy is created in SPS for RDP and/or SSH connections, an Administrator (or root) connection tile appears for that connection policy on the SRA Connections panel. If this connection tile was deleted by mistake, there are two ways of restoring it:
(Option 1) Clone a connection from one of your active connections
To restore the Administrator (or root) connection tile by cloning a connection
-
Find the group from which you have deleted the Administrator (or root) connection tile.
-
Select a connection tile from that group and from (Options), choose Clone & Customize.
-
Find the Account section on Add new user to target server and type Administrator or root into the Account field.
Figure 29: Connections > > Clone & Customize > Add new user to target server — Restoring a deleted Administrator (or root) connection tile
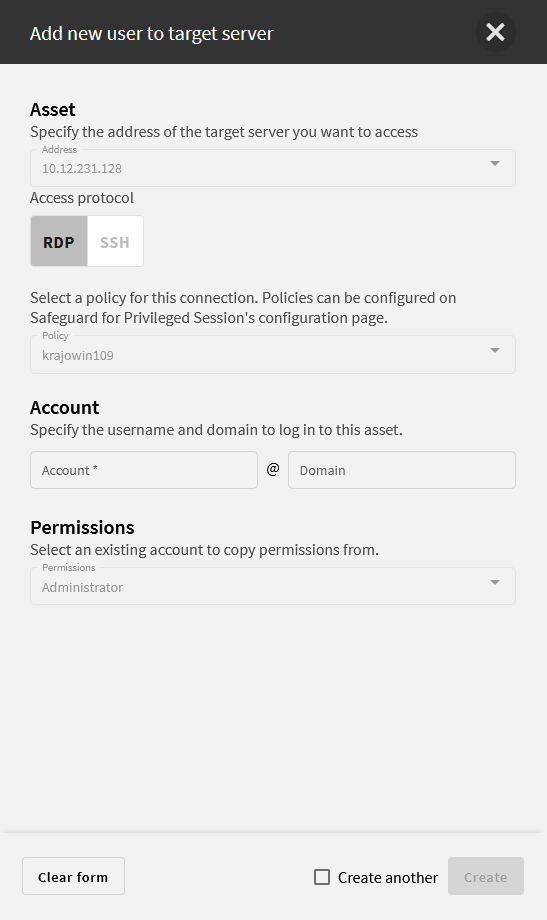
Note, that specifying a domain name is optional.
-
Click Create.
(Option 2) Create a new connection policy in SPS
To restore the Administrator (or root) connection tile by creating a new connection policy in SPS
-
Open the SPS web interface.
-
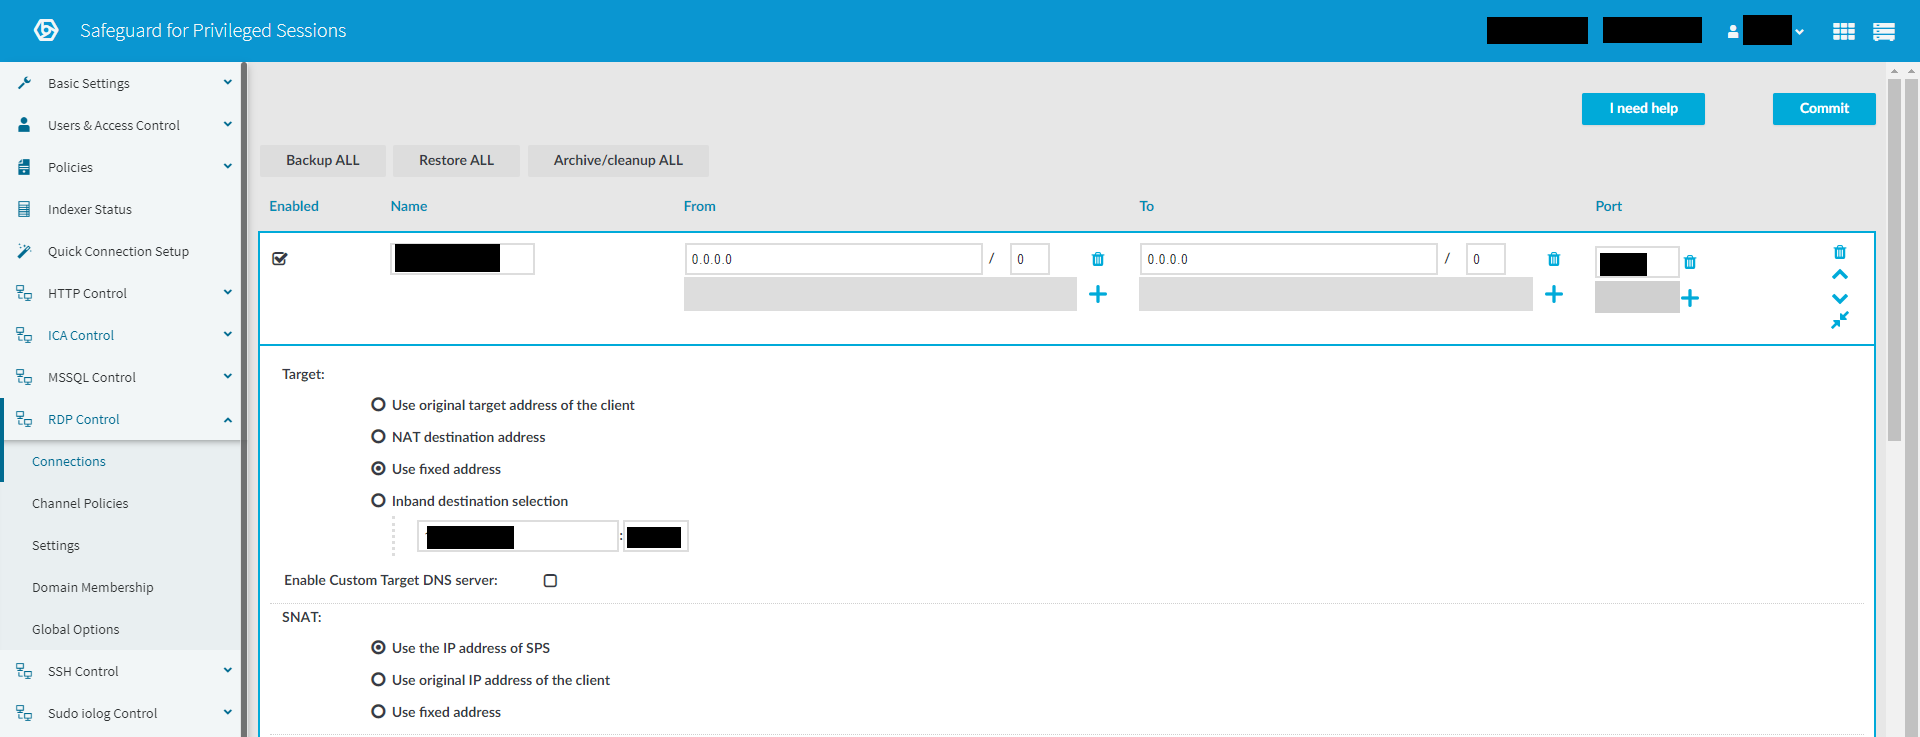
Go to RDP Control > Connections (or SSH Control > Connections - depending on the type of protocol) and find the connection policy your Administrator (or root) user previously belonged to.
-
Create a new connection policy by copying the details of that previous connection.
Figure 30: RDP control > Connections — Creating a new connection policy for Administrator or root in SPS
-
Commit your changes.
-
Return to SRA and refresh the page. The newly created Administrator (or root) connection tile should be visible.
