Perform the following steps to transfer synchronization workflows from Quick Connect to Synchronization Service:
- Install Synchronization Service.
You can install Synchronization Service on the computer running Quick Connect or on a different computer. For installation instructions, see Step 1: Install Synchronization Service earlier in this document.
- Configure Synchronization Service to use a new database for storing configuration settings and synchronization data.
To perform this step, use the Configuration Wizard that appears when you start the Synchronization Service Administration Console the first time after you install Synchronization Service. For detailed instructions, see Step 2: Configure Synchronization Service earlier in this document.
- Import configuration settings from Quick Connect or Synchronization Service.
Before you proceed with this step, it is highly recommended to disable the scheduled workflows and mapping operations in Quick Connect or earlier versions of Synchronization Service. You can resume the scheduled workflows and mapping operations after you complete this step.
To import configuration settings:
- On the computer where you have installed Synchronization Service, start the Synchronization Service Administration Console.
- In the upper right corner of the Administration Console window, click the gear icon, and then click Import Configuration.
- In the wizard that appears, select the version of Quick Connect Sync Engine used by your Quick Connect version or Active Roles Synchronization Service from which you want to import the configuration settings.
Optionally, you can select the Import sync history check box to import the sync history along with the configuration settings.
- Follow the steps in the wizard to complete the import operation.
If the synchronization data you want to import is stored separately from the configuration settings, then, on the Specify source SQL Server databases step, select the Import sync data from the specified database check box, and specify the database.
- Retype access passwords in the connections that were imported from Quick Connect.
You need to retype access passwords in the imported connections because, for security reasons, the import of configuration settings does not retrieve the encrypted passwords from Quick Connect. Use the Synchronization Service Administration Console to make changes to each connection as appropriate, depending upon the data system to which the connection applies. For instructions on how to modify connections, see External data systems supported out of the box later in this document.
- If your synchronization workflows involve synchronization of passwords, then you need to install the new version of Capture Agent on your domain controllers. For installation instructions, see Managing Capture Agent later in this document.
The new version of Capture Agent replaces the old version. However, as the new version supports both Synchronization Service and Quick Connect, you do not lose the password synchronization functions of Quick Connect after you upgrade Capture Agent.
The following table lists the default communication ports used by Synchronization Service:
Table 1:
Default communication ports
|
53 |
TCP/UDP |
DNS |
Inbound, outbound |
|
88 |
TCP/UDP |
Kerberos |
Inbound, outbound |
|
139 |
TCP |
SMB/CIFS |
Inbound, outbound |
|
445 |
TCP |
SMB/CIFS |
Inbound, outbound |
|
389 |
TCP/UDP |
LDAP |
Outbound |
|
3268 |
TCP |
LDAP |
Outbound |
|
636 |
TCP |
SSL
This port is only required if Synchronization Service is configured to use SSL to connect to an Active Directory domain. |
Outbound |
|
3269 |
TCP |
SSL
This port is only required if Synchronization Service is configured to use SSL to connect to an Active Directory domain. |
Outbound |
|
15173 |
TCP |
Synchronization Service
This port is used by Capture Agent to communicate with Active Roles Synchronization Service. |
Outbound |
|
7148 |
TCP |
Capture Agent
(only if Synchronization Service is configured to synchronize user passwords from an Active Directory domain to other connected data systems)
This port is used by Active Roles Synchronization Service to communicate with Capture Agent. |
Inbound |
|
135 |
TCP |
RPC endpoint mapper
Port 135 is a dynamically allocated TCP port for RPC communication with Active Directory domain controllers. For more information about ports used for RPC communication, see the following Microsoft Support Knowledge Base articles at support.microsoft.com:
|
Inbound, outbound |
Synchronization Service Administration Console
The Synchronization Service Administration Console is a graphical user interface that provides access to the Synchronization Service functionality. You can use the Administration Console to connect Synchronization Service to external data systems, manage existing connections, and perform data synchronization operations between the connected data systems. The Administration Console is installed as part of Synchronization Service.
To start the Administration Console
To start the Active Roles Synchronization Console, depending upon the version of your Windows operating system, click Active Roles 7.5 Synchronization Service on the Apps page or select All Programs | One Identity Active Roles 7.5 | Active Roles 7.5 Synchronization Service from the Start menu.
The Synchronization Service Administration Console looks similar to the following:
Figure 3: Administrator Console
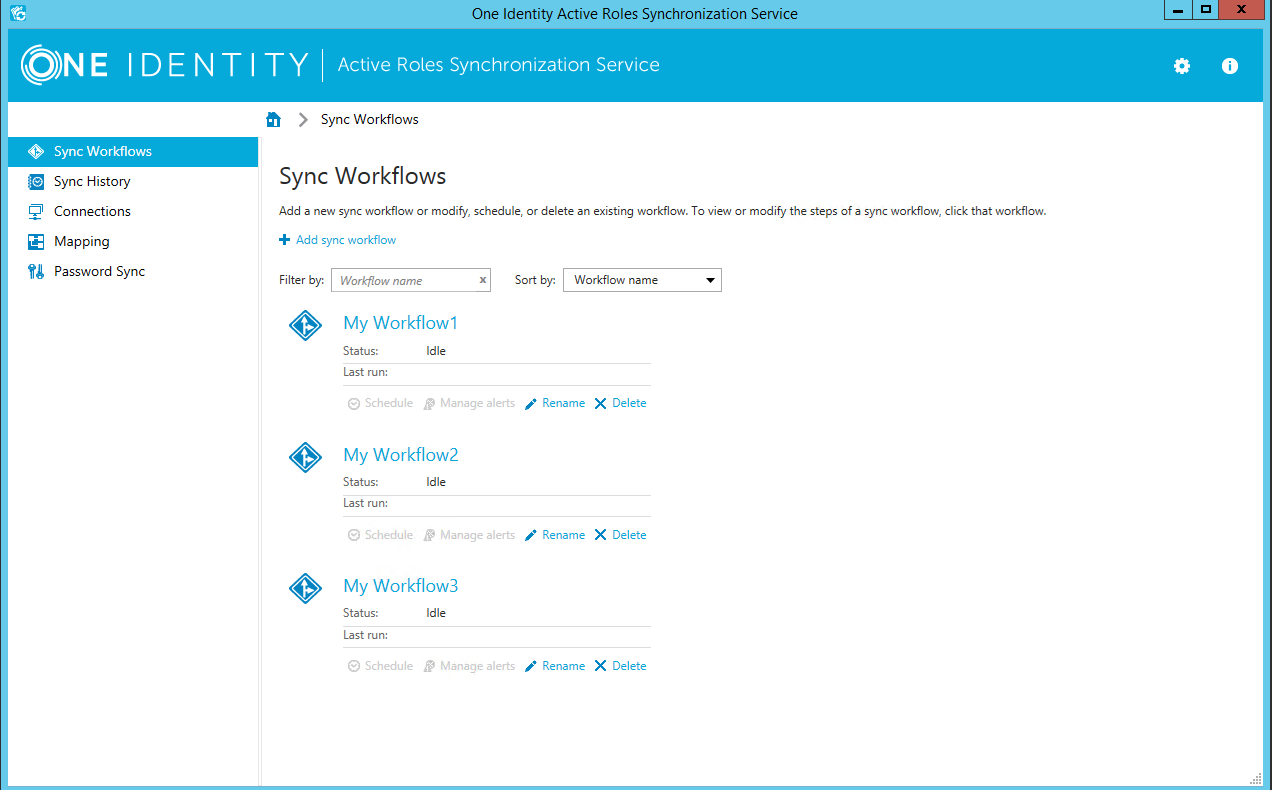
In the upper right corner of the console, you can click the following items:
Table 2:
|
The Gear icon |
Provides the following commands:
- Configure Sync Service Starts a wizard that helps you change the configuration settings of the current Synchronization Service instance.
- Import Configuration Starts a wizard that helps you to import configuration settings from a configuration file created by another instance of Synchronization Service.
- Export Configuration Starts a wizard that helps you to save the configuration profile of the current Synchronization Service instance to a file. You can use this file to apply the saved configuration to other instances of Active Roles Synchronization Service deployed in your environment.
- Mail Profiles Allows you to add, edit, or delete mail profiles for sending notification emails about sync workflow runs. For more information on how to use the email notification, see Using sync workflow alerts.
- Diagnostic Logging Allows you to specify settings for writing Synchronization Service diagnostic data to the Synchronization Service log file or Windows Event Log.
- Communication Port Allows you to change the communication port number used by the Synchronization Service.
- Configure Azure BackSync Allows you to configure backsync operation in Azure with on-premises Active Directory objects.
|
In this section:
For more information about the elements you can use on these tabs, see the next subsections.
